Day in the (quarantine) life | WFH vlog


How’s everyone doing these days? I was feeling really down a few weeks ago, being bombarded by bad news and feeling I was getting nowhere by staying at home all the time. But it got better as I cooked more, read more, finished my song, and became more productive in my everyday work. This week has made me feel really fortunate and grateful for all the resources I have that makes it possible to WFH, which is not accessible to other people who may have lost their jobs because of this virus. I’ve also really taken for granted being able to go to restaurants with friends and doing gigs... but I think it’s best I give all of that up for now. Hope to see y’all in person soon, and stay healthy.

♥ Cindy

 
Valentine's Day Dim Sum - Rose dumplings

Valentine's Day Dim Sum - Rose dumplings


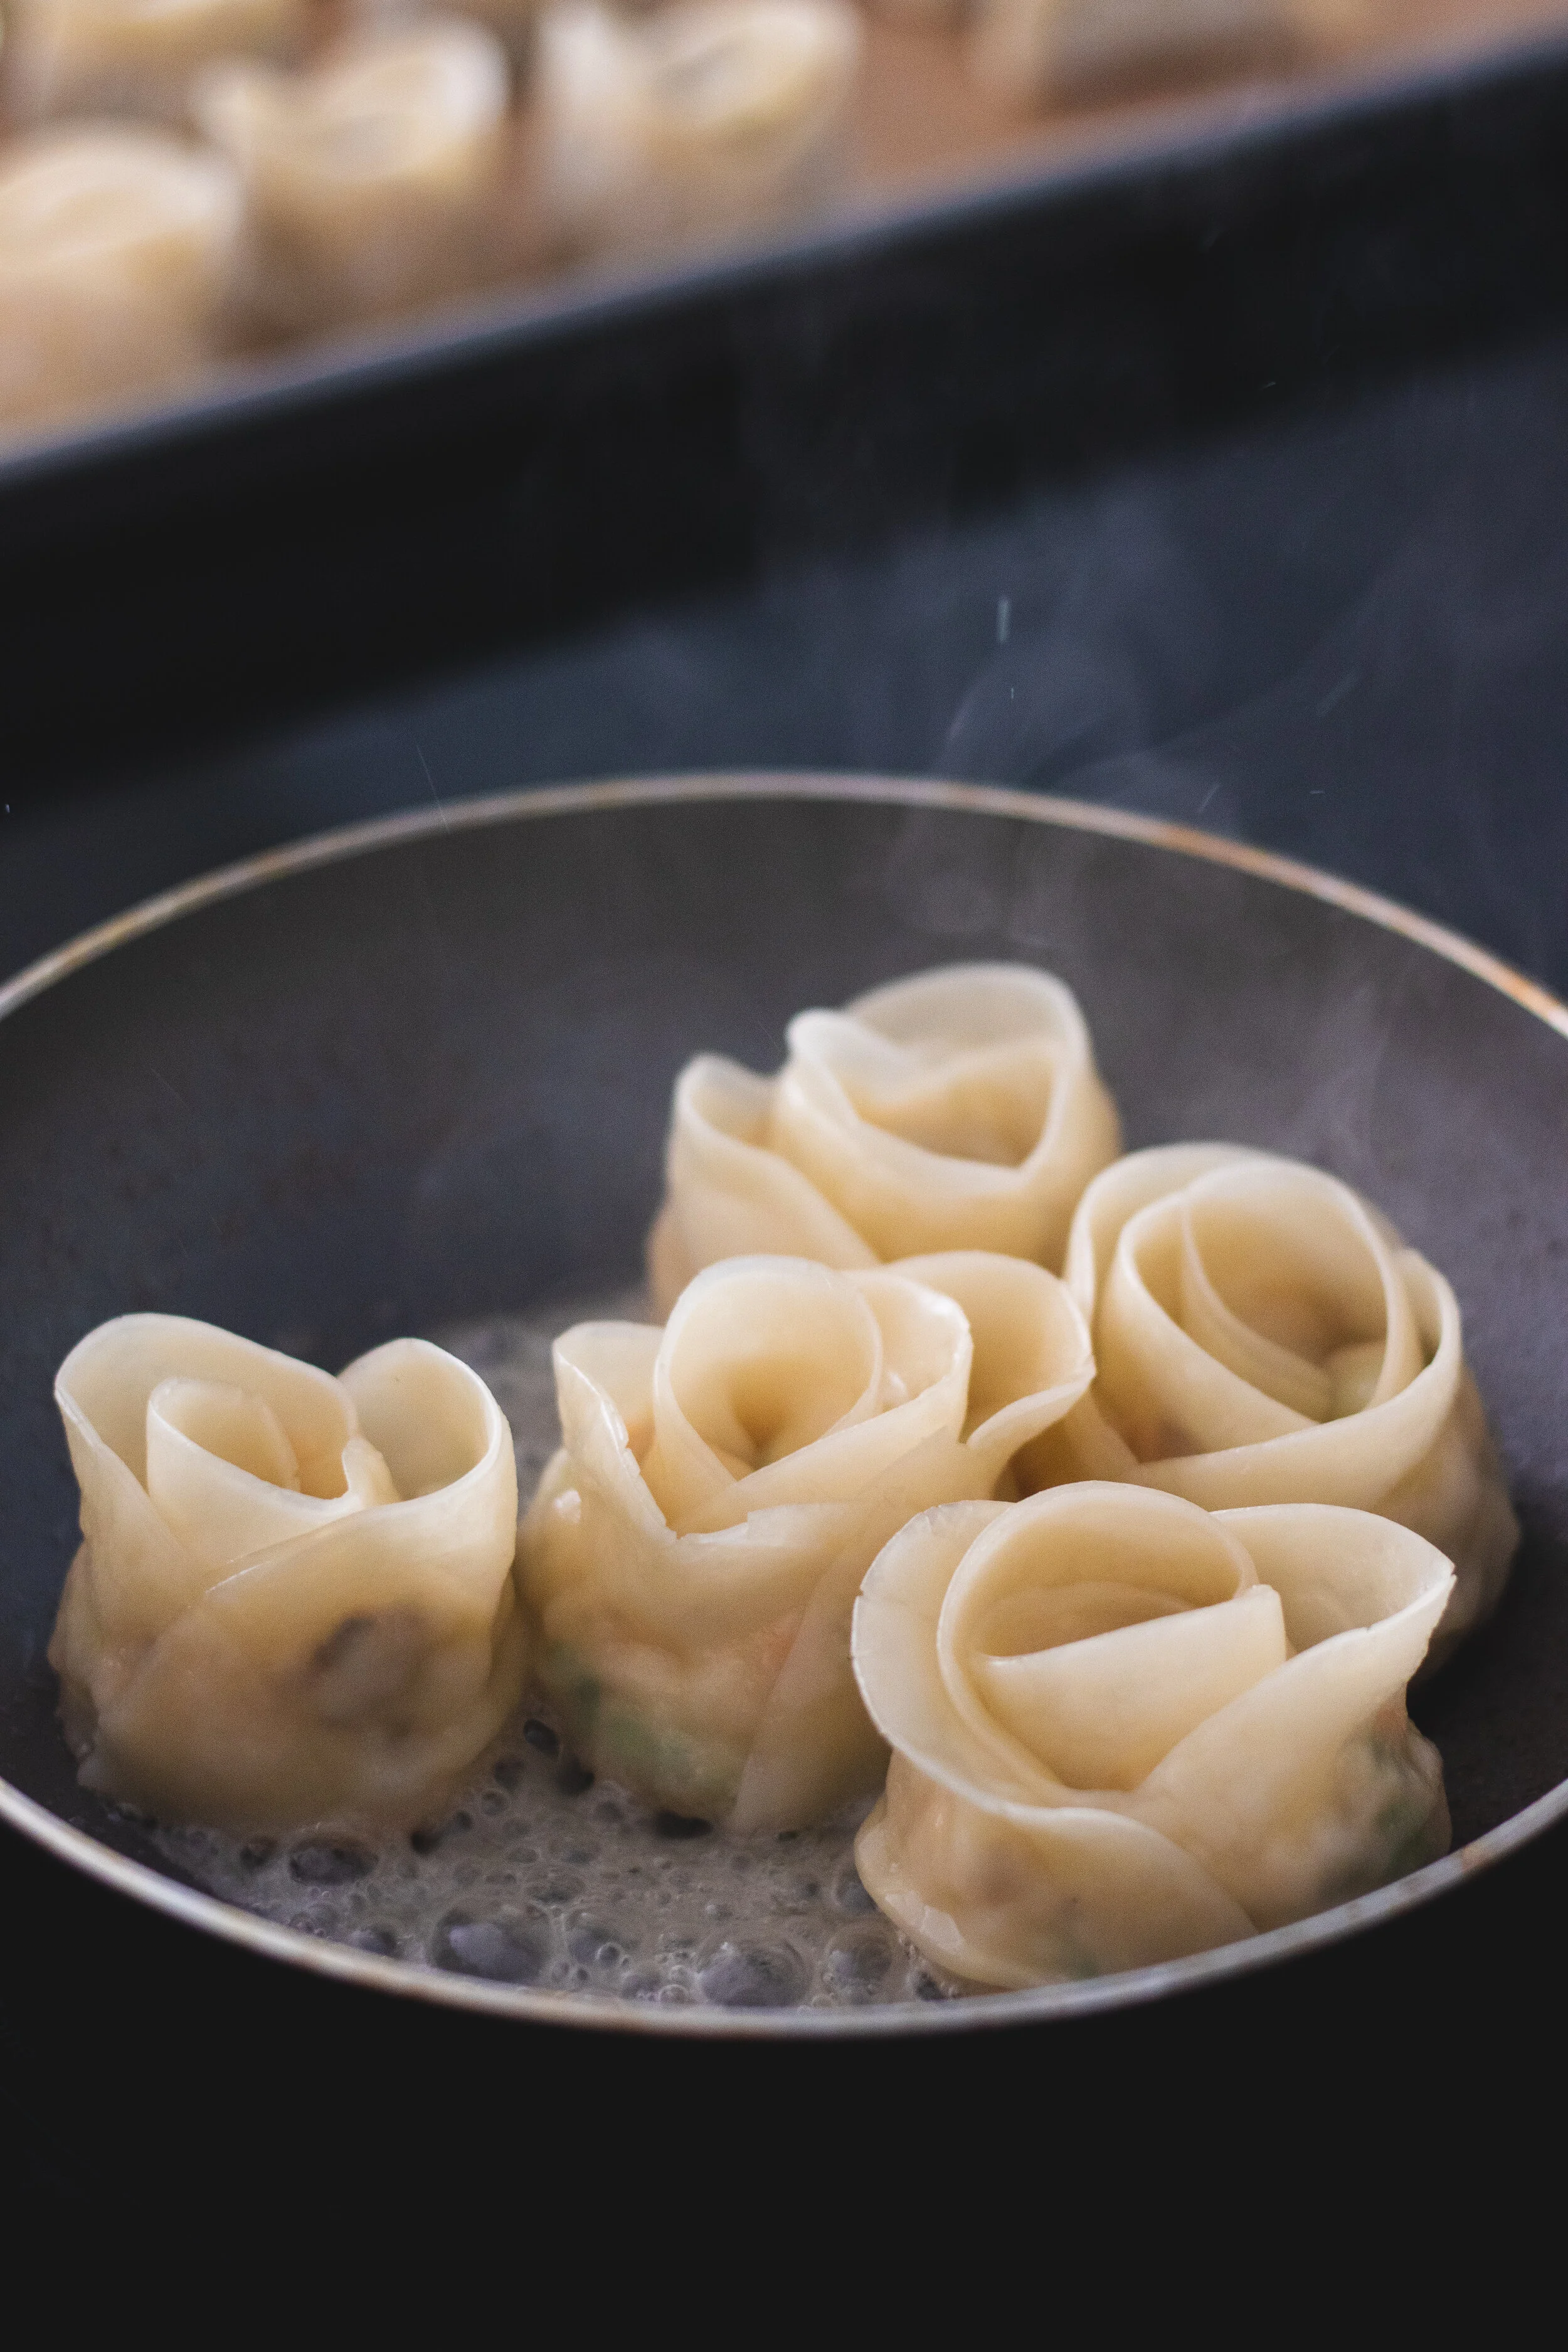
For this year’s Valentine’s Day, I decided to abandon my sweet tooth for something more savory. Dumplings are something my mom taught me when I was young, and it’s always been a humble and nostalgic dish in my mind. But because it’s Valentine’s Day (annnd because I’ve been binging a lot of Bachelor recently), I decided to make a more sophisticated rose-shaped version that’s a little bougie-er than usual (perfect for impressing your dinner date!).

Instead of being filled with the usual pork and cabbage, these contain a fancier shrimp and shiitake filling. If you want to make the more humble, classic version, you can check out my recipe for pork + cabbage and as well as chicken + shiitake dumplings here.


Valentine's Day Dim Sum - Rose Dumplings


Can’t resist my fillings for you.

You’re the one that I wonton.

You’re all that and dim sum.

… okay I’ll stop, but I can guarantee after one bite of these dumplings, you’ll be wonton more.


Valentine's Day Dim Sum - Rose Dumplings


What you’ll need:

Meats/Seafood: 16 oz peeled and deveined shrimp (or any other ground meat, or tofu if you’re vegetarian)

Vegetables: 2 scallions, 1 cup minced shiitake mushrooms, 1/2 tbsp minced garlic

Seasonings: 2 tsp salt, 2 tsp black or white pepper, 2 tsp soy sauce, 1 tsp rice vinegar, 1 tsp sesame oil (optional)

Dairy: 2 eggs

Other: Around 50 - 72 dumpling wrappers (1 - 1.5 packs), 1 1/2 tbsp corn starch, water


Valentine's Day Dim Sum - Rose Dumplings


Step 1: Prep

To prep the ingredients for the dumpling filling, start off by squeezing water out of the shiitake mushrooms. Removing the water from vegetables prevents the dumplings from becoming soggy and falling apart during the cooking process. Then, mince the mushrooms and garlic and chop the scallions into small pieces, setting aside a portion of the green stems for garnish later. Mince the shrimp until the texture resembles ground meat. Feel free to use a food processor to help you finely chop all of your ingredients in this step.


Valentine's Day Dim Sum - Rose Dumplings


Step 2: Mix it and mix it and mix it and mix it

Combine the minced shrimp, shiitake mushrooms, garlic, cornstarch, eggs, salt & pepper, soy sauce, sesame oil, and scallions in a large bowl. (Optional: you can heat up a tablespoon of oil in a pan till smoking and drizzle it over the ingredients to bring out the flavor of the scallions.)

Mix everything in a circular motion, going in one direction to keep the shrimp tender.


Valentine's Day Dim Sum - Rose Dumplings


Step 3: Folding the dumplings

Prepare a small bowl of water before you start (you’ll need dabs of water to seal the dumplings). Arrange 4 dumpling wrappers in a line, slightly overlapping, and use some water to stick them together on their sides. Spread a thin strip of filling in the middle of the wrappers, wet the top and bottom rounds of the wrappers, and fold the wrappers upward so they’re sealed on top.

Tip: Squeeze the filling so it gathers at the bottom of the dumpling, ensuring that the top is completely sealed. This will make the filling less likely to seep out when you’re rolling the dumpling into shape, and make prettier rose petals.


Valentine's Day Dim Sum - Rose Dumplings
 
Valentine's Day Dim Sum - Rose Dumplings


Step 4: Rolling the dumplings

Carefully roll the dumpling from end to end, making a flower shape. Use a dab of water to close the dumpling off by sealing the edge with its side.

Note: if you want smaller roses, use 3 wrappers instead of 4.


Valentine's Day Dim Sum - Rose Dumplings


Step 5: Shape the dumpling (optional)

Gently fan out the edges to create more realistic petals to the dumpling rose.


Valentine's Day Dim Sum - Rose Dumplings
 
Valentine's Day Dim Sum - Rose Dumplings


Step 6: Pan frying the dumplings

To pan fry the dumplings, start by heating a drizzle of vegetable oil in a pan. Lay the dumplings down and fry for about 2-3 minutes until the bottoms start to brown. Turn off the heat and add water to the pan, covering about 1/4 to 1/3 of the dumpling. Put a lid over the pan and steam for 4-6 minutes (shrimp cooks pretty fast, but if you’re using meat, you may need to steam the dumplings for longer). Cook without lid for about 1-2 minutes or until all the water has evaporated to form a golden crust. Remove from pan and garnish with leftover scallions.

Note: if you have a steamer, you can also steam the dumplings as well. I would not recommend boiling these since they have a pretty complicated shape and might fall apart in the water unlike standard dumplings.


Valentine's Day Dim Sum - Rose Dumplings


The golden crust at the bottom is the best part! Plus, it pairs really well with the soft texture of the dumpling on top.

Step 7: Dipping sauces

Spicy mayo dipping sauce: combine 1 part sriracha with 2 parts Japanese mayo (or regular mayonnaise if you can’t make your way to a Japanese grocer). I added some pink food coloring to make it more festive for Valentine’s day 🥀


Valentine's Day Dim Sum - Rose Dumplings


Classic dumpling dipping sauce: combine 2 tbsp soy sauce and 1/2 tbsp of rice vinegar. Garnish with sesame seeds and scallions, or anything you’d like.


Valentine's Day Dim Sum - Rose Dumplings


If you don’t want to cook all of your dumplings right away, you can freeze them and eat them throughout the week. Just make sure you arrange them in a flat layer when you’re freezing them so that they don’t stick together.


Shrimp and Shiitake Rose dumplings

Ingredients (makes 12-18 dumplings)

  • 16 oz shrimp (peeled and deveined)
  • 2 scallions
  • 1 cup shiitake mushrooms
  • 1/2 tbsp minced garlic
  • 2 tsp salt
  • 2 tsp black or white pepper
  • 2 tsp soy sauce
  • 1 tsp rice vinegar
  • 1 1/2 tbsp corn starch
  • 2 eggs
  • 50-72 dumpling wrappers (1-1.5 packs)
  • water
  • 1 tsp sesame oil (optional)

Takes , Makes enough for 4-5 people.


Instructions

  1. To prep the ingredients for the dumpling filling, start off by squeezing water out of the shiitake mushrooms. Removing the water from vegetables prevents the dumplings from becoming soggy and falling apart during the cooking process. Then, mince the mushrooms and garlic and chop the scallions into small pieces, setting aside a portion of the green stems for garnish later. Mince the shrimp until the texture resembles ground meat. Feel free to use a food processor to help you finely chop all of your ingredients in this step.

  2. Combine the minced shrimp, shiitake mushrooms, garlic, cornstarch, eggs, salt + pepper, soy sauce, sesame oil, and scallions in a large bowl. (Optional: you can heat up a tablespoon of oil in a pan till smoking and drizzle it over the ingredients to bring out the flavor of the scallions.) Mix everything in a circular motion, going in one direction to keep the shrimp tender.

  3. Prepare a small bowl of water before you start (you’ll need dabs of water to seal the dumplings). Arrange 4 dumpling wrappers in a line, slightly overlapping, and use some water to stick them together on their sides. Spread a thin strip of filling in the middle of the wrappers, wet the top and bottom rounds of the wrappers, and fold the wrappers upward so they’re sealed on top. Tip: Squeeze the filling so it gathers at the bottom of the dumpling, ensuring that the top is completely sealed. This will make the filling less likely to seep out when you’re rolling the dumpling into shape, and make prettier rose petals.

  4. Carefully roll the dumpling from end to end, making a flower shape. Use a dab of water to close the dumpling off by sealing the edge with its side. Gently fan out the edges to create more realistic petals to the dumpling rose. Note: if you want smaller roses, use 3 wrappers instead of 4.

  5. To pan fry the dumplings, start by heating a drizzle of vegetable oil in a pan. Lay the dumplings down and fry for about 2-3 minutes until the bottoms start to brown. Turn off the heat and add water to the pan, covering about 1/4 to 1/3 of the dumpling. Put a lid over the pan and steam for 4-6 minutes (shrimp cooks pretty fast, but if you’re using meat, you may need to steam the dumplings for longer). Cook without lid for about 1-2 minutes or until all the water has evaporated to form a golden crust. Remove from pan and garnish with leftover scallions. Note: if you have a steamer, you can also steam the dumplings as well. I would not recommend boiling these since they have a pretty complicated shape and might fall apart in the water unlike standard dumplings.

  6. For a Spicy mayo dipping sauce: combine 1 part sriracha with 2 parts Japanese mayo (or regular mayonnaise if you can’t make your way to a Japanese grocer). I added some pink food coloring to make it more festive for Valentine’s day 🥀

  7. For a classic dumpling dipping sauce: combine 2 tbsp soy sauce and 1/2 tbsp of rice vinegar. Garnish with sesame seeds and scallions, or anything you’d like.

Hope you try this recipe out this V-day season with someone special 💖 Or even better—make these with your besties for a Galentine’s night in.

♥ Cindy

 
FoodCindy ZhangComment
Holiday Cookie Box - 5 homemade cookies to gift this year


Growing up, my family and I always bought Royal Dansk Butter Cookie tins for the holidays. After we finished the cookies, we would keep the blue tins around to store various items. There would always be a wave of disappointment whenever I found one of these blue boxes, thinking that there’d be cookies inside, but then realizing that my parents had used them to store coins instead.

These cookie boxes have always been a tradition for me and family, so I was half expecting us to get more store-bought cookie boxes by the end of November. However, this year I broke the tradition after coming across a video by NYT Cooking showing me the most gorgeous box of homemade cookies by food stylist and cookbook author Susan Spungen. After watching the video, I was instantly ready to ditch the box of store-bought cookies (which look pretty boring, to be honest) in favor of throwing on my apron and making a box of cookies myself.

I ended up gifting these to my parents and my teammates at work, who were both very happy to receive them. My team devoured them pretty quickly, while my parents are still working their way through, making sure to not ruin their waistlines too much before the holidays ended.


Holiday Cookie Box
Holiday Cookie Box


To get more inspiration for my cookie box, I started following the hashtag #cookiebox on Instagram and did multiple searches on Pinterest for “cookie box.” After seeing photos of these creations on social media, I realized that this was a pretty popular trend, and that people didn’t take these cookies lightly. These boxes were aesthetic af, and some of them even contained some pretty difficult items like meticulously decorated sugar cookies or macarons (which I honestly have no more patience for these days).

I didn’t end up making all of the cookies from the NYT Cooking video, but instead improvised and found myself a diverse set of cookie recipes that satisfied everyone and wouldn’t be too difficult to accomplish in the kitchen. The one that I couldn’t resist from the video, however, was the marbled tahini (black/white sesame) cookies.


Holiday Cookie Box

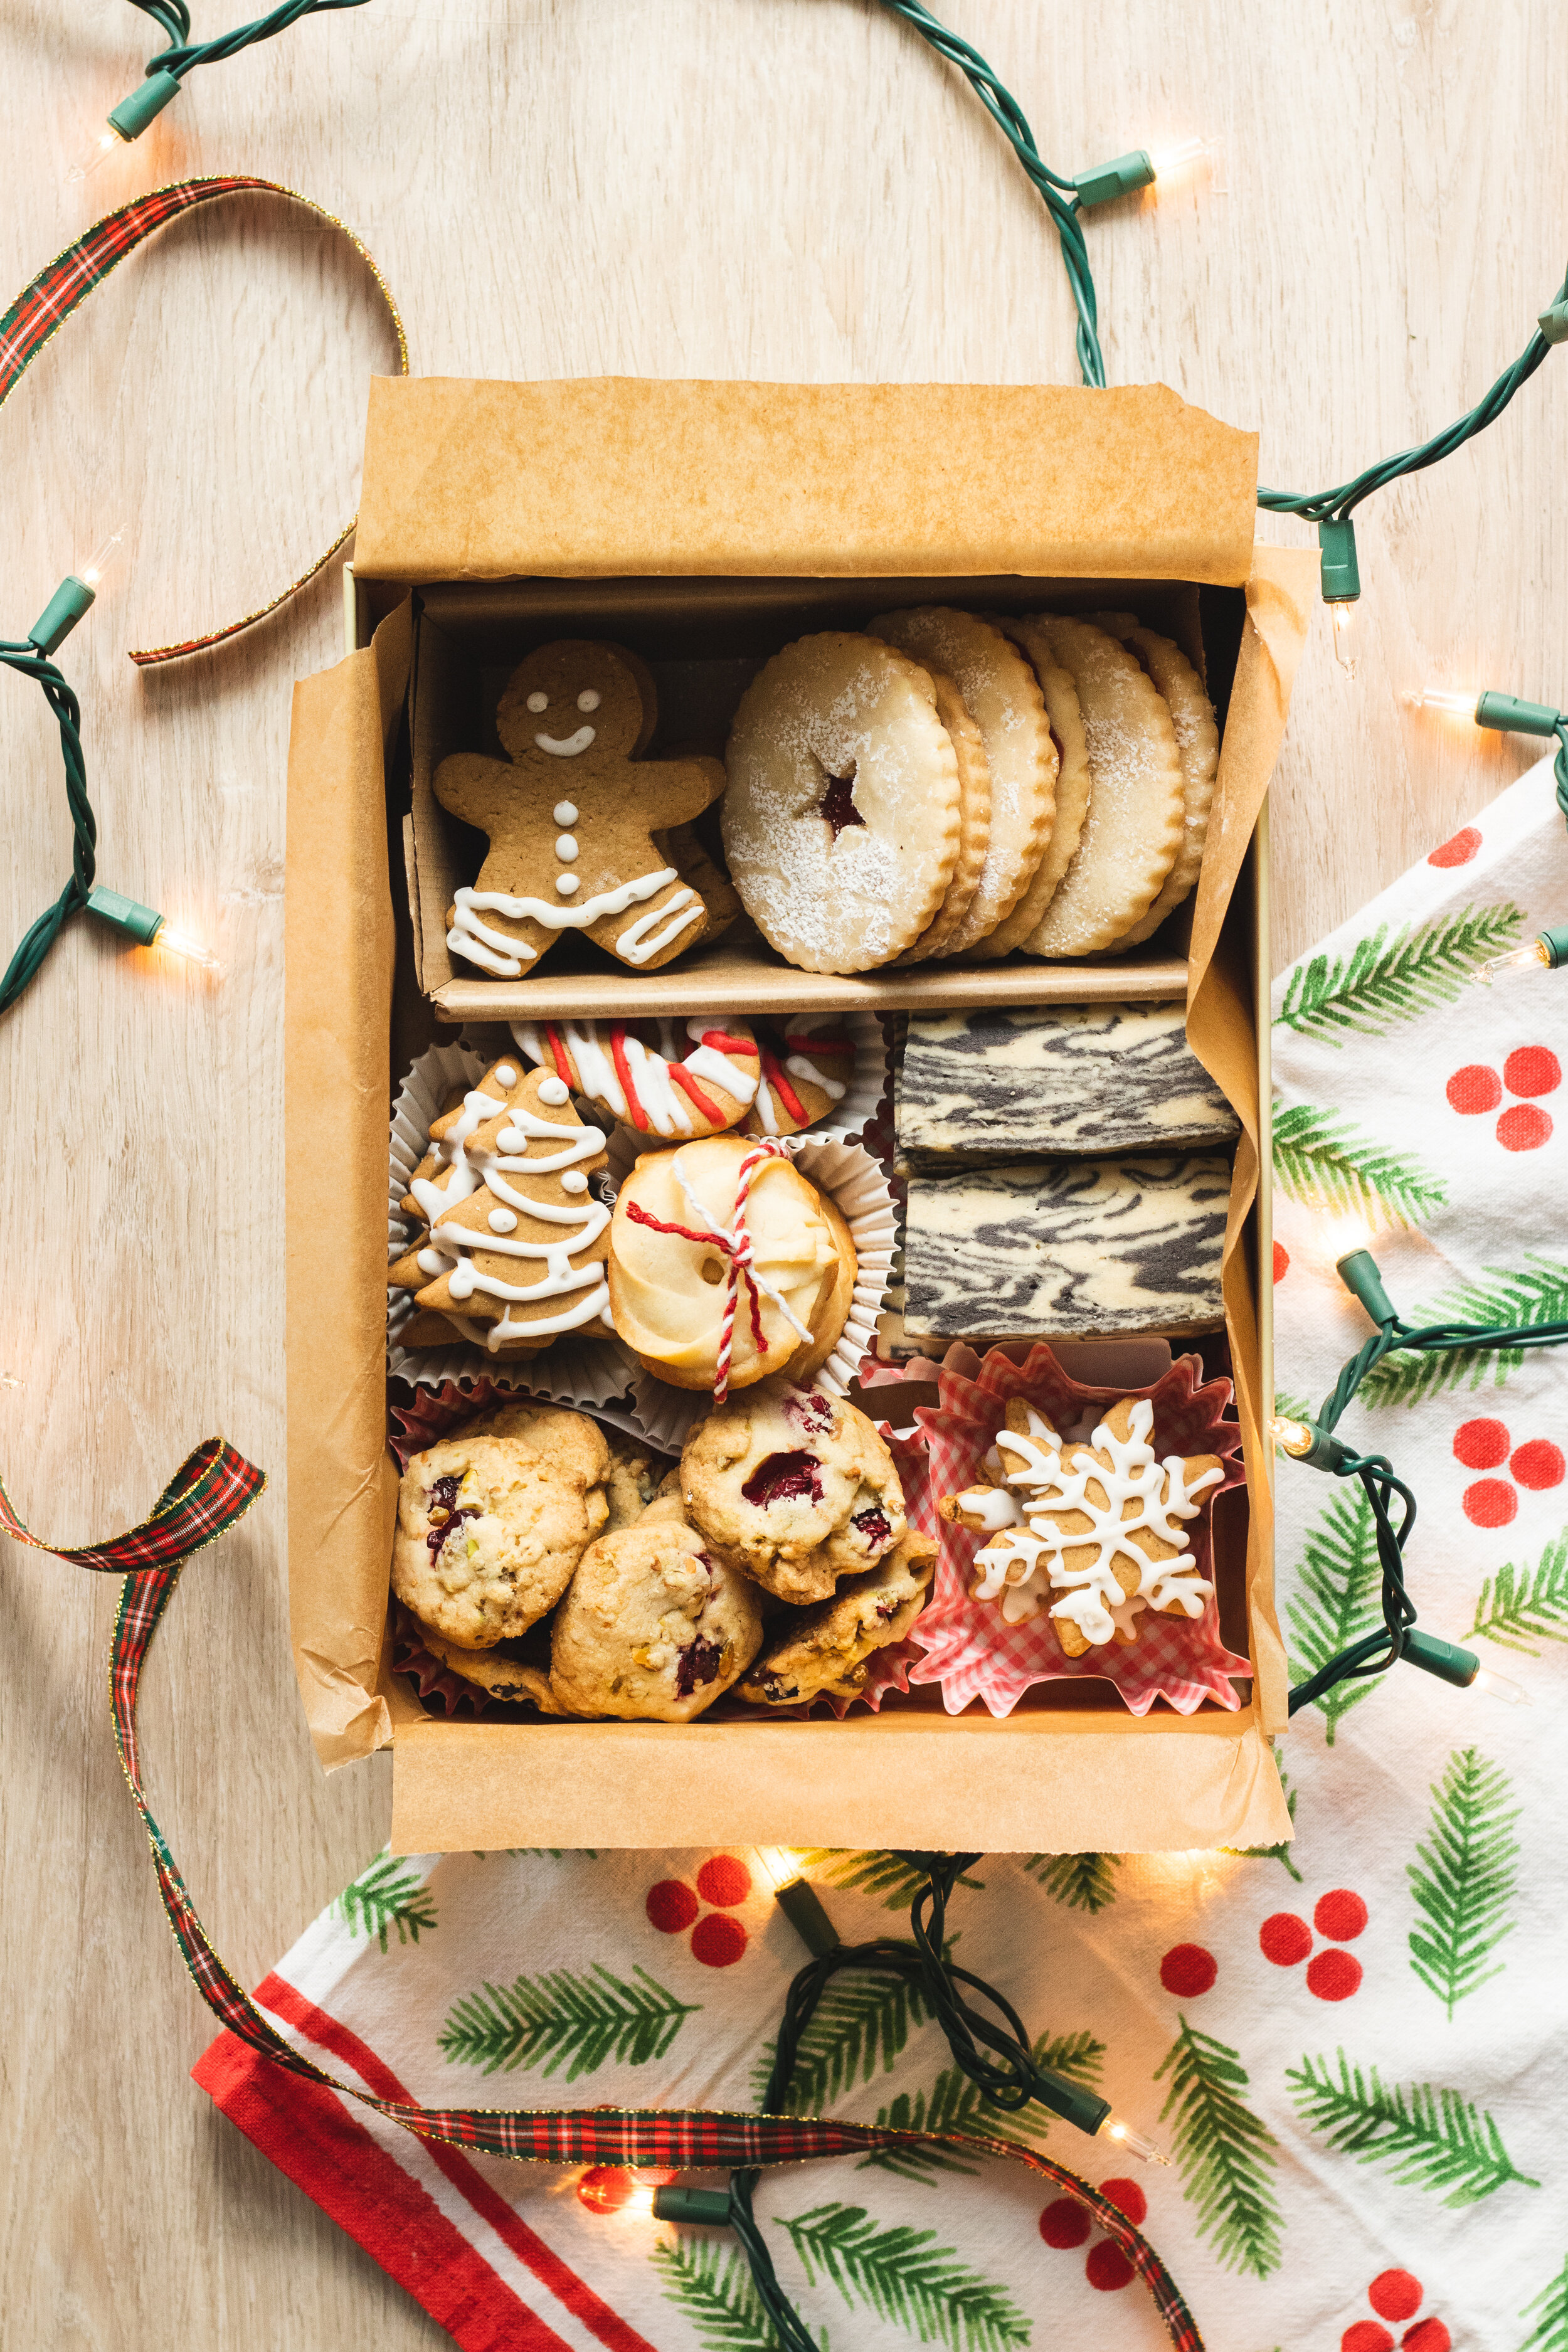
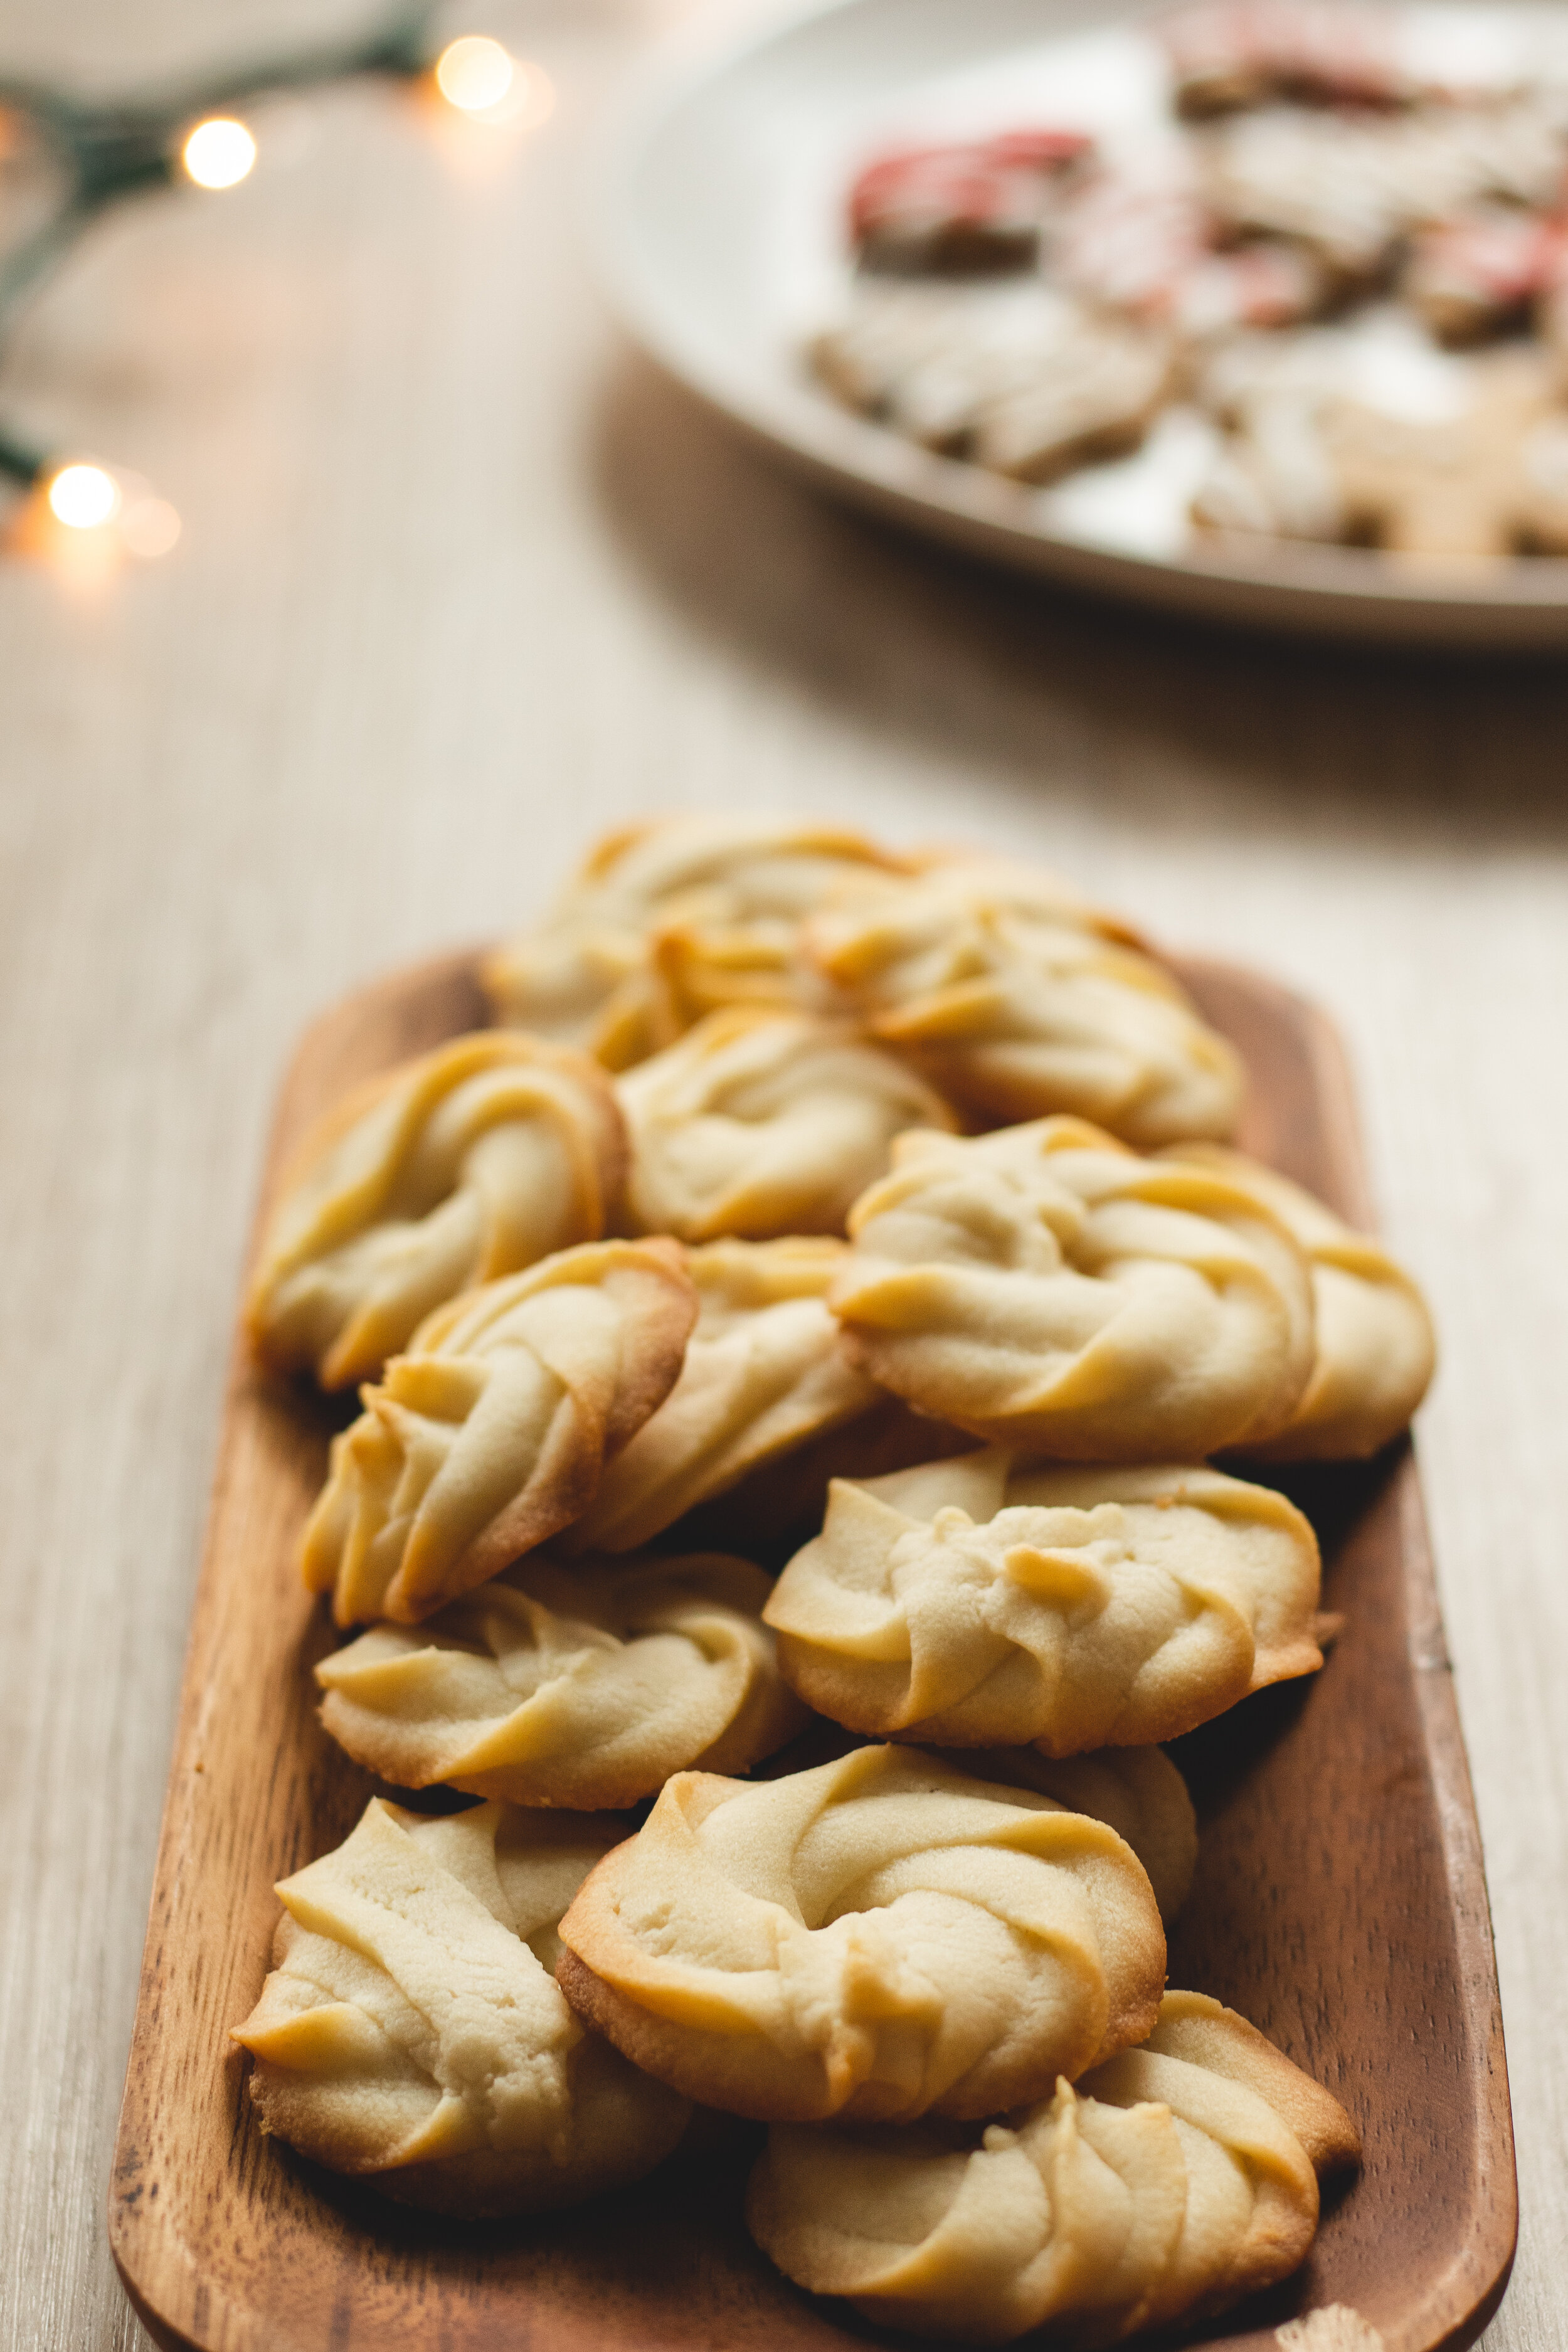
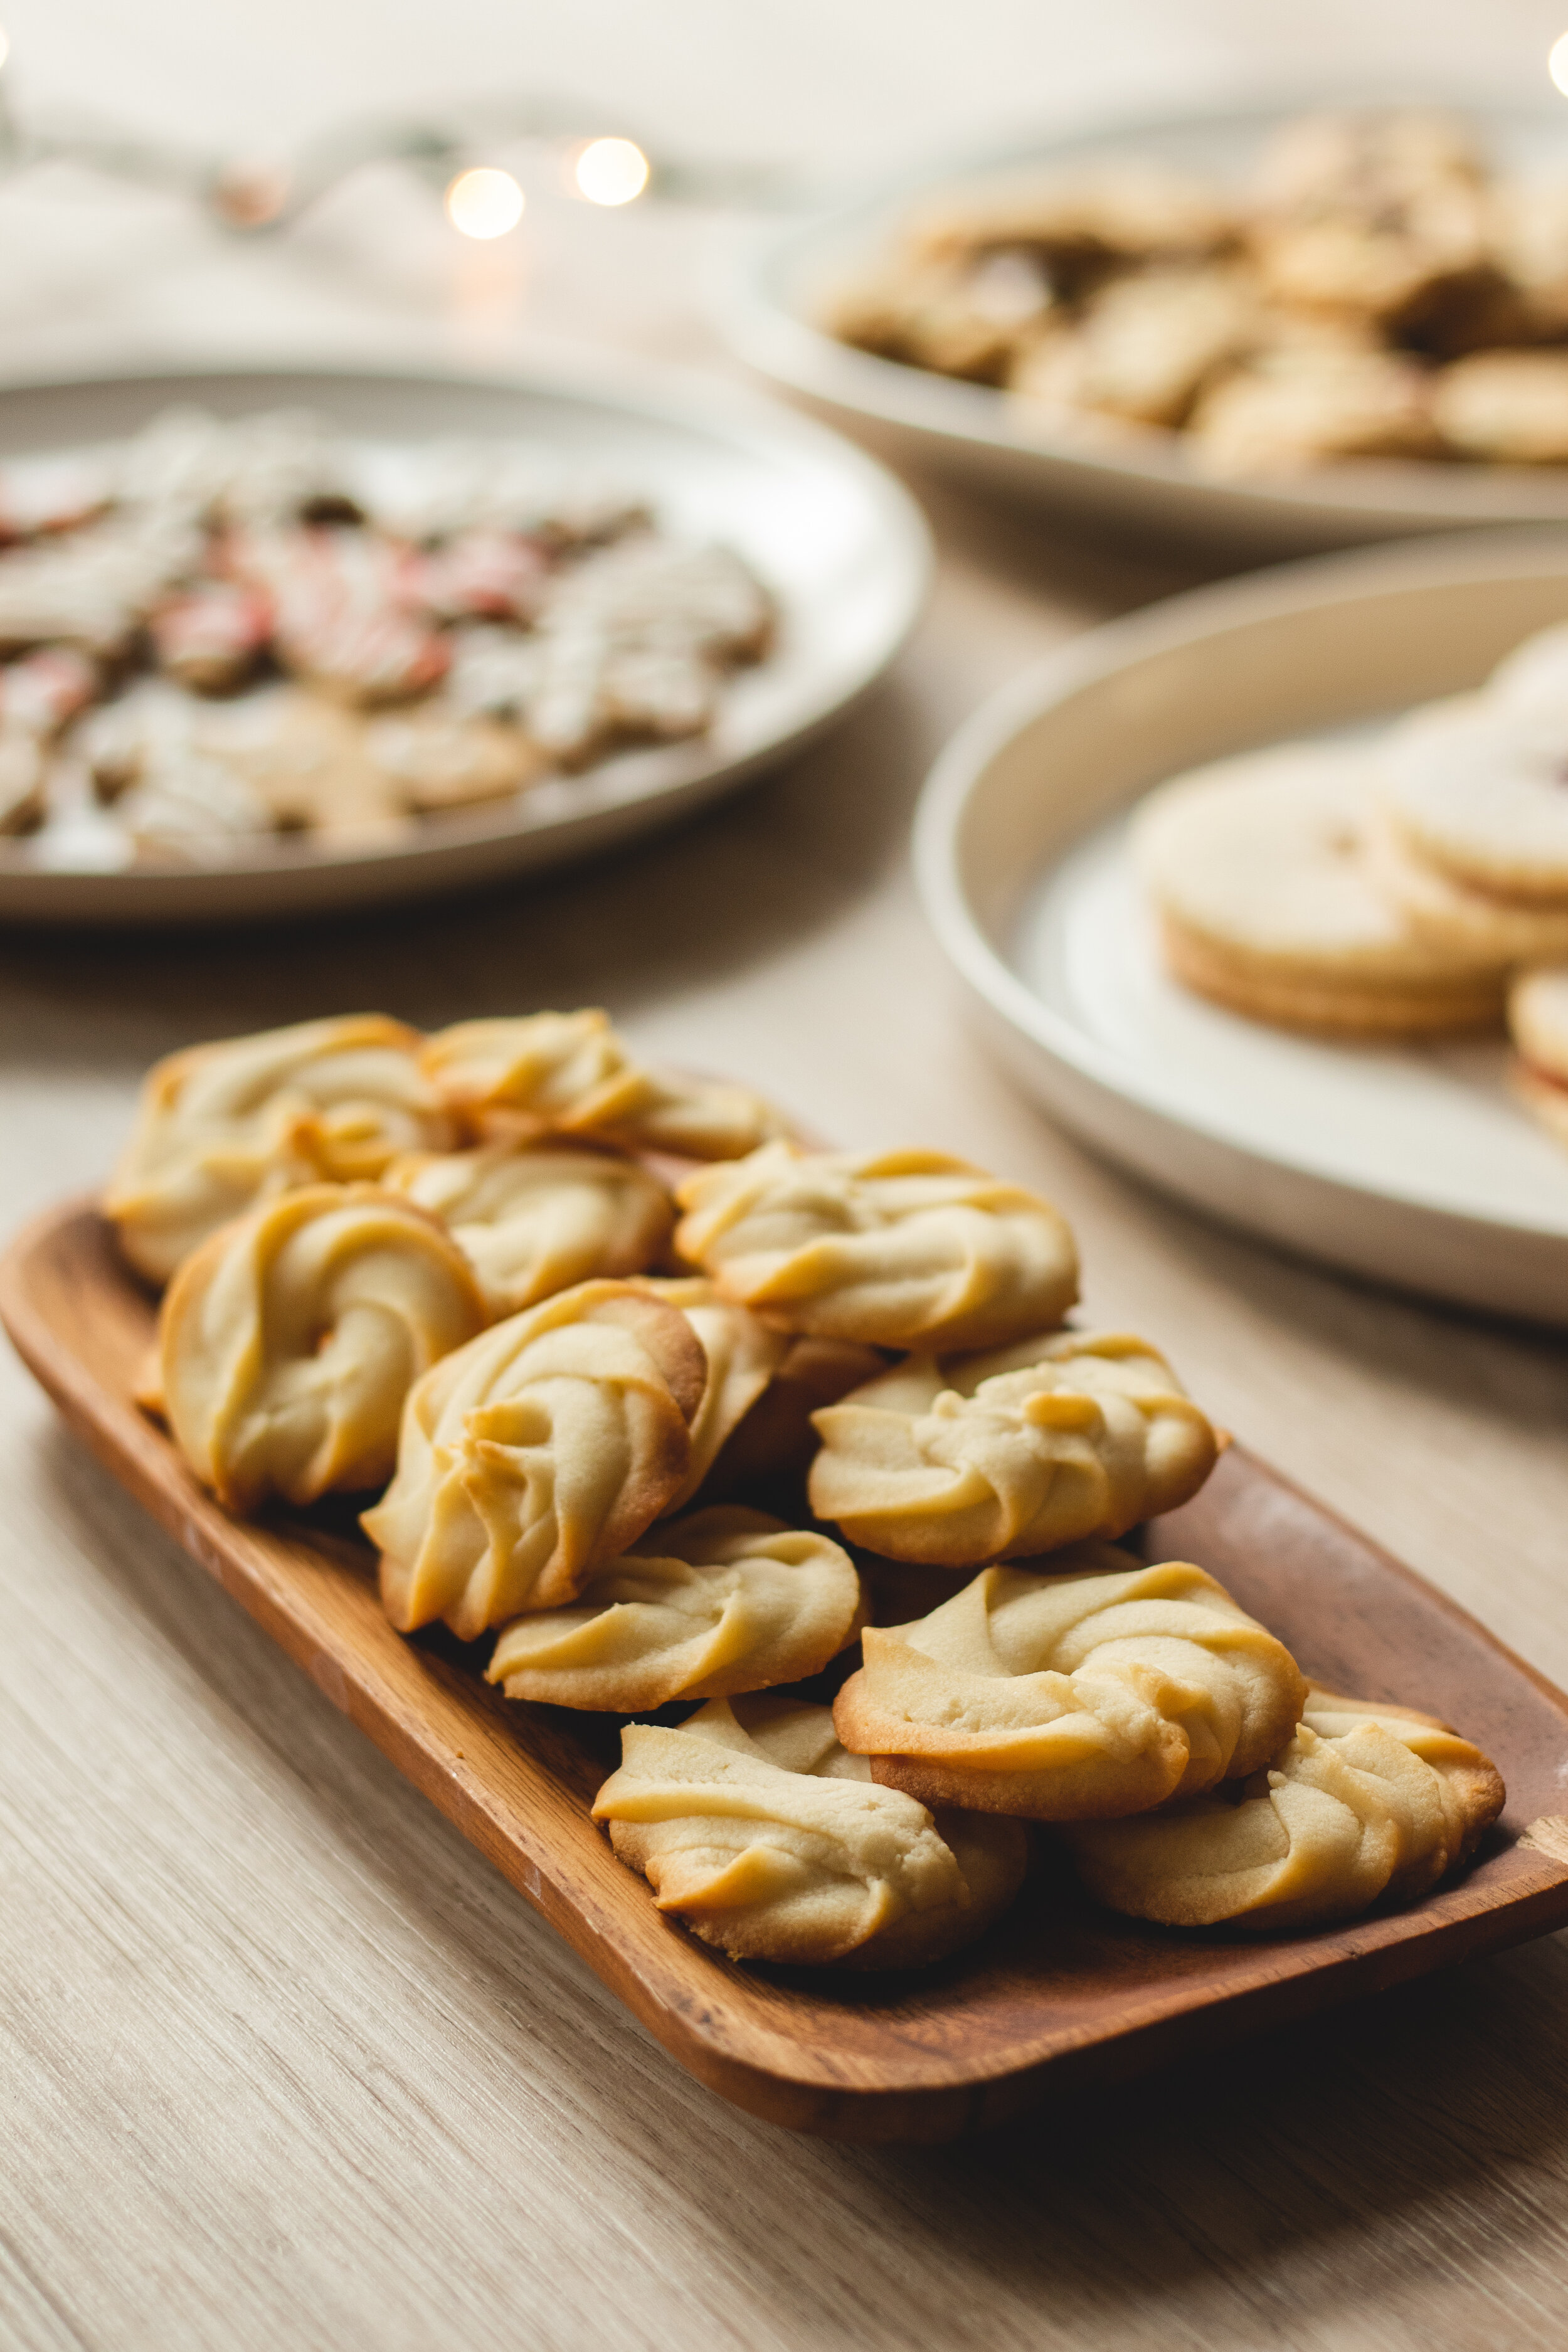
From left to right, top to bottom: frosted gingerbread cookies, cranberry pistachio shortbread cookies, butter swirl shortbread cookies, strawberry jam Linzer cookies, marbled black/white tahini (sesame) shortbread cookies


You might think that I’m crazy for making 5 distinct cookies that look and taste very different. However, I took a shortcut by making a large portion of a “master dough” which I could add to and modify for each of the different cookies. After looking through all the recipes for these cookies, I realized that they all had the following ingredients in common: butter, sugar, flour. Here’s a recipe for making a shortbread “master dough” that you can customize quickly later on:

Basic Shortbread Cookie Dough

The shortcut for shortbread cookies ;)

  • 1 cup (2 sticks) butter (room temperature)
  • 1 cup sugar
  • 2 cups flour
  • Pinch of salt
  • 1 tsp vanilla extract (optional)

Instructions

For this very basic dough, just cream the sugar together with the butter and vanilla (optional) with a hand mixer. Then, blend in your dry ingredients—the flour and salt—and you have yourself a simple dough that acts as a blank canvas for a variety of different cookies. You can separate the dough and mix in other ingredients like almond extract (which I did for the Linzer cookies) or ground pistachios. Because I needed to pipe out my butter swirl cookies, I just added extra milk to the dough to make a thinner mixture that I could squeeze out of a piping bag.

Gather the dough into a disk or log and wrap tightly in plastic wrap. Store it in the refrigerator to be used in the next few days. If you expect to keep the dough for longer, you can freeze the dough for up to 2-3 months.

Then, based on the specific cookie, these usually take from 15-20 minutes in the oven, varying from 325°-350°F.


Holiday Cookie Box - 5 homemade cookies to gift this year


Cookie 1: Almond Linzer Cookies

For the biggest cookie in the box, I chose a recipe which I knew would be simple. My parents also love eating cookies with jam in them, so I knew that Linzer cookies was a must in this box.


Holiday Cookie Box
Holiday Cookie Box


Cookie 2: Marbled black/white tahini (sesame) cookies

These are the most sophisticated out of the entire bunch. They practically look like they belong in an art museum. Unfortunately, my marbling technique needed sharpening, and the cookies didn’t come out quite like the ones that Susan Spungen made. They were still one of the most delicious and unique cookies in the box though.


Holiday Cookie Box
Holiday Cookie Box


Cookie 3: Butter Swirl Shortbread Cookies

I also wanted a super classic shortbread cookie for my box. If the marbled sesame cookies were the sophisticated one out of the bunch, then we need a more basic character to balance it out. Because I needed to pipe these cookies out of a pastry bag, I made sure to add more milk to the dough in order to thin it out into a ribbony paste.


Cookie 4: Cranberry Pistachio Shortbread Cookies

This cookie was the most rustic cookie out of the bunch, and one of the simplest to assemble. Cranberries are a holiday staple, and pistachios are one of my favorite ingredients to add to sweet and savory dishes. These ended up being one of my favorite cookies in the box.


Holiday Cookie Box - 5 homemade cookies to gift this year


Cranberry Pistachio Cookies

Makes 16 cookies

  • 1 cup (2 sticks) butter (room temperature)
  • 1 cup sugar
  • 2 cups flour
  • 1/2 cup of peeled pistachios
  • 1/2 cup of whole cranberries
  • Pinch of salt
  • 1 tsp vanilla extract

Prep time: 15 minutes | Chill time: 30 minutes | Bake time: 15 minutes

Makes 16 cookies


Instructions

  1. Pulse the pistachios in a food processor until they're a rough powdery texture, or chop them up into small pieces with a knife. Mix them into the flour and salt.

  2. Cream the butter together with the sugar and vanilla (optional) with a hand mixer. After they're blended, mix in the dry ingredients until it comes together into a dough-like texture.

  3. Knead the cranberries carefully into the dough with your hands, trying not to break them.

  4. Chill the dough in the fridge for 30 minutes or overnight.

  5. Preheat the oven to 350°F (or 175°C) while you take the dough out of the fridge and bring it back to room temperature. Break apart small pieces to knead into a spheres, then flatten them out into inch-wide disks. Lay them on a sheet of parchment paper on top of a sheet pan, with a half inch space between each cookie. Bake for approximately 15 to 17 minutes. Allow the cookies to rest on the pan for several minutes before transferring to a wire rack to cool completely.

  6. Bake for approximately 15 to 17 minutes at 350°F (or 175°C). Allow the cookies to rest on the pan for several minutes before transferring to a wire rack to cool completely.

  7. You can store these cookies for a couple weeks in an airtight container to enjoy later.


Cookie 5: Gingerbread cookies with icing

Because I had quite a lot on my hands for the last 4 cookies, I decided to be lazy and bought a cookie mix for the 5th and final cookie. Since I knew I wanted to spend some time getting creative by decorating these cookies, I went with the Sur La Table Gingerbread cookie mix, which also came with a cookie cutter and an icing mix. I got a few extra festive cookie cutters from the store, and cranked out the final cookie relatively quickly.


Holiday Cookie Box - 5 homemade cookies to gift this year
IMG_4354-2.jpg


Luckily, the entire cookie box turned out to be a success. The unique and diverse set of cookies left my coworkers indecisive, and the entire box was finished by the end of the day. They were a hit with my parents as well, who found the marbled sesame cookies to be their favorite.


Holiday Cookie Box - 5 homemade cookies to gift this year
 
Holiday Cookie Box - 5 homemade cookies to gift this year
 
Holiday Cookie Box - 5 homemade cookies to gift this year


Let’s not forget about one of the most important elements of this cookie box: the box itself. I found mine from Daiso for only $1.50 each. During the holidays, Daiso usually has a lot of festive decorations and stationary that’s perfect for someone on a budget. Even better though, if you have a tin left over from a gift or from a previous box of cookies (one that’s not holding coins, presumably), then feel free to recycle that and use it for your new box of cookies.


Holiday Cookie Box - 5 homemade cookies to gift this year


I also created a cookie “cheat sheet” that explained the details of each cookie (excuse the bad drawing).

I hope this post inspired you to give out a heart-felt gift that you can create in the comfort of your own kitchen. Cookies are generally one of the easier dessert items to make, and can be easily transported and kept for long periods of time. Take the holiday season to get creative and give back to those you love most.

Just realized that this is probably my last post of the decade 🙀

Happy holidays everyone, and cheers to 2020! 🥂

♥ Cindy

 
FoodCindy Zhang Comments
Truffle Salt Avocado Toast


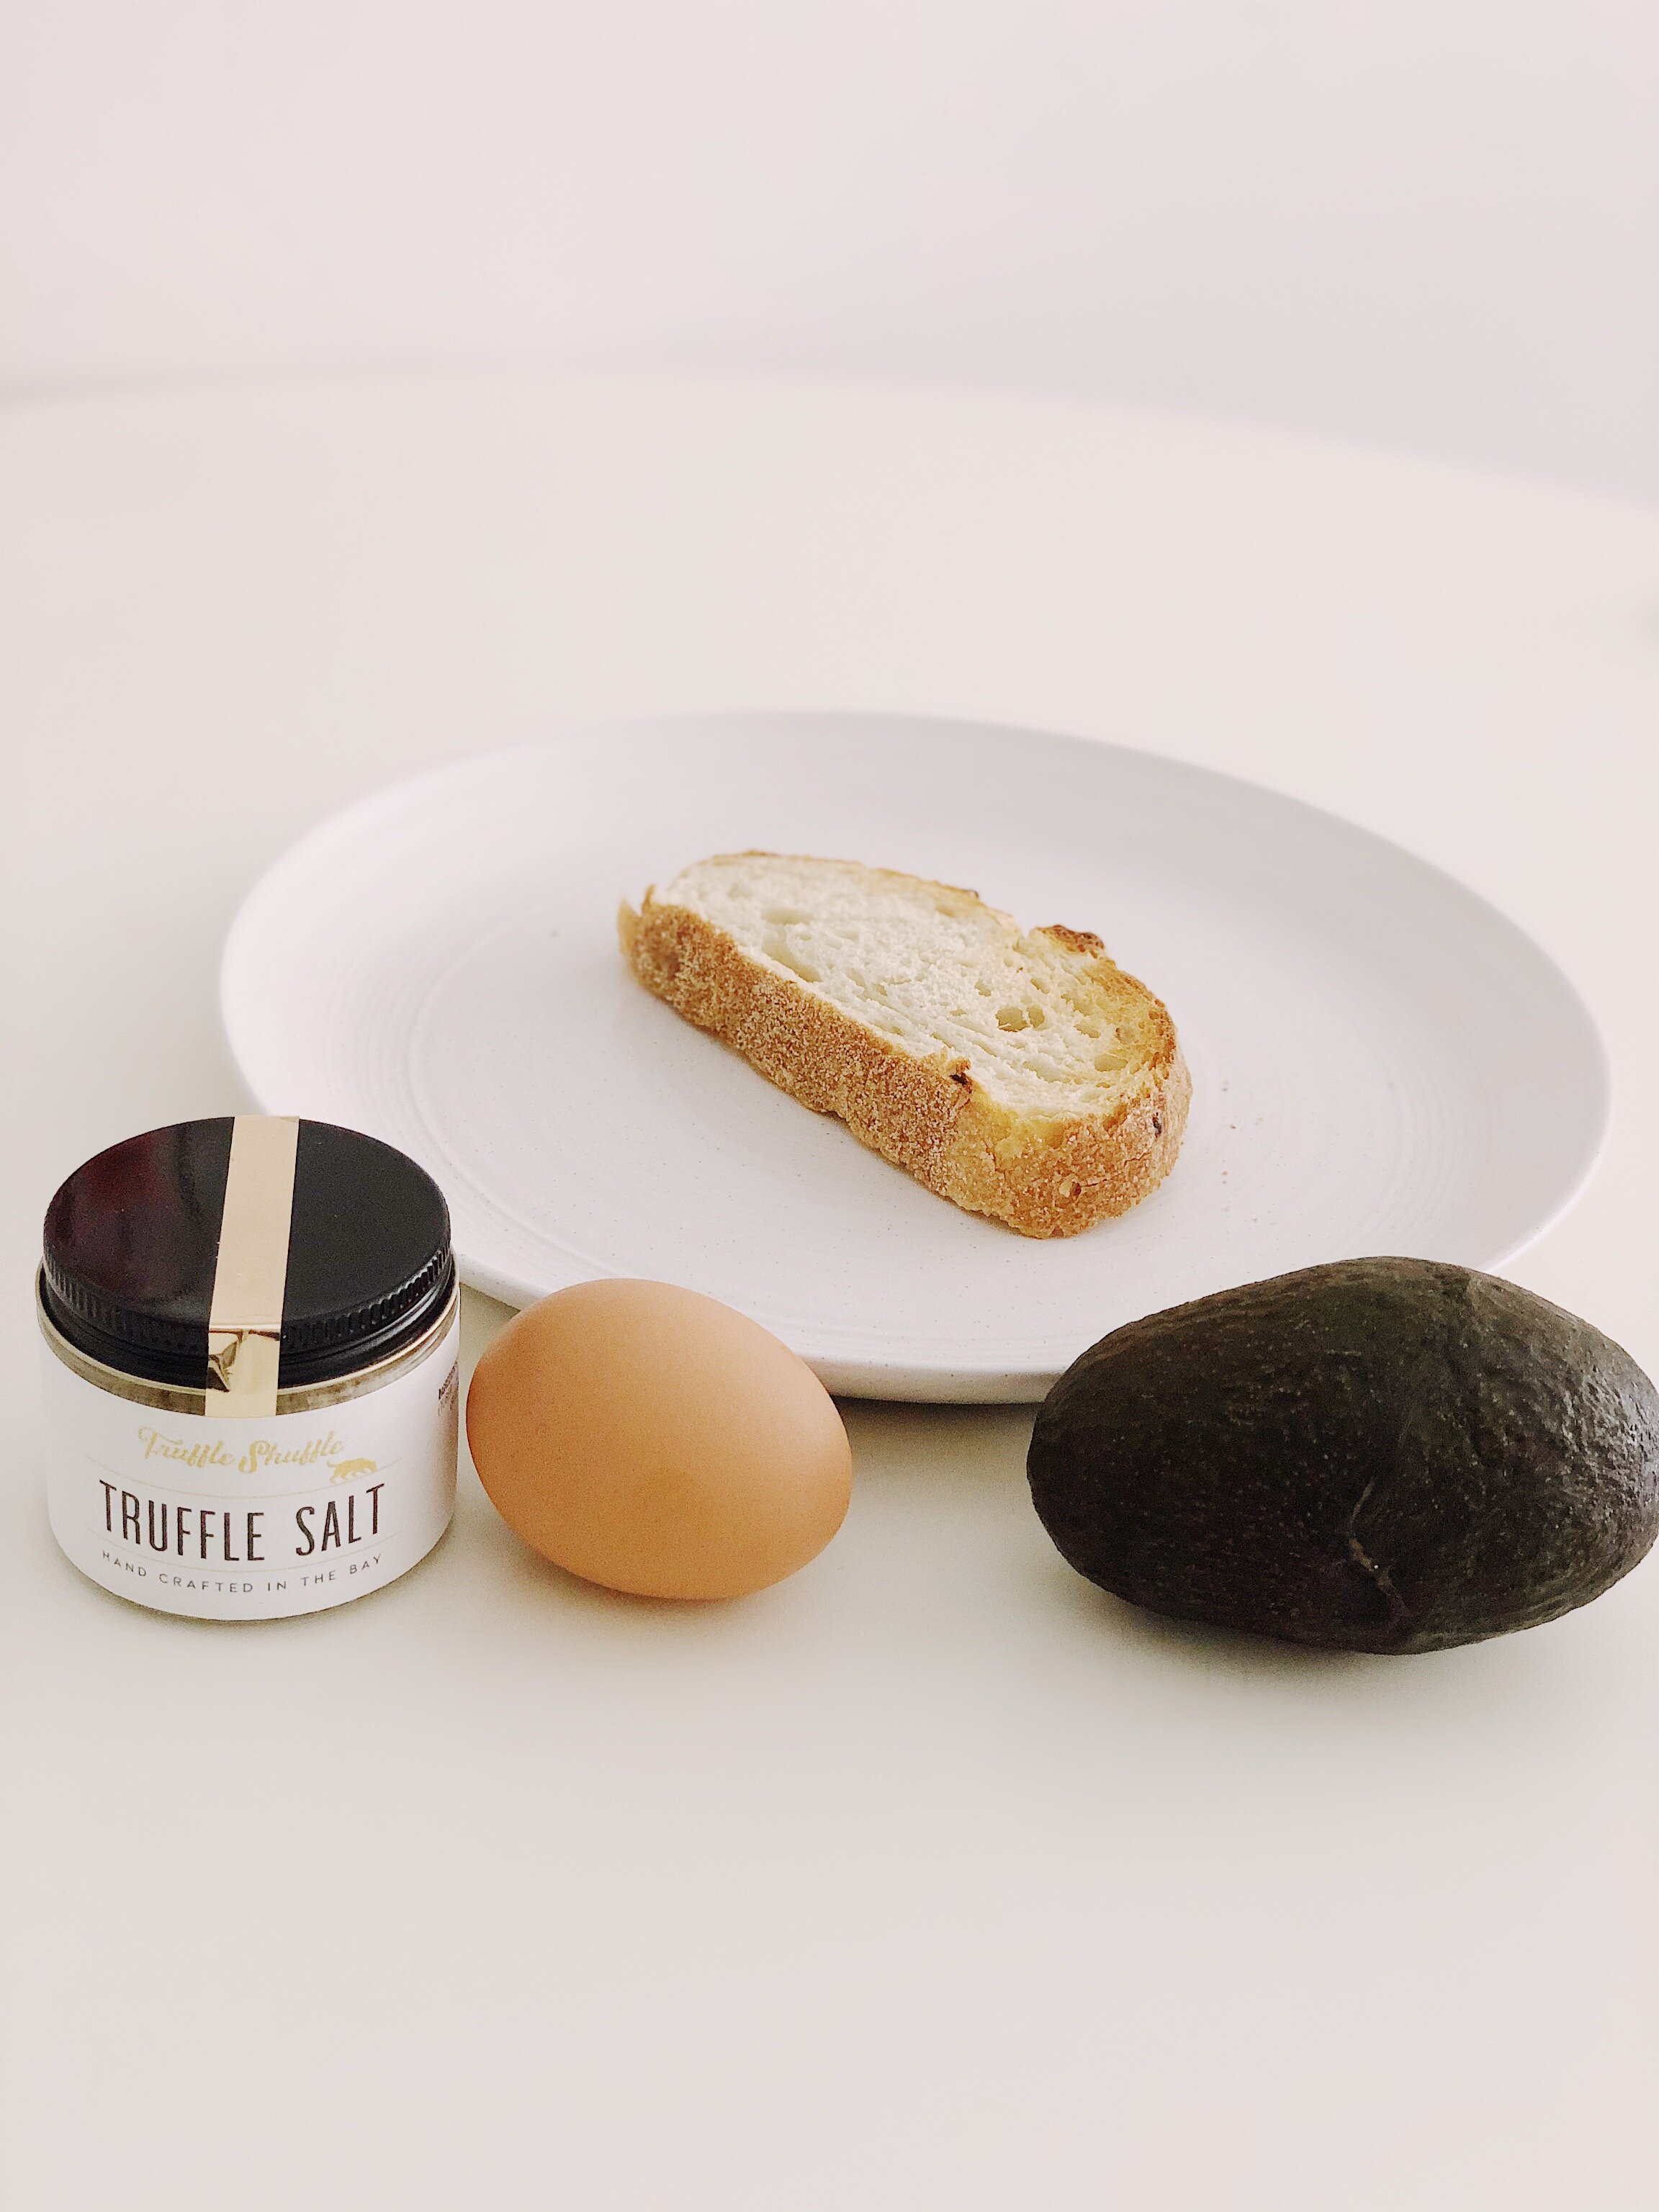
I recently made these luxurious truffle salt mashed potatoes for Thanksgiving. To continue with this truffle salt trend, I thought I’d share something that I made a couple months ago when I first got the truffle salt from Truffle Shuffle for my birthday—avocado toast! Since I love having avocado toast for breakfast, and because it’s something that’s pretty difficult to mess up, it naturally became the first canvas for the truffle salt.


Besides the truffle salt, there are a few other staple spices that I usually like to add to my avocado toast: Everything Bagel seasoning, Trader Joe’s Mushroom & Company Umami Seasoning Blend, and garlic powder. Because I really wanted the truffle to stand out in this particular avocado toast, I made sure to only add a small amount of seasoning (especially knowing that there’s a lot of salt inside these seasonings as well).


Truffle Salt Avocado Toast


Step 1:

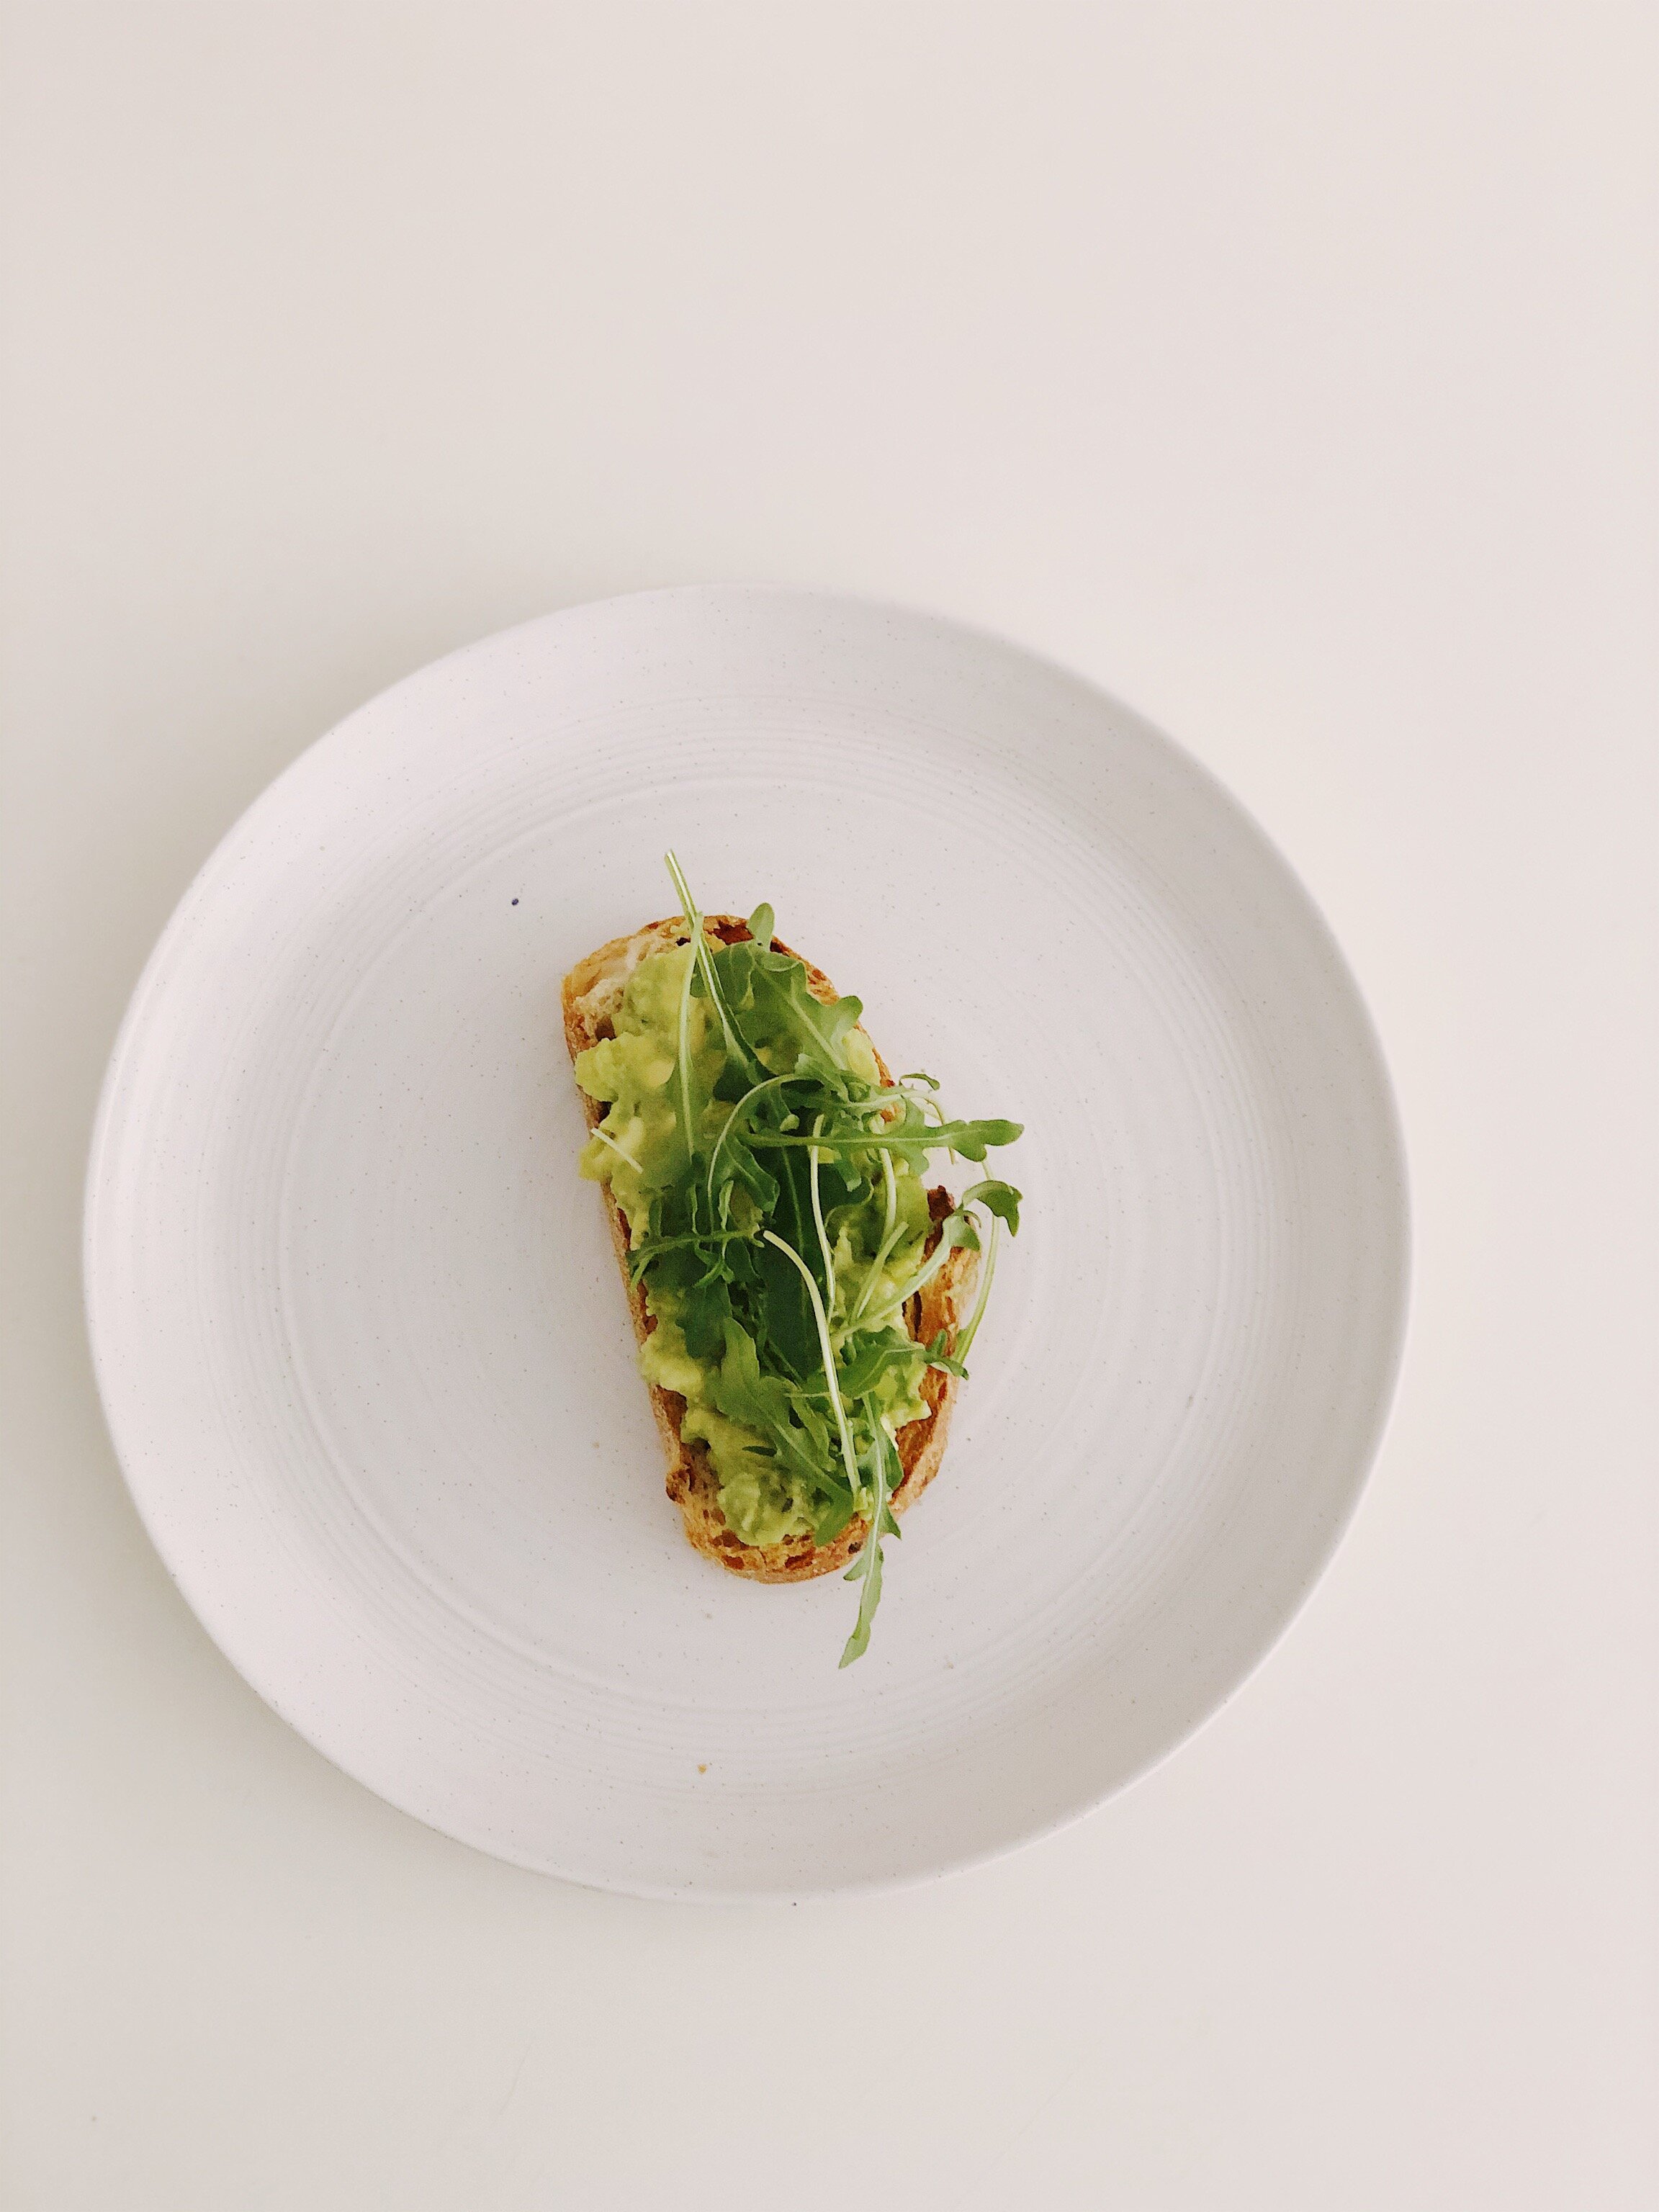
Cut up the avocado into small chunks and mash it up with the Everything Bagel seasoning, umami blend, garlic powder, and truffle salt to taste. Toast a piece of your bread of choice, and spread the avocado on top.


Truffle Salt Avocado Toast


Step 2:

Add some veggies of your choice (my favorite is arugula!). But Microgreens, alfalfa sprouts, spinach, tomatoes, or radish slices are also really great toppings.


Truffle Salt Avocado Toast


Step 3:

Avocado toast is always better with an egg (non-negotiable unless you’re vegan—don’t @me). I think a poached egg works the best, and cooking it is really not as intimidating as you think. You can find some tips and tricks on this blog post here.


Truffle Salt Avocado Toast


Step 4:

Sprinkle a little more truffle salt on top of the egg, and add freshly ground pepper on top.


Truffle Salt Avocado Toast


Truffle Salt Avocado Toast

Ingredients (serves 2)

  • 1 medium-large avocado
  • 2 eggs
  • 2 slices
  • 1-2 tsp truffle salt
  • 1 tsp Everything Bagel Seasoning*
  • Pinch of Garlic Powder*
  • Pinch of Trader Joe's Mushroom and Company multipurpose umami seasoning blend*
  • A few sprigs of arugula

* Feel free to replace these seasonings with your own favorites!

Takes , Makes enough for 2 people.


Instructions

  1. Cut the avocado into small chunks and mash it up with the Everything Bagel seasoning, umami blend, garlic powder, and truffle salt to taste. You won't need too many of these seasonings, since their salt content is quite high. Toast a piece of your bread of choice, and spread the avocado mix on top.

  2. Top the avocado off with a few sprigs of arugula. Microgreens, alfalfa sprouts, spinach, tomatoes, or radish slices are also really great toppings.

  3. For the poached egg on top: Bring a pot of water to a soft boil/simmer. Crack the egg into a small bowl to avoid egg shells when you add it into the water. Make a "tornado" in the water with a spoon before adding the egg. This will allow the egg to spiral onto itself and prevent it from falling apart in the water. Should you add vinegar? It’s totally optional. A little bit of white vinegar can help the egg stay firm, but I’ve made plenty of poached eggs without it.

  4. Poach the egg for 3-4 minutes, and let it drain on a paper towel before adding it on top of the avocado toast.

  5. Sprinkle a little more truffle salt on top of the egg, and add freshly ground pepper on top.

Hope this will inspire you to try out a glammed up version of this simple breakfast. Thanks again to Truffle Shuffle and my friend Sam for giving this jar to me for my birthday 💖

♥ Cindy
 
Food, 2Cindy Zhang Comment
Truffle Salt Mashed Potatoes + Everything else I made for Thanksgiving this year
 
Everything+I+made+for+Thanksgiving+this+year


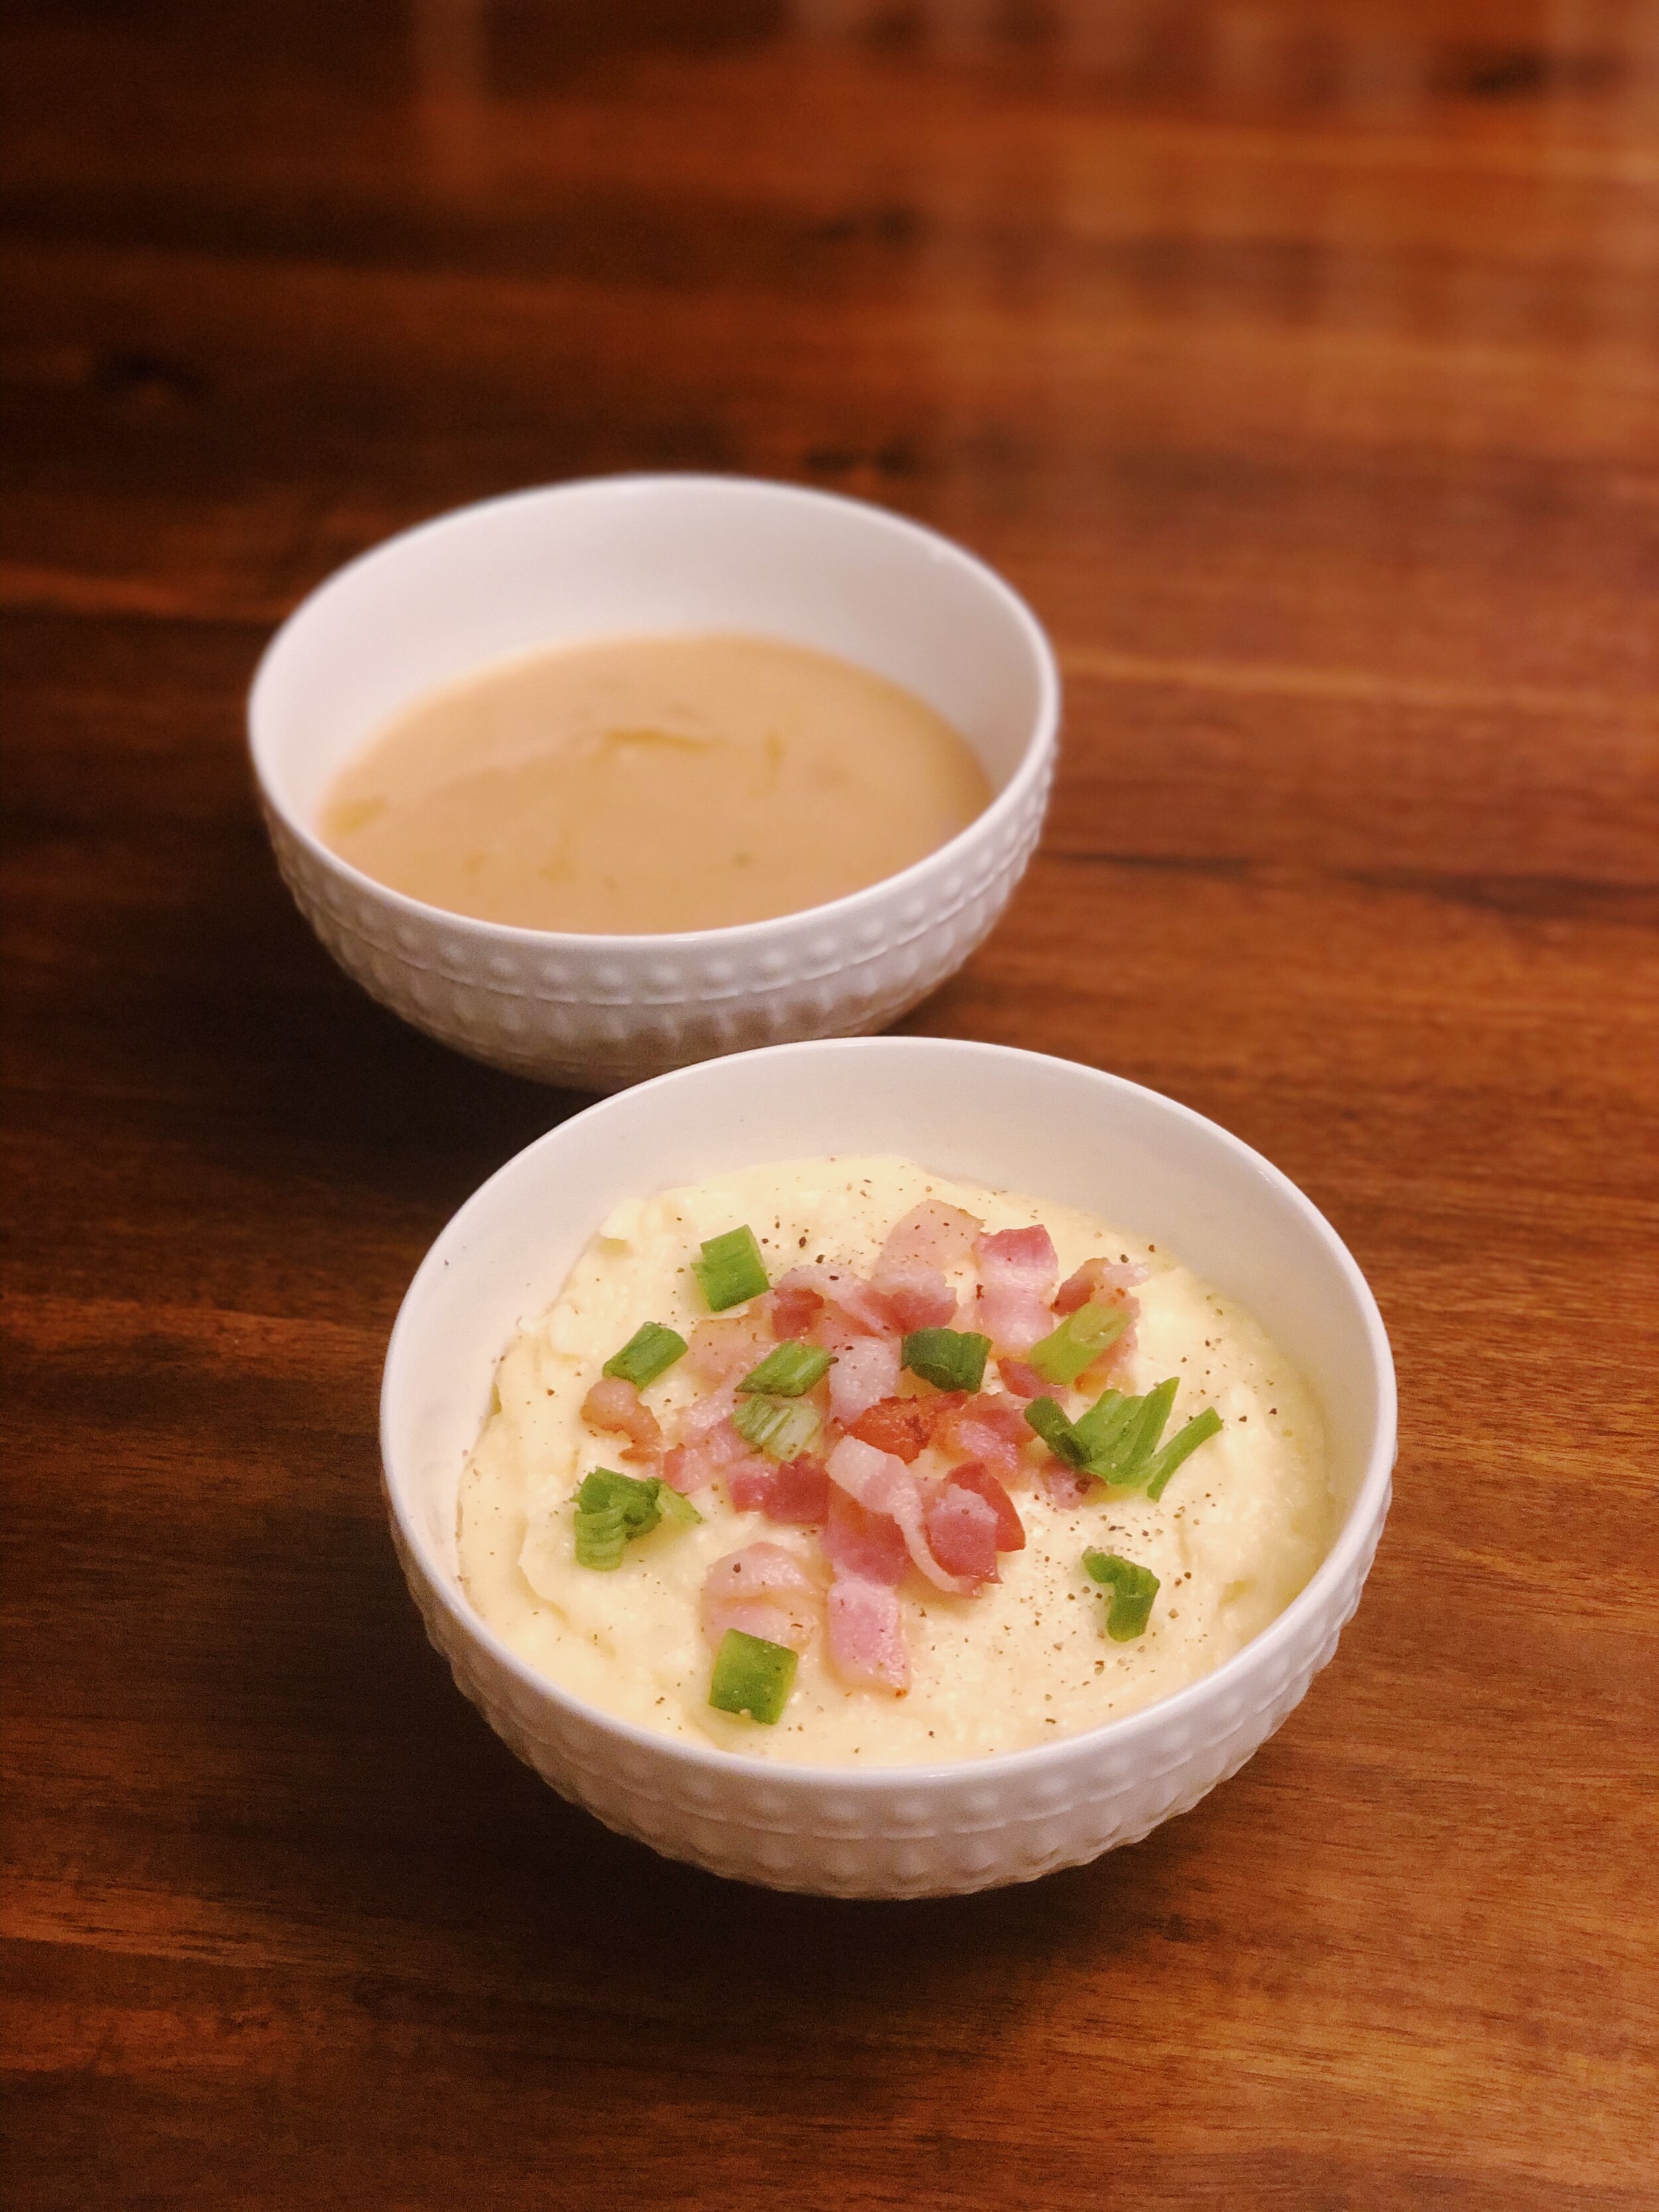
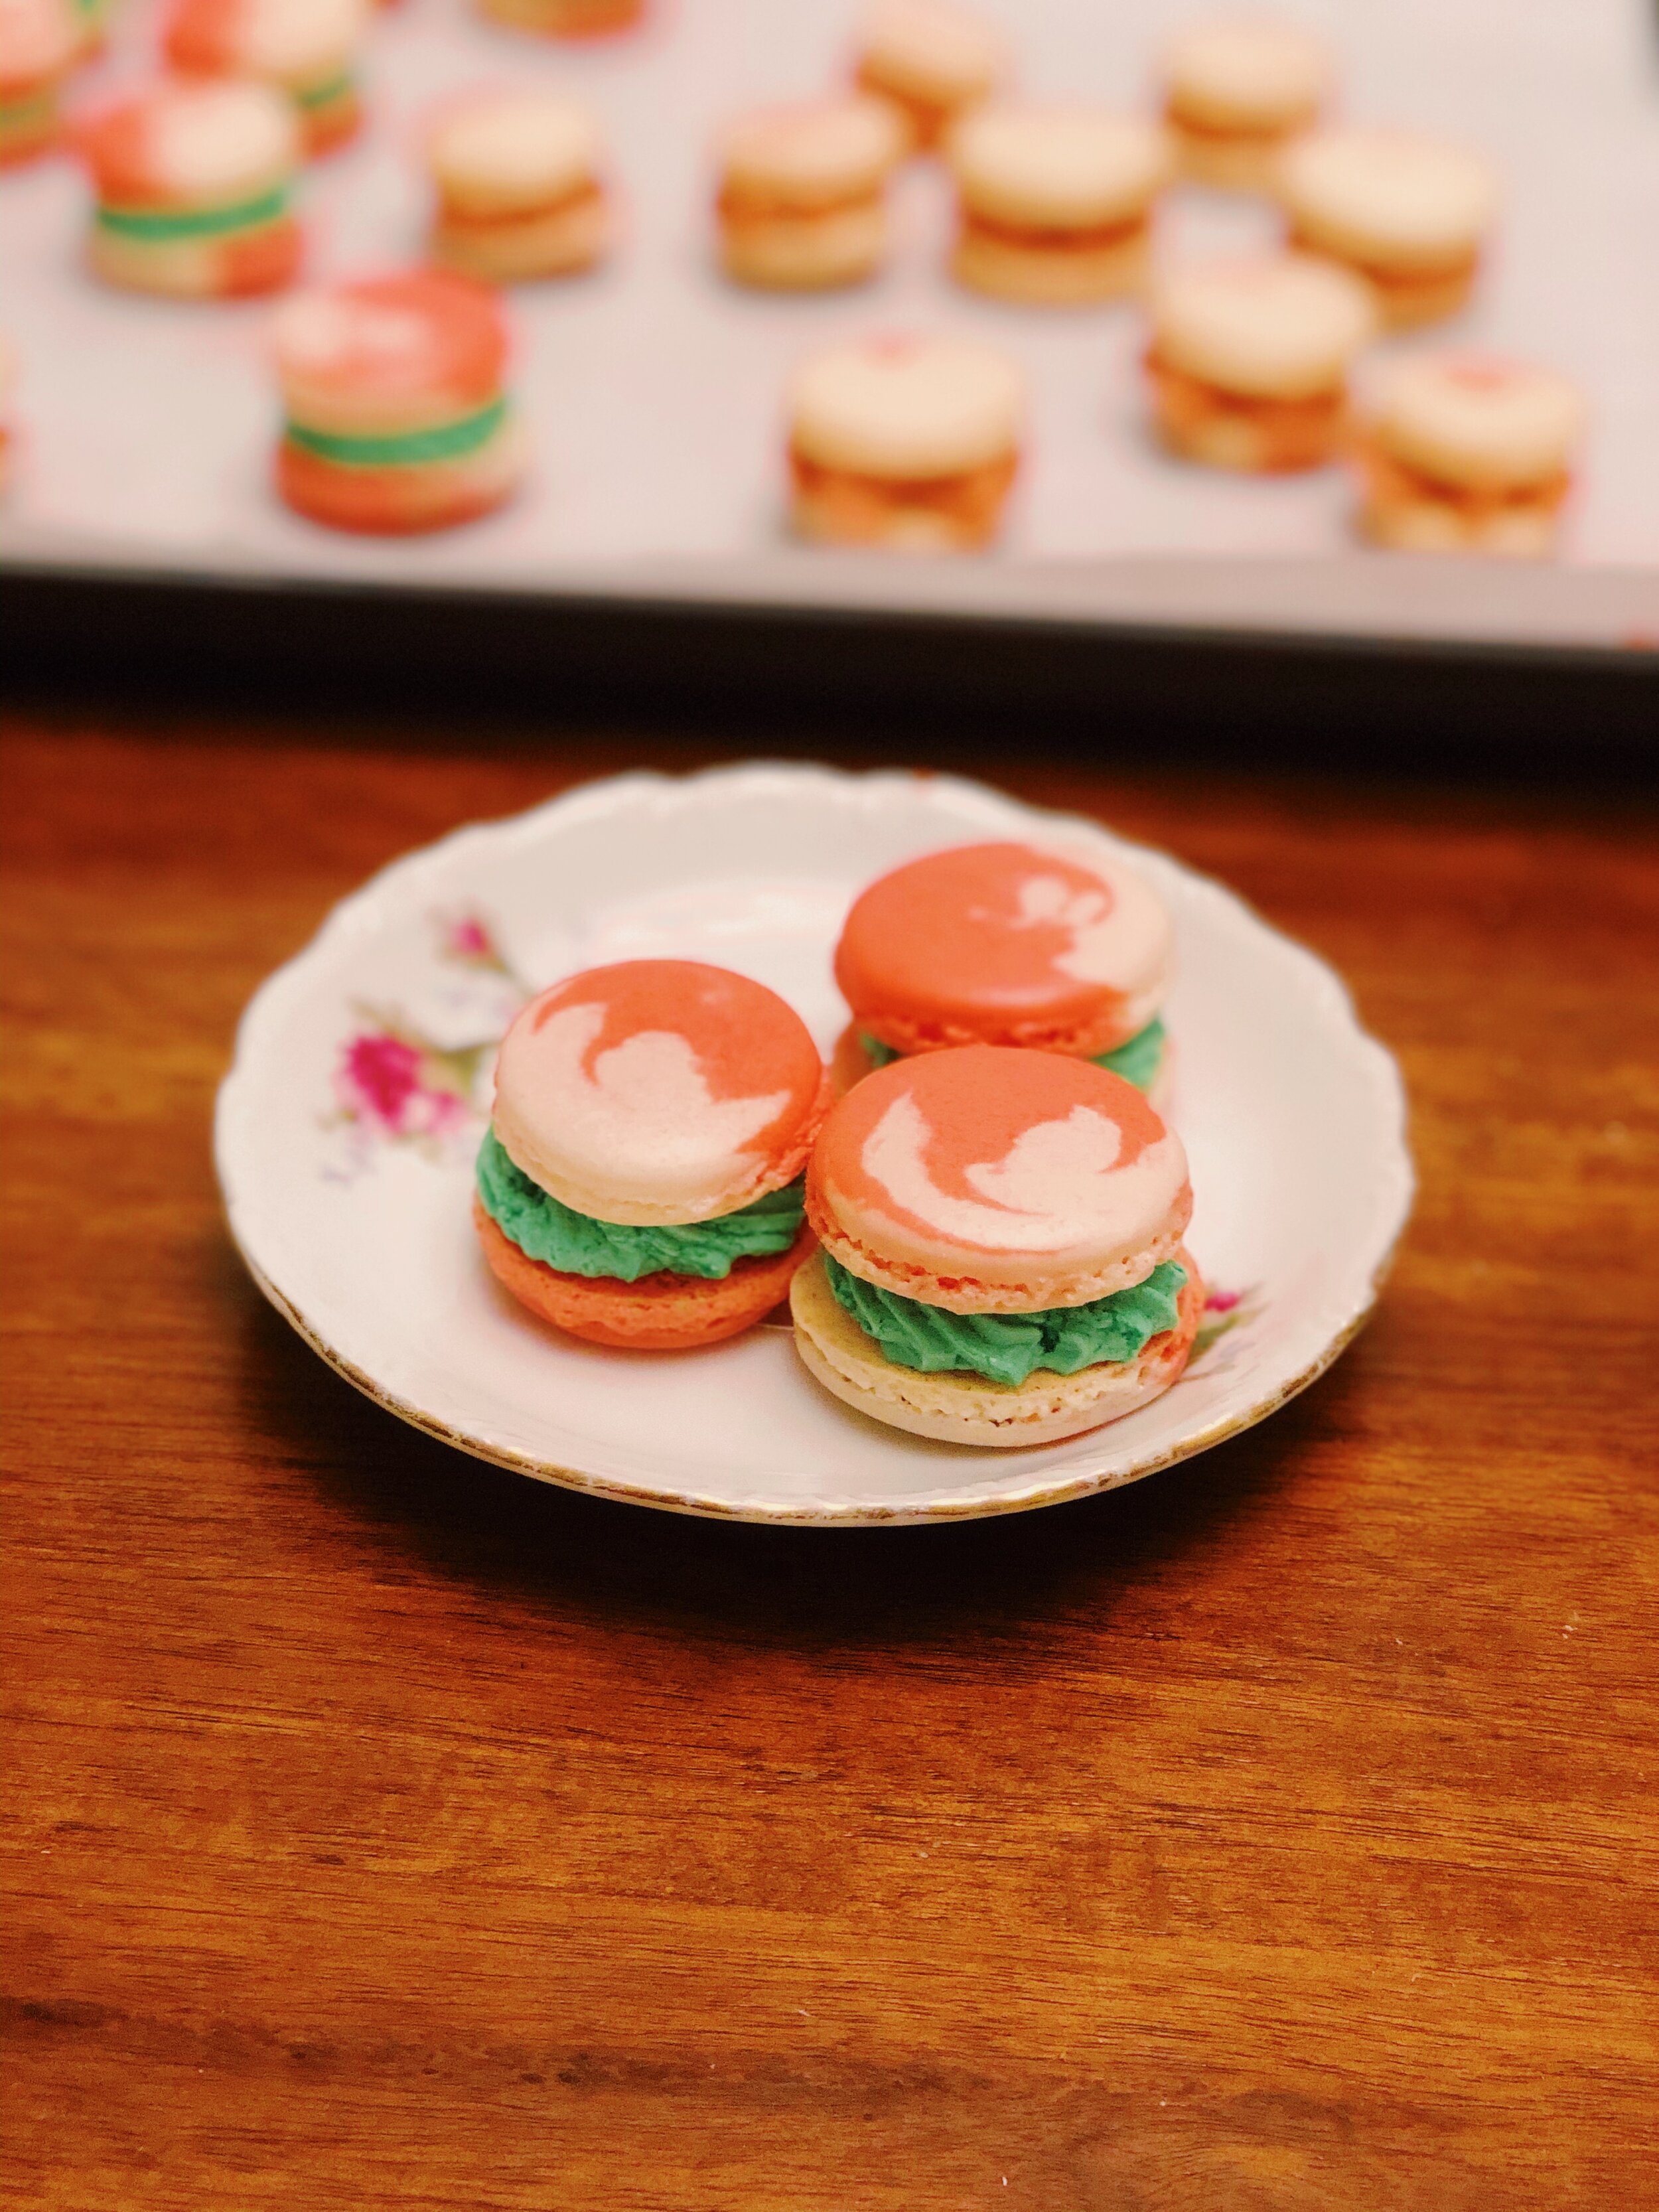
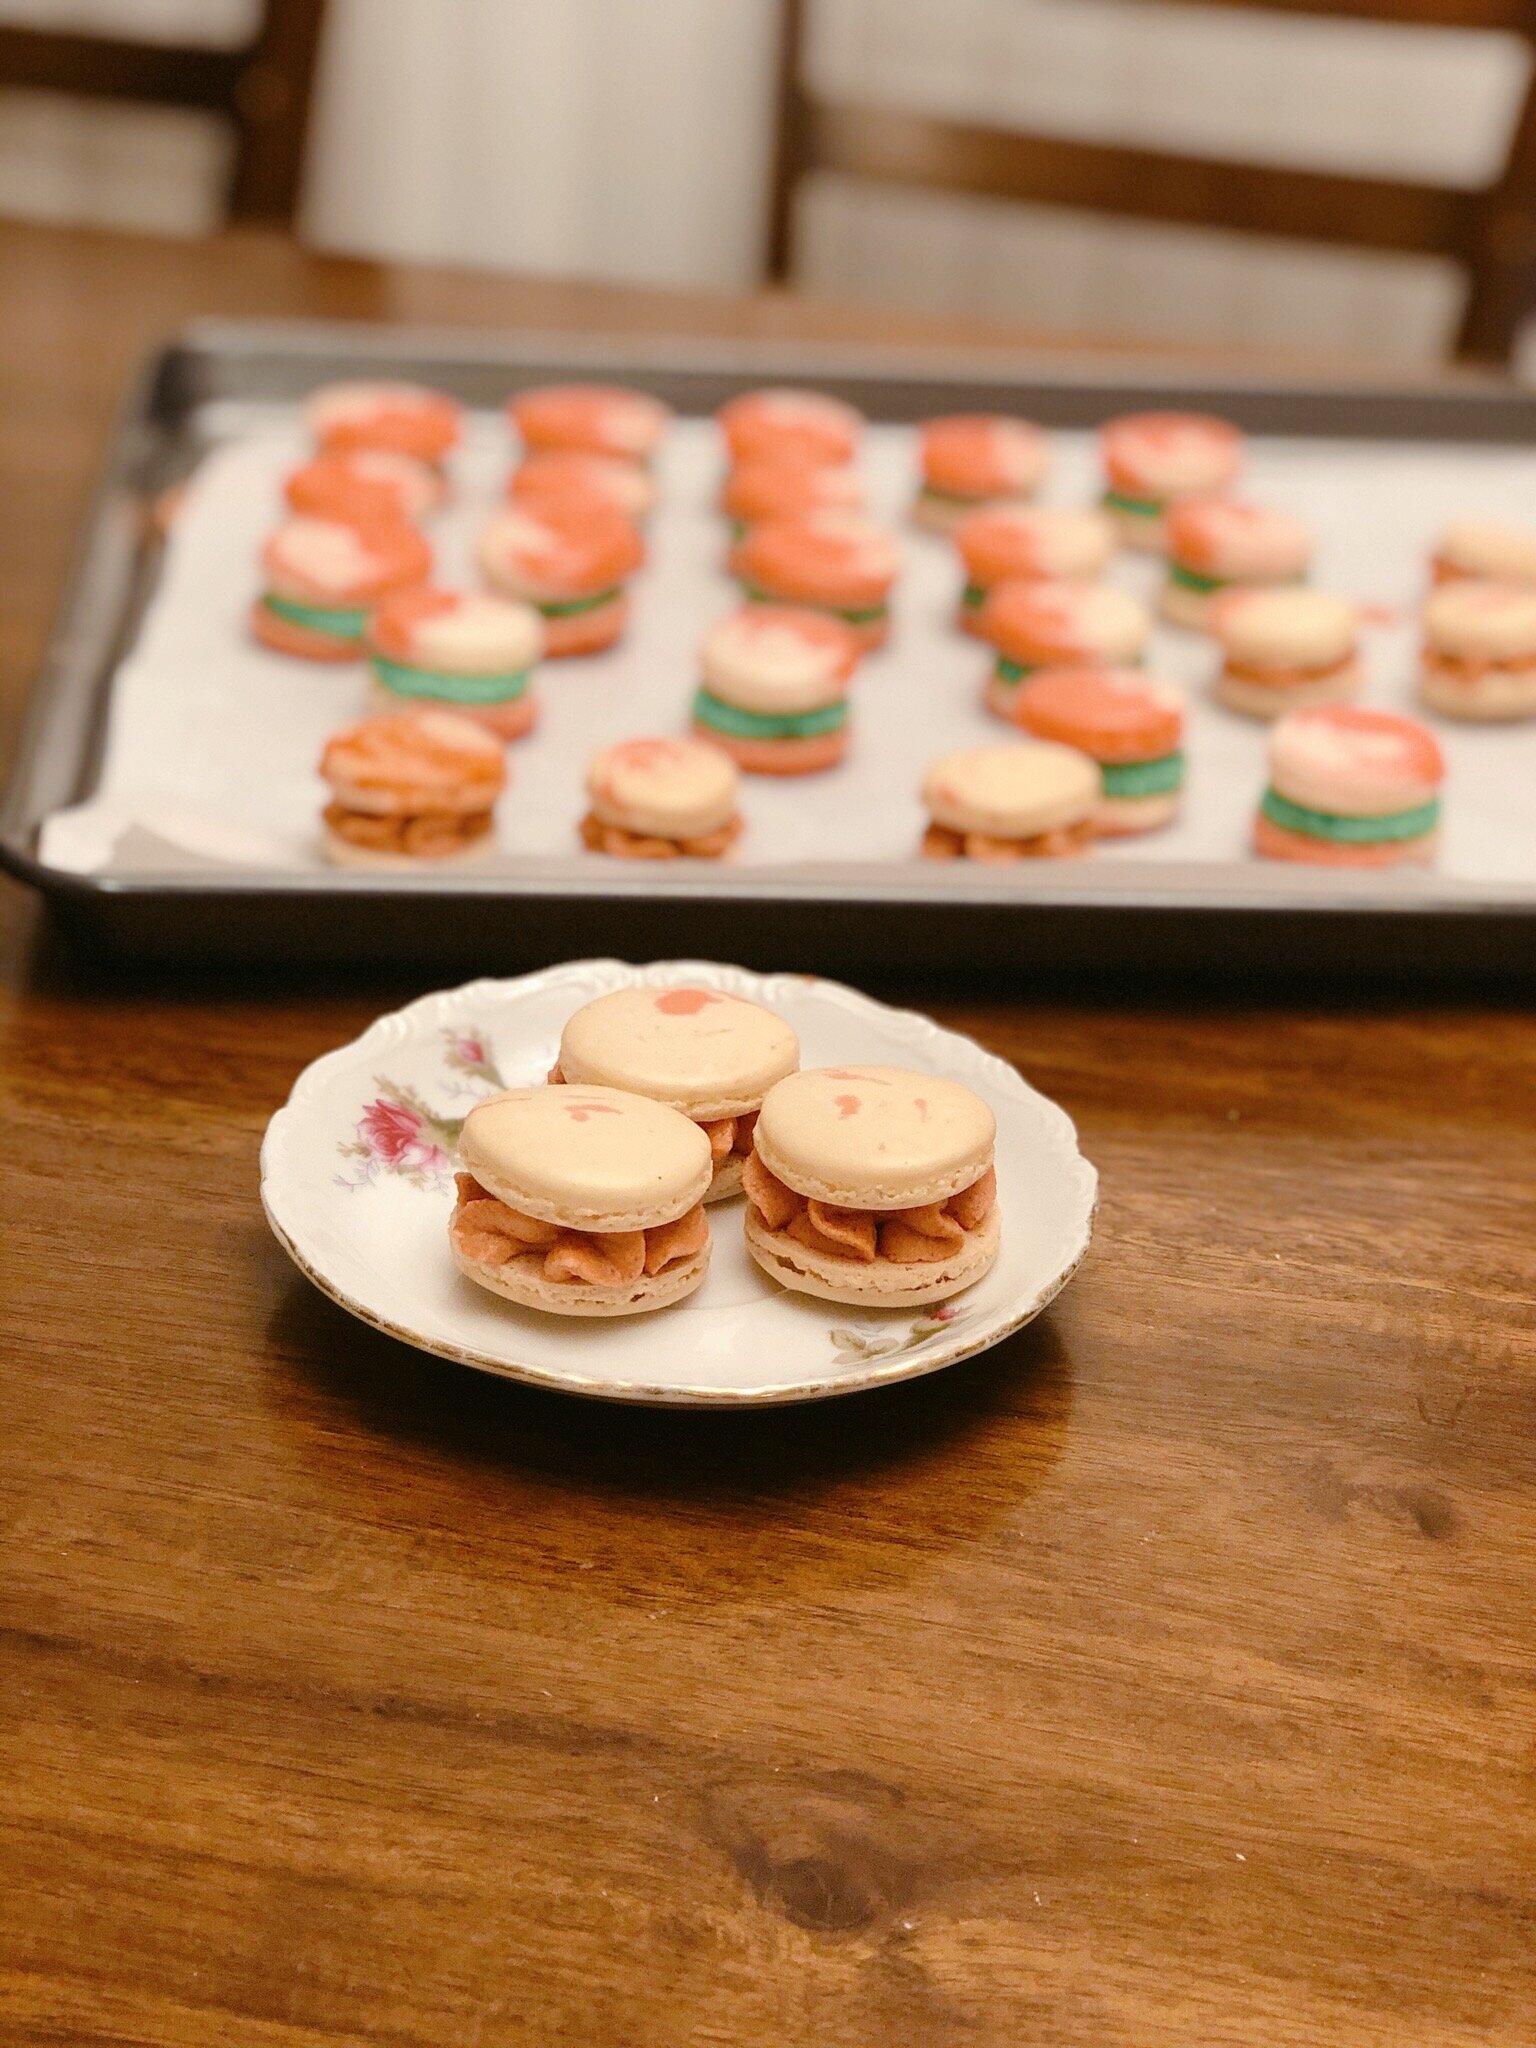
Happy Thanksgiving! I hope you had a wonderful time relaxing and enjoying food with your family and friends. Despite it always turning into an Asian Thanksgiving in the Zhang household, I ended up seizing the kitchen to make a few seasonal Thanksgiving favorites like Pumpkin Pie and Mashed Potatoes. I even got a little bit adventurous and rode my macaron high from a few months ago to create some Pumpkin Spice Macarons (#basicbutbougie).


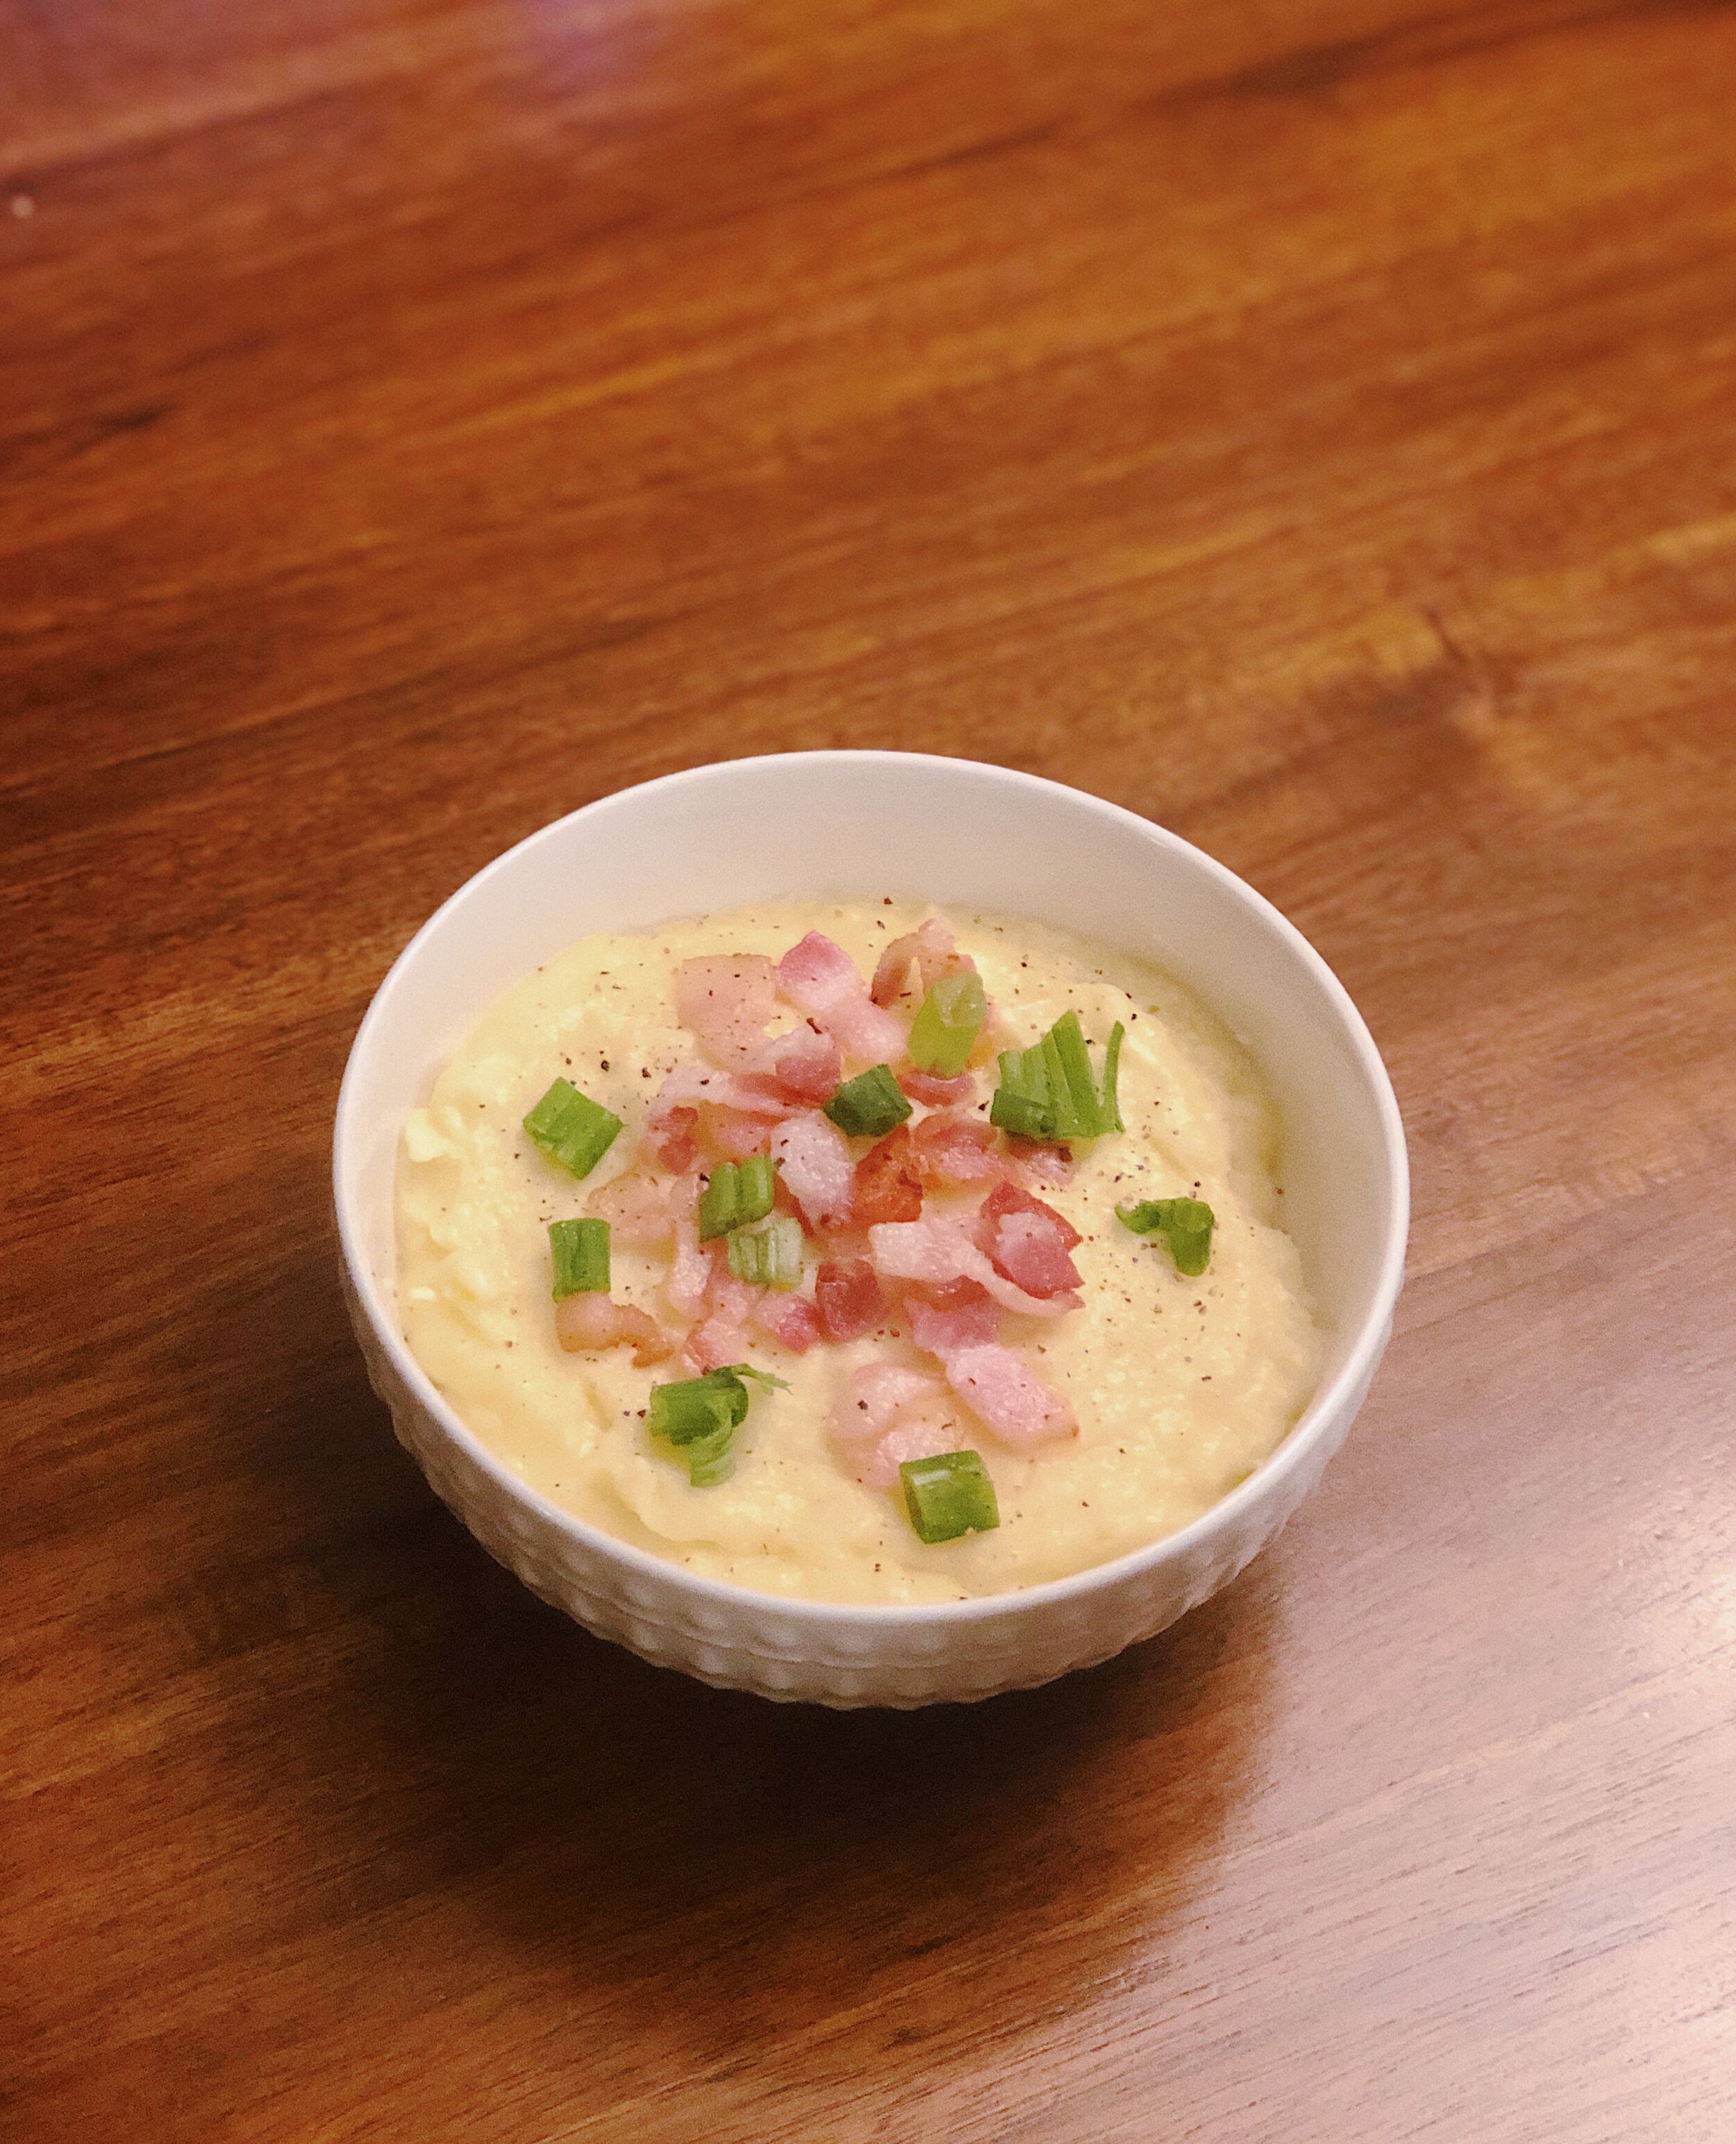
I wanted to highlight one of my proudest achievements this Thanksgiving: these mashed potatoes shown above. Made with truffle salt, (lots of) cultured butter, garlic-infused heavy cream, and topped with bacon and scallions. There are a lot of ways to mash your potatoes—using a potato masher, a ricer, or even a fork—but I went the extra mile and gained some extra biceps by sieving the potatoes through a mesh (they should be called “meshed” potatoes instead of “mashed” potatoes, am I right?! 🥁). I learned this method through this really helpful video by Tasty, and the potatoes ended up being silky smooth and very luxurious.

Mashed potatoes can act as a blank canvas for your favorite spices, and so I decided to pull something a little extra out of my pantry—truffle salt. I recently received a jar for my birthday from a shop in Oakland called Truffle Shuffle, and I’ve been using it ever since in pasta, eggs, and even on my avocado toast. So when it came time to make these mashed potatoes, I thought, why not throw a sprinkle of this in as well? It’ll give this traditional Thanksgiving staple an updated flavor reminiscent of truffle fries.


Truffle Salt Mashed Potatoes

Ingredients (serves 3-4 people)

  • 4 potatoes
  • 2 cloves of garlic
  • ½ cup heavy cream
  • ¾ cup/12 tbsp/6 oz of cultured butter*
  • truffle Salt to taste
  • bacon for garnish (optional)
  • chopped chives or scallions for garnish (optional)

* I love the taste of cultured butter, but regular butter will do just fine!

Takes , Makes enough for 3-4 people.


Instructions

  1. Peel the potatoes and slice them into 1-inch cubes. Set them aside in cold water while you work to prevent them from oxidizing.

  2. Add the potatoes to a pot of cold water with a sprinkle of salt. Boil them for around 15 minutes, or until the potatoes are fork-tender.

  3. Strain the potatoes and put them back into the pot on the stove and stir them around for 30 seconds to 1 minute. This will ensure the potatoes lose all of their moisture.

  4. Mash your potatoes with a potato masher, or run them through a ricer or a wire sieve.

  5. Melt the butter and add it gradually to the potatoes while stirring. Try to do this while your potatoes are still in the warm pot on the stove, on low heat.

  6. Add the cloves of garlic to the heavy cream and heat them up in a saucepan (or the microwave, if you're feeling extra lazy).

  7. Remove the garlic cloves from the heavy cream and slowly add it to the potatoes while mixing.

  8. Mix the truffle salt into the potatoes, giving them a taste to determine the amount you should add. Try not to make them too salty if you're planning on adding gravy or bacon.

  9. Garnish with chopped scallions or chives, bacon pieces, and black pepper, if desired.


Pumpkin Cream Cheese Pie


I also made a pumpkin cream cheese pie that was tasty but on the uglier side. I found the recipe on Pinterest about two years ago and decided to bring it back again this year to be the main dessert item.


If you’ve been following me on Instagram, then you’ll know that I’ve been on a macaron craze these last few months. The journey to create macarons that receive a passing grade hasn’t been easy, but it’s been fun to play around with food coloring and get creative with the filling. For the holiday season, I made these Christmas colored ones on the left, filled with a matcha green buttercream (not a traditional Christmas flavor, but it fulfilled the green part of the macaron). On the left, I created these pumpkin spice macarons, which is kind of like a rendition of my pumpkin pie above, only in macaron form. You can find the recipe for my black sesame macarons here.


I apologize once again for not posting as much as I used to. I’ve been honing in most of my attention on my music these days, and it’s been pretty stressful and emotionally-draining, to say the least. Spending some time in the kitchen and being creative with food has definitely lightened up my mood a bit.

I also just wanted to take a moment apart from the food/music to think about what I’m thankful for. Negative emotion can be a lot stronger than positive emotion, so a lot of the time I tend to ignore all the positivity that surrounds me, and hone in on all the negative parts of my life. But since it’s Thanksgiving, I really wanted to stop and give thanks to all the things that make me happy:

  1. 👨‍👩‍👧‍👦 To my parents. They uprooted their lives in China and brought me here for a better education. I still remember when we were living on $40/week when my parents were grad students, and I can’t be thankful enough of every ounce of their hard work to get me to where I am today. Though they were strict at times, I wouldn’t have the job I have today or be the musician I am today without them forcing me to study or play the violin when I was younger. Thanks for demonstrating a wonderful work ethic and showing me that hard work really does pay off, I love you :)

  2. 👯‍♀️To the friends who managed to see past the surface-level things and embraced the uglier side of me—thanks for calling me out on my BS and reminding me that I don’t need social validation to feel good about myself. I really needed y’all this year. (Also, thanks for making me laugh and laughing at my jokes)

  3. 👩🏻‍💻👨🏻‍💻👩‍🏫👨‍🏫To my incredible team at Pinterest. Thanks for making my M-F/9-5 a blast. I’m so fortunate to work in such a comfortable, inclusive environment that sometimes it doesn’t seem like work at all. Thanks for making me grow, too :)

  4. 👩‍🎤👩🏻‍🎨 To all the talented artists I met this year, whether in person or online. I admire you a lot, and sometimes I hate you for being so great at what you do. You force me to get my shit together and work harder so I can get on your level. Thanks for using your platform and talent to help me share a piece of my art with the world.

  5. 🎸 To my 3 guitars: you’ve gotten me into a lot of trouble and sometimes I cringe at how much I suck—but you helped me become a better musician and become more confident in front of a live audience.

  6. 🐶 To my dog: thanks for loving me unconditionally and making me feel like I’m the most attractive person in the world. Thanks for listening to me when I’m spilling my secrets. I love you!

  7. 📖To all the readers of this blog: Thanks for giving me a purpose to be creative. I really hope the content here inspires you, and that it prompts you to take some time out of your day to let your creative energy run wild.

♥ Cindy
 
FoodCindy ZhangComment
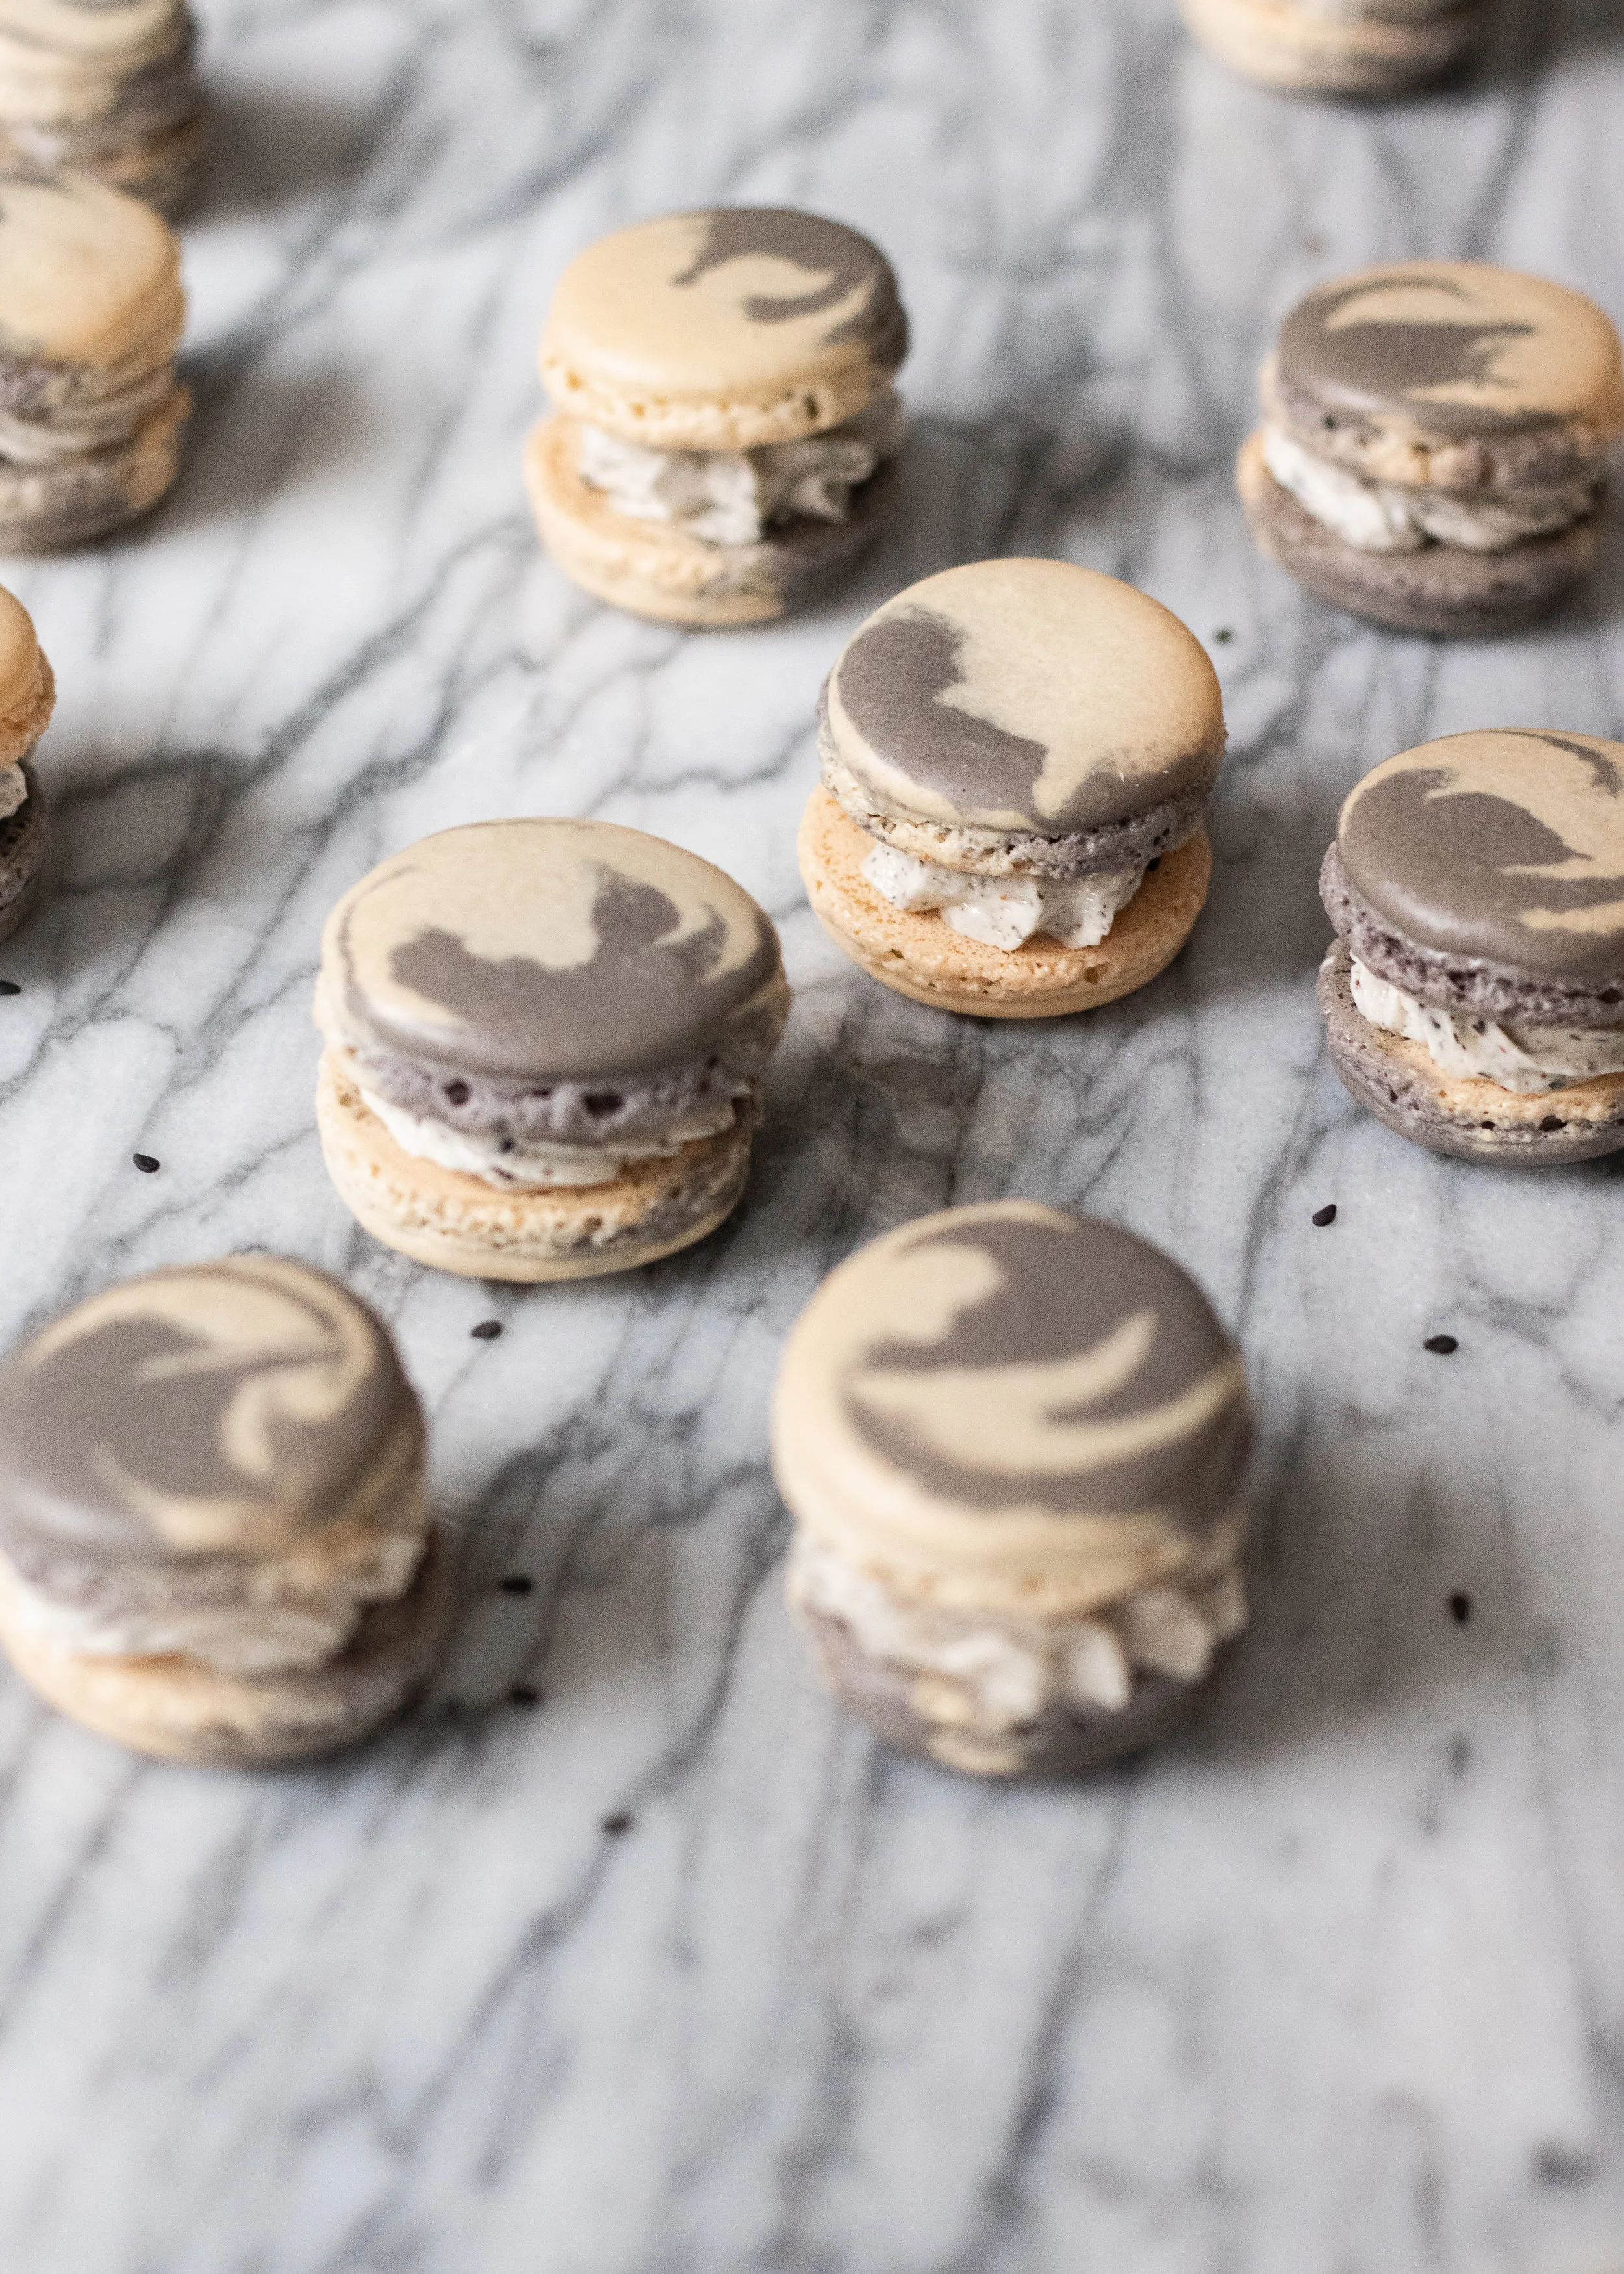
Black Sesame Cheesecake Macarons


Watch the video for a in-depth tutorial on how to make these macarons. If you enjoyed watching, please give me a thumbs up/subscribe to me on YouTube!


Black Sesame Cheesecake Macarons


Probably one of the most intimidating desserts to ever grace my kitchen: French Macarons. They’re notorious for being sold at high prices at fancy patisserie shops. After trying them out in my own kitchen, I realized the ingredients that go into making them are actually not very expensive at all, and you could probably find most of them already sitting in your fridge or pantry (with the exception of almond flour, maybe). In my opinion, the real reason why they’re so expensive is because there’s so much that can go wrong when you’re making them. You truly have to be a perfectionist during every step of the process, and not rush to the finish line—as there is a lot of waiting involved.

In these past few months, I’ve made my fair share of macarons, and also experienced my fair share of failures. I will try to share everything I’ve learned in this post, so you won’t make the same mistakes I did.


Black Sesame Cheesecake Macarons


wet ingredients + the perfect meringue

  1. Separate your egg yolks from the egg whites using your clean hands. Using the shell to separate them could risk puncturing the yolk and leaving them behind in the whites. Your egg whites have to be absolutely pristine for macarons, and a little bit of yolk could ruin everything.

  2. Make sure the bowl you are working in has no traces of oil or water. Egg whites will not whip properly in the presence of oil and water. You can use a paper towel doused in a bit of vinegar to wipe the bowl clean.

  3. The size of your egg matters! When a recipe calls for “3 eggs,” there’s a lot of variation that can happen there. I try to weigh out my egg whites on a kitchen scale, or try to figure out whether I should use small, large, or x-large eggs in my recipe.

  4. Do you need to age your egg whites? Not necessarily. But I found that it’s easier to whip your egg whites when they’ve been sitting for a day or two in the fridge. I usually don’t think far ahead enough to age them for that long, but I’ll try to separate the egg whites and leave them hanging out at room temperature in the morning if I know I’ll be making macarons in the afternoon.

  5. Make sure your egg whites are whipped to stiff peaks (that is, the peaks aren’t drooping at all when you lift your whisk). Another way to test this out is to lift the bowl upside down: the meringue should be strong enough to stick to the bowl and not drip out.


Dry Ingredients

  1. Make sure to use blanched almond flour over natural almond flour. I accidentally used unblanched almond flour once, and not only did the macarons turn out looking very ugly, but they also cracked on top.

  2. Run your dry ingredients through a food processor if you have one to ensure that they’re superfine.

  3. Sieve your dry ingredients 2-3 times to ensure that your macaron shells have a smooth top.

how to macaronage perfectly (Look for that figure 8!)

Macaronage is just a fancy word describing the process in which we fold the dry ingredients in with the meringue. But this is probably the trickiest stage in making macarons. Under-mixing or over-mixing the batter will completely ruin the macaron shell.

  1. Fold in the dry ingredients a little at a time.

  2. Use a rubber spatula (or something pliable) to fold in the dry ingredients. This way, you can scrape down all the excess ingredients on the sides of the bowl.

  3. People say the desired texture of the batter should be “ribbon-like” or resemble lava. I actually find those two descriptions quite difficult to understand. Instead, opt for the Figure 8 test instead: you should be able to make a Figure 8 by drizzling the batter with your spatula without it breaking. Once you’re at this stage, stop mixing and start piping.


Piping the macaron shells

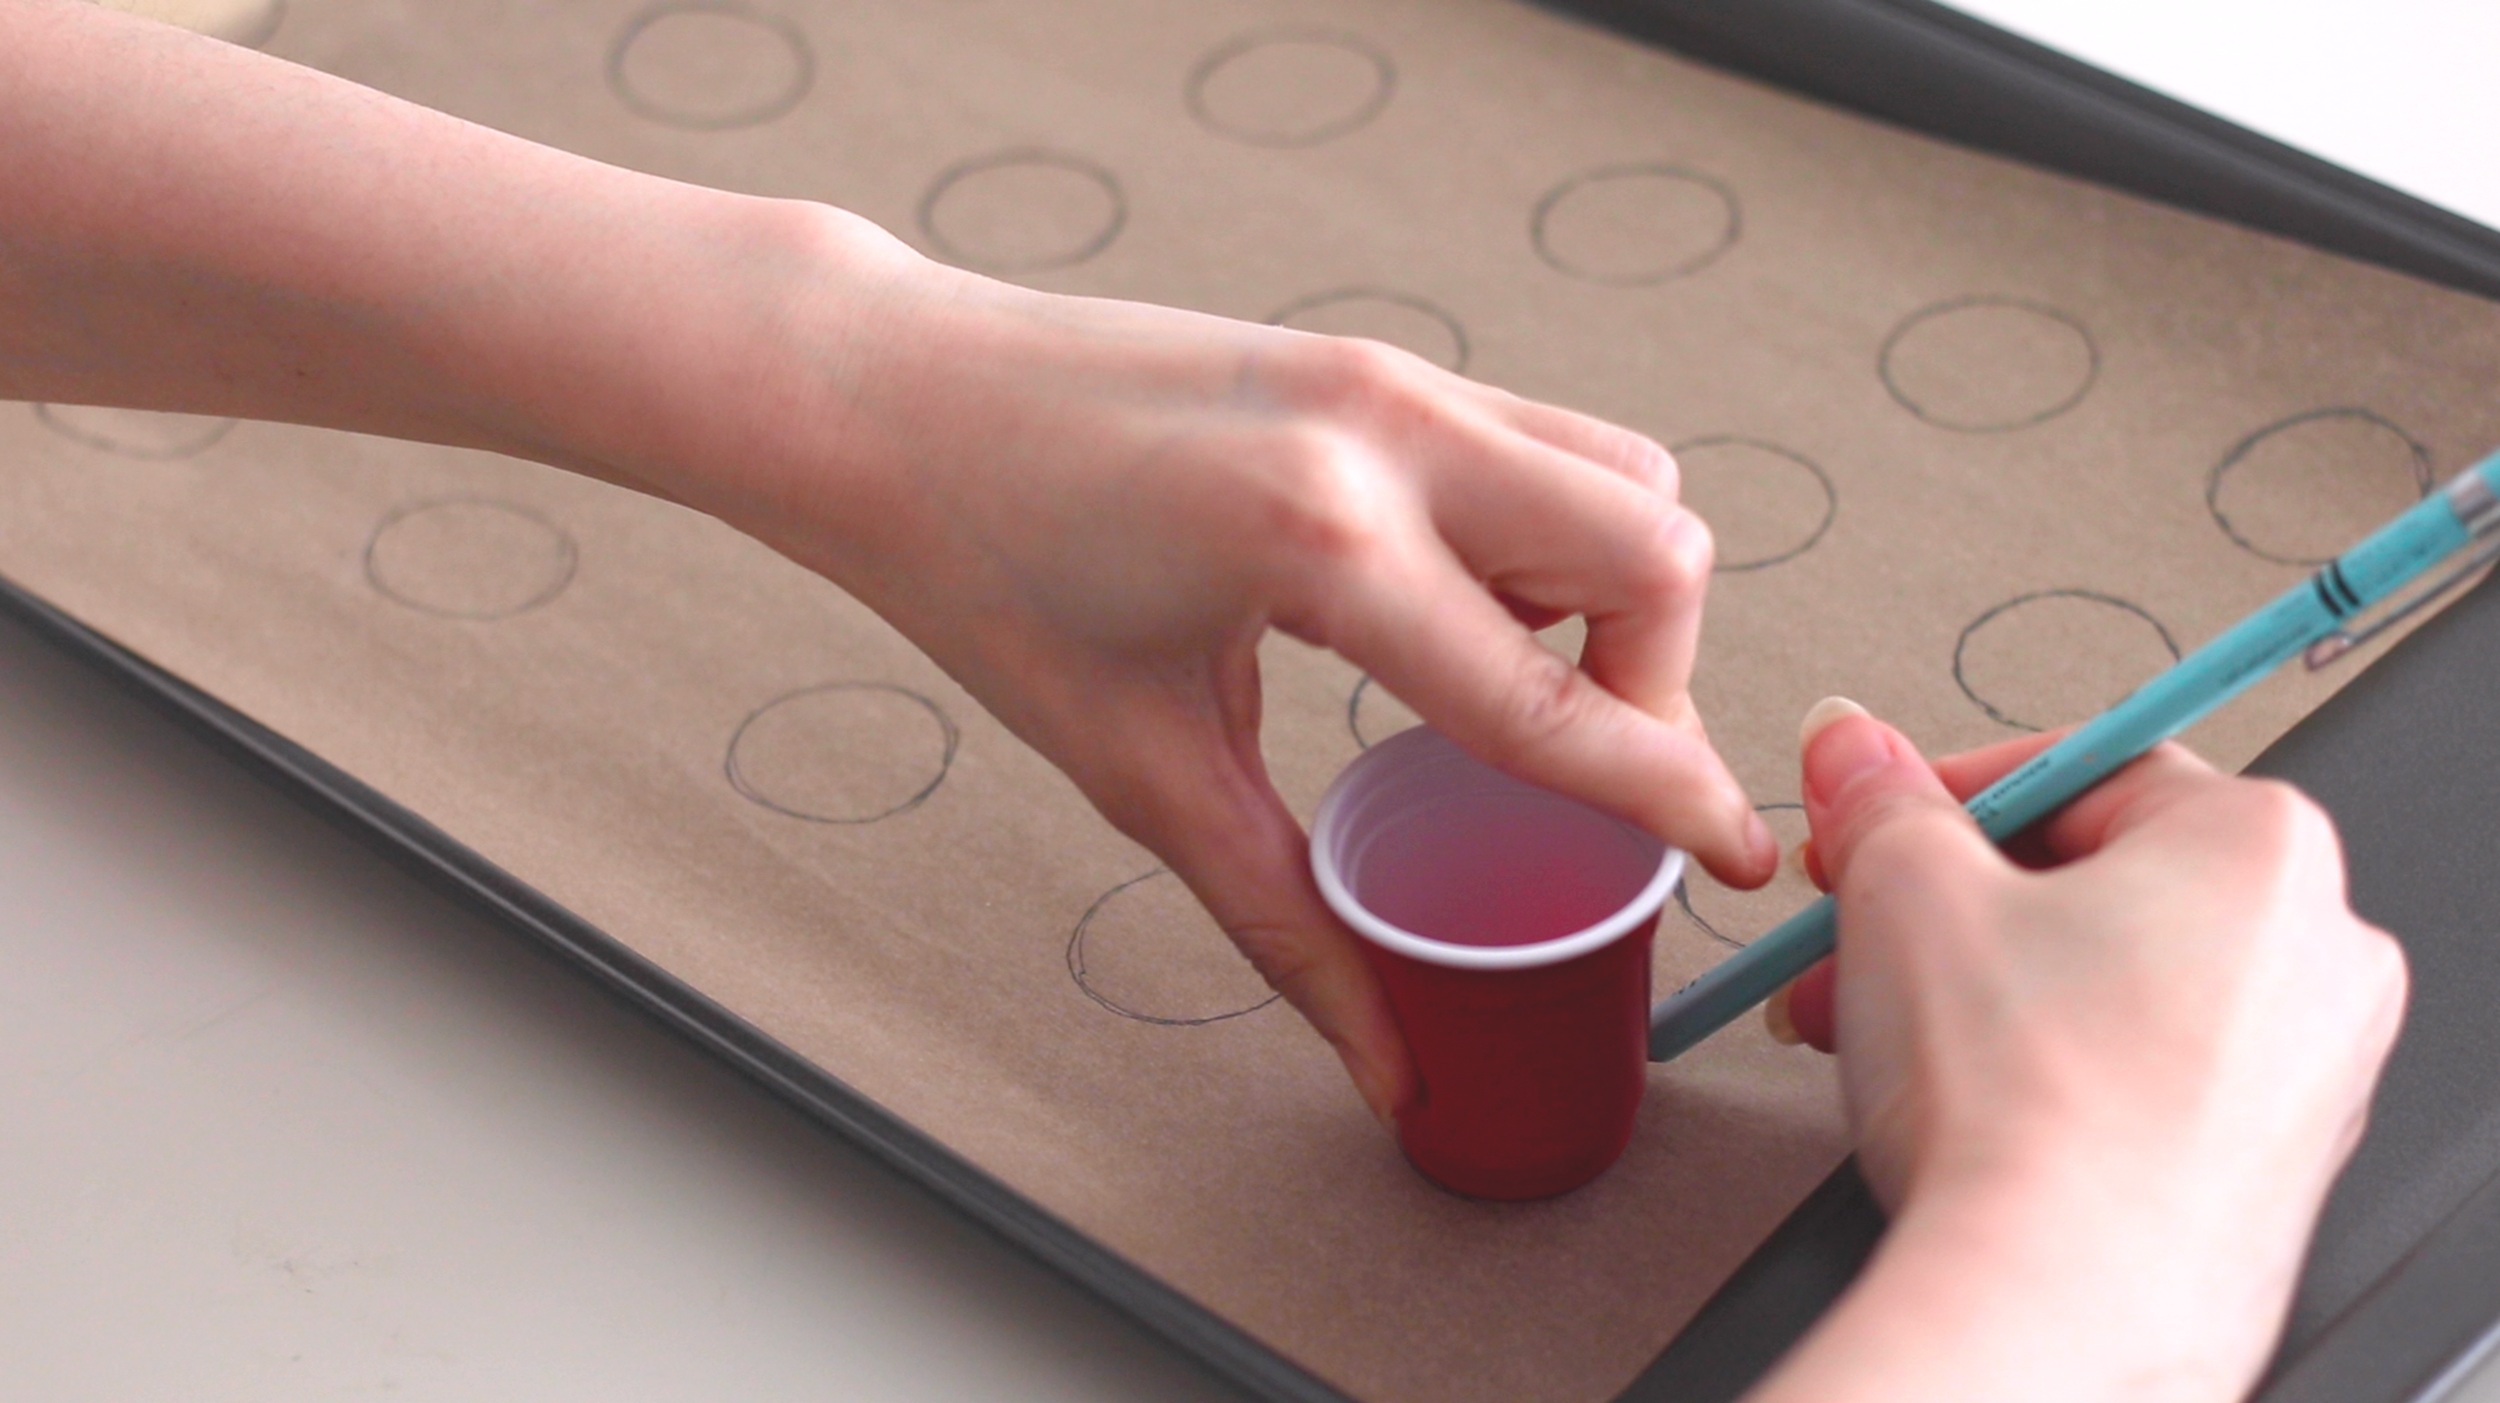
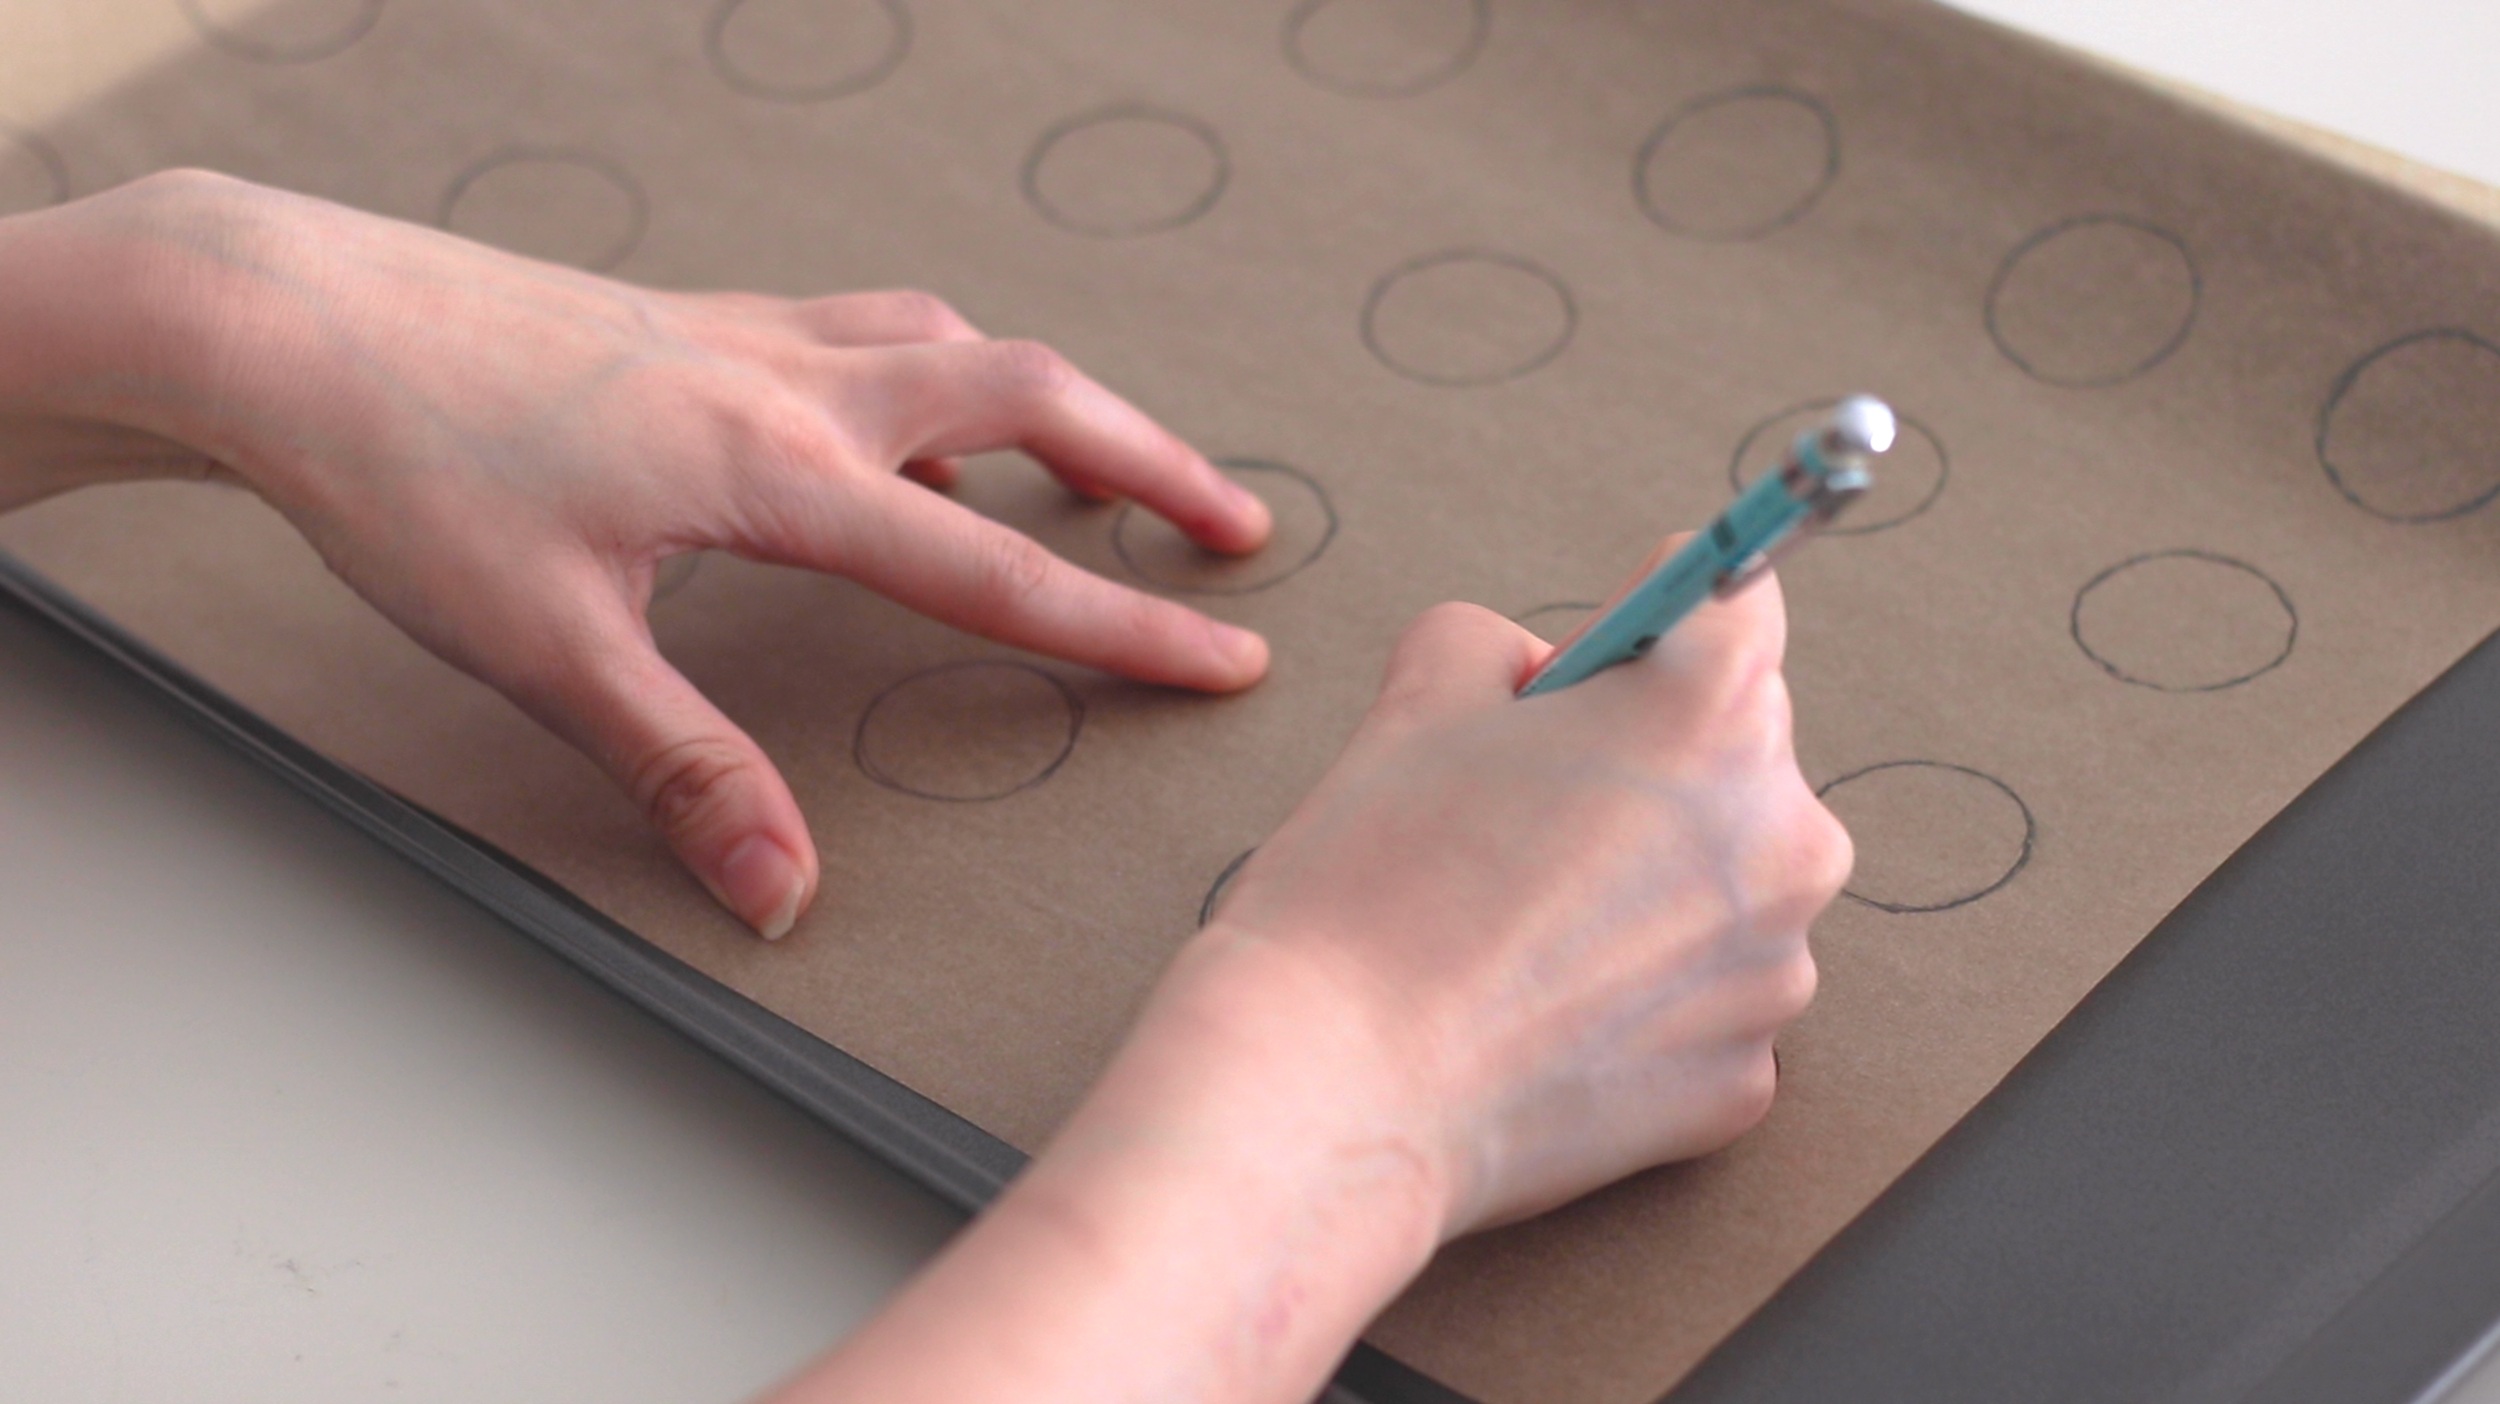
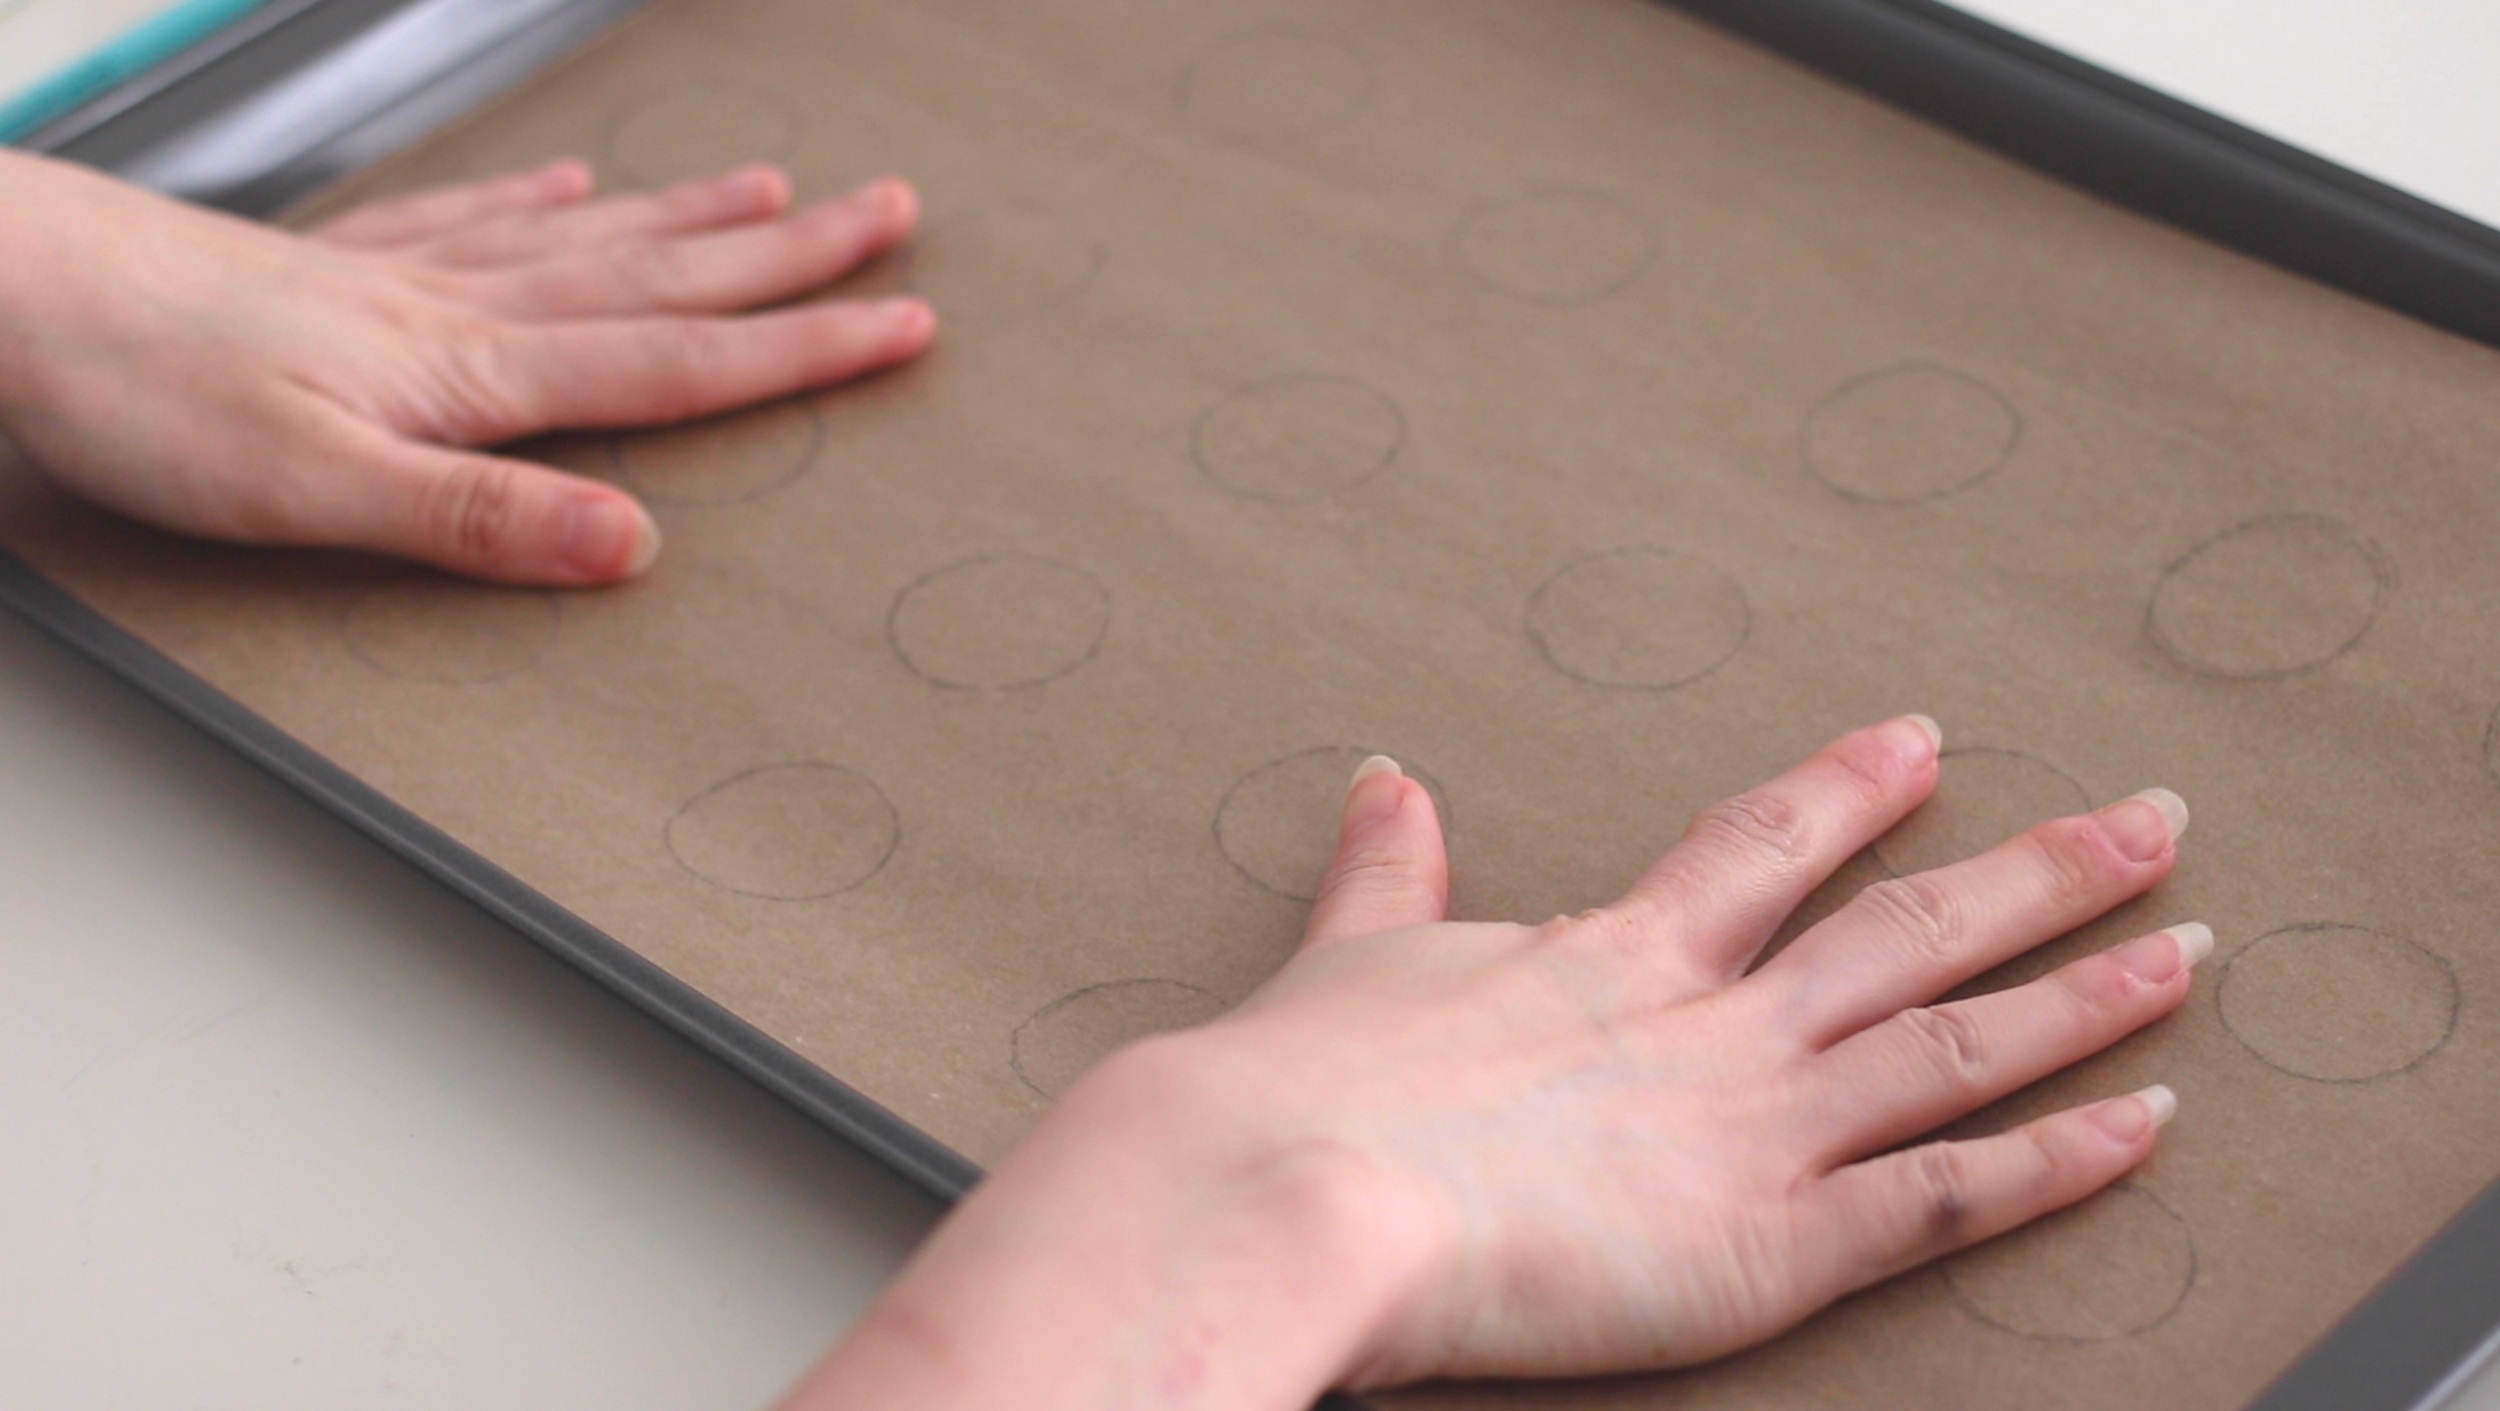
  1. There are a lot of macaron baking mats out on the market, but parchment paper is actually the best surface to bake on, since they will dry the shells out the most. You can make your own by drawing circles on a sheet of parchment paper (I used a shot glass 🤦🏻‍♀️) and then flipping over the parchment paper so the macaron shells can be piped onto the other side.

  2. Try to pipe the macarons to be a little smaller than your desired size. You will need to tap them on the table later to get rid of air bubbles, which will make them grow outward.

  3. Pipe with confidence! Especially at the end of each one. Lift your pastry bag quickly so you don’t leave any batter hanging.

  4. After piping, make sure tap your pan against the table to get rid of all of the air bubbles in the batter. If you want to go the extra mile, you can even take a toothpick and pop out each individual air bubble yourself so your cookies have the smoothest surface possible.


Black Sesame Cheesecake Macarons


Baking your Macarons (and waiting to bake them)

  1. It’s imperative that you let your macarons rest before baking them. I usually wait around 40 minutes to an hour. During that time, you can start working on your filling, or even take care of some dirty dishes :) After resting, the batter will have developed a clear film on top, and you’ll be able to brush your finger across the surface without any of the batter coming off.

  2. Too high of an oven temperature may fade the food coloring and make it more yellow—for example a pink macaron could end up looking more peach-colored. Most recipes call for 300°F, but I’ve found that 290°F has worked better in preserving the color.

  3. After taking them out of the oven, be sure to let them rest before taking them off the parchment paper. They should be completely cooled down when you start piping any sort of filling on top of them.


Black Sesame Cheesecake Macarons


Though the macaron shell/cookie can be one of the trickiest things in the kitchen to get right, the filling for macarons is quite the opposite. You can literally go in any direction with the filling: American, Swiss, or French buttercream, chocolate ganache, cream cheese frosting, lemon curd, or even something more Asian inspired: like this black sesame “cheesecake” filling.

(calling it cheesecake mostly just due to my addition of cream cheese into the buttercream 🙃)


Black Sesame Cheesecake Macarons


Black Sesame Cheesecake Macarons

Ingredients (Makes 18 Macarons/36 individual cookies)

    The cookie:
  • 100 g Egg Whites - around 3 large egg whites (at room temperature)
  • ¼ cup white sugar (50 g)
  • 2 cups powdered sugar (200 g)
  • 1 cup blanched almond flour (120 g)
  • pinch of salt
  • ¼ tsp cream of tartar (2 ml)
  • 2-3 drops of black gel food coloring
    Black sesame cream cheese buttercream:
  • 1/3 cup black sesame seeds, toasted (30 g)
  • 1 cup powdered sugar (100 g)
  • 1 cup butter (227 g or 2 sticks)
  • 2 oz cream cheese (57 g)
  • 1 tbsp heavy cream
  • 1 tsp vanilla extract

Takes , Makes 18 filled macarons, or 36 individual cookies.


Instructions

  1. Separate the egg whites from the yolks ahead of time and leave them at room temperature for at least 30 minutes (it’s even better if you age them for a few days).
  2. Sieve the dry ingredients (powdered sugar and almond flour) 2-3 times and discard the bigger pieces that won’t pass through the sieve.

  3. Whisk the egg whites with the salt and cream of tartar in a clean bowl that is free of oil or water. Add the granulated sugar gradually in batches. Whisk until your meringue acquires stiff peaks, and sticks to the bowl when you lift it upside-down.

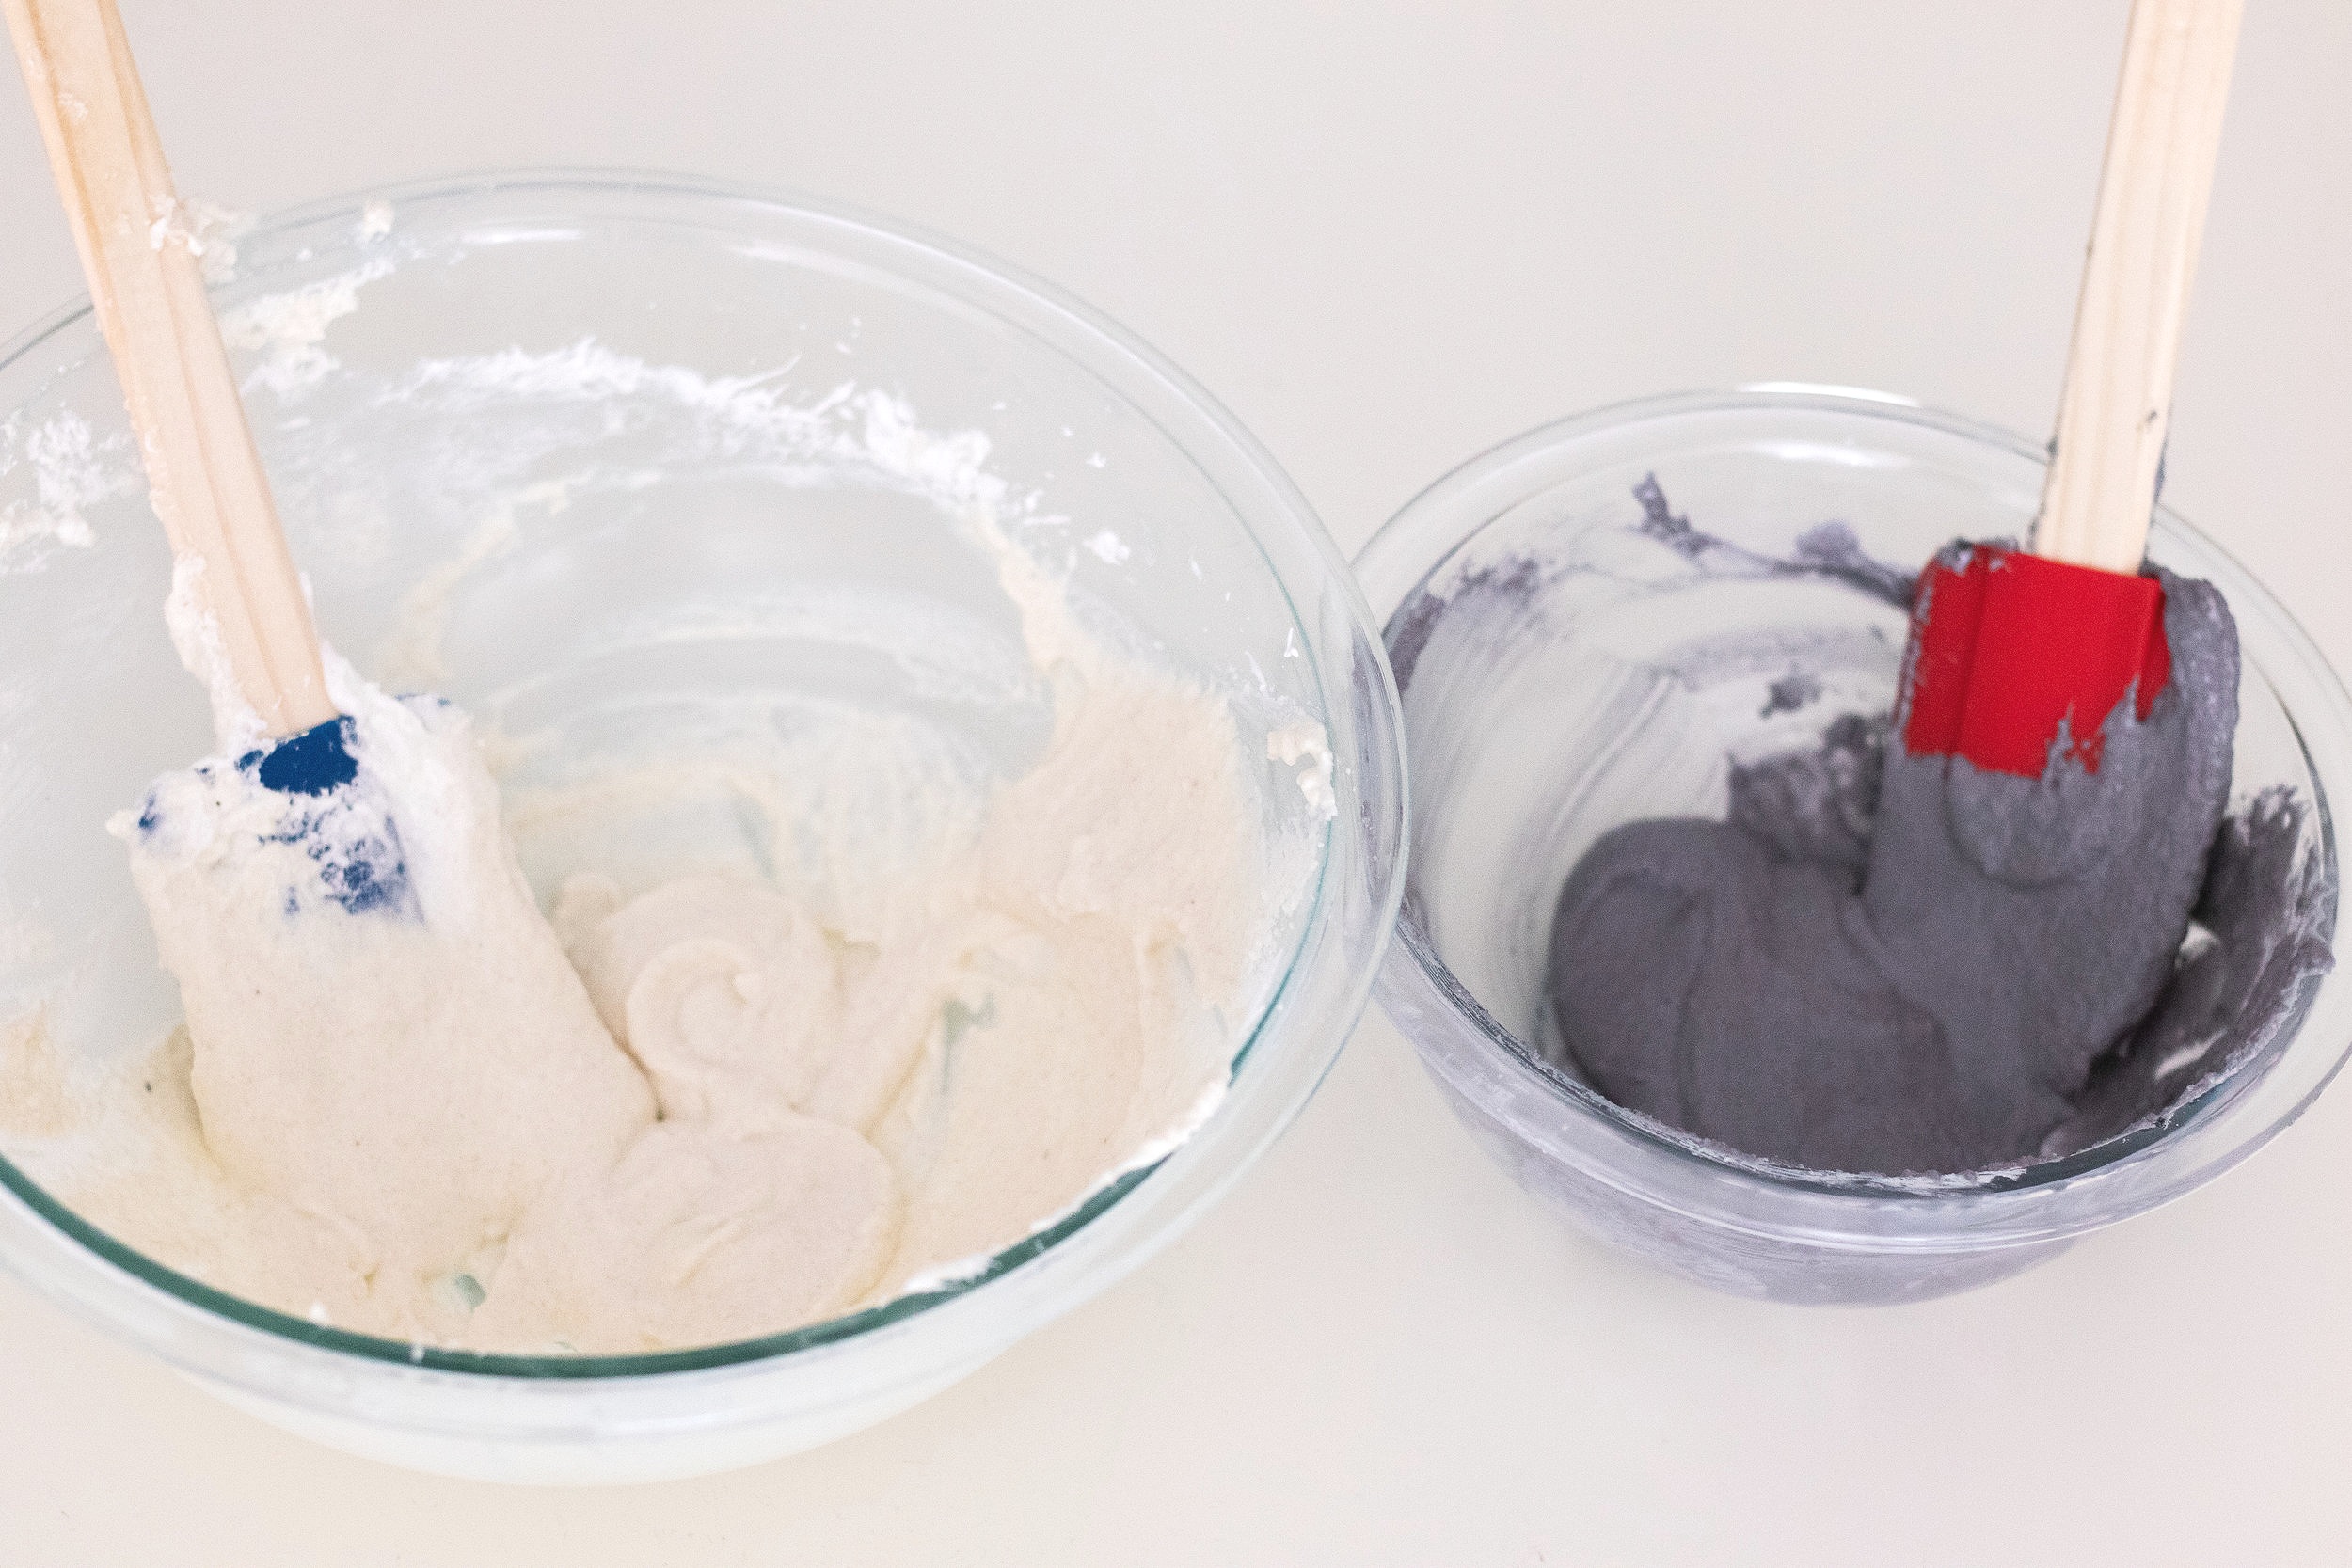
  4. Add the dry ingredients into the meringue in batches, and fold them in gently. Once the mixture looks combined,and resembles a lava-like texture, transfer half of the mixture to another bowl, and add 2-3 drops of black gel food coloring. Continue to fold both the black and white batter.

  5. You’ll know when you’re done when you’re able to make a Figure 8 by drizzling the batter with your spatula without it breaking. Once you’re at this stage with both the black and white batter, stop mixing and start piping.

  6. Put the black and white batters into separate piping bags. Push the batter all the way to the tip of the bag.

  7. Fit another piping bag with a round tip, and insert the two closed piping bags with the black and white batter into it, pulling the ends of the two bags through the round tip. Cut open the ends of the two pastry bags and you’re ready for piping.
  8.  
  9. Use the leftover batter to cover the four corners of the baking pan, then put a piece of parchment paper on top of the pan. This will prevent the parchment paper from sliding around when you’re piping.

  10. Pipe 3/4 inch circles on the parchment paper, leaving space between each cookie. Try to do this in a circular motion to create a “marbling” effect.

  11. Tap the pan against the table to get rid of air bubbles.

  12. Preheat the oven to 290°F / 140° C and let the macarons rest for 40 minutes to 1 hour before baking.

  13. Bake for 20 minutes. After baking, let them rest for 15 - 30 minutes before lifting them from the parchment paper and make sure they’re completely cool before piping on the filling.
  14. Meanwhile, make the black sesame cream cheese buttercream: start off by toasting the sesame seeds in a small pan for 3-4 minutes until fragrant. Let them cool down, and put them into a ziplock bag and use a rolling pin to grind them to a powdery texture. If you have a food processor or an herb grinder, you can use that instead.
  15. Cream the room temperature butter, cream cheese, black sesame powder, heavy cream, and vanilla extra together with an electric mixer.
  16. Put the filling into a pastry bag and pipe them onto the cooled macaron shells. Cover the top with another shell and sandwich the cookie together. And you’re done!
  17. Please keep them refrigerated if you’re not going to eat them right away.


Black Sesame Cheesecake Macarons


This is definitely one of the trickiest recipes on this blog, and it took a lot of batches of ruined macarons before I could finally make this post. I hope you found the tips above helpful, and that you’re confident to go try these out yourselves!

Let me know how it turns out for you by tagging @cinders_zhang on Instagram! Support me by saving this recipe on Pinterest, and subscribing to my Youtube channel :)

If you’re feeling a little inspired by France now, go check out this related blog post for a Paris bucket list 🇫🇷

♥ Cindy

 
Food, 2Cindy ZhangComment