Posts in Food
Gyoza 2 ways: pork & cabbage, chicken & mushrooms


Watch the video for a in-depth tutorial on how to make this dish. If you enjoyed watching, please give me a thumbs up/subscribe to me on YouTube!


How to make Gyoza | potstickers | dumplings | 餃子

 
Gyoza 2 ways: pork & cabbage, chicken & mushrooms


Today we’re making one of my all-time favorite things to eat: potsticker dumplings, otherwise known as gyoza. We’ll be making them with 2 different fillings: pork and napa cabbage (from my mom’s recipe) as well as chicken and dried shiitake mushrooms.


Gyoza 2 ways: pork & cabbage, chicken & shiitake
Gyoza 2 ways: pork & cabbage, chicken & mushrooms


Gyoza might seem pretty intimidating, but they’re actually really easy to make on weekends for meal prep on weekdays. If you don’t want to cook all of your dumplings right away, you can freeze them and eat them throughout the week. Just make sure you arrange them in a flat layer when you’re freezing them so that they don’t stick together.


Gyoza 2 ways: pork & cabbage, chicken & shiitake


You can’t go wrong with the classic pork and napa cabbage filling. I’ll show you my mom’s recipe, which I grew up eating. You’ll need: ground pork, napa (or Chinese) cabbage, scallions, eggs, minced ginger & garlic, vegetable or canola oil, cornstarch, white or black pepper, soy sauce, and salt.

We want to make sure the cabbage doesn’t release too much water into our dumplings. To make the cabbage give up its moisture, sprinkle some salt onto the cabbage and set it aside for 30 minutes. Note that different types of cabbage and different parts of the cabbage itself may release more water than others.


Gyoza 2 ways: pork & cabbage, chicken & mushrooms


Chicken and dried shiitake mushrooms are a classic pairing in Chinese cuisine. For this filling, you’ll need: ground chicken, dried shiitake mushrooms (soaked overnight), water from soaking the mushrooms, carrots, scallions, eggs, minced ginger & garlic, cornstarch, soy sauce, sesame oil, and salt.

Most of the time, store-bought ground chicken is made from chicken breast—which I’m not a big fan of. So, if you’re really finicky about this stuff like me, you can make your own ground chicken by mincing some boneless chicken thigh (which will make a much more tender filling).


Gyoza 2 ways: pork & cabbage, chicken & mushrooms


Rumor has it that you should only mix the filling in one direction to keep the meat tender and juicy. I’m not sure if this is scientifically proven or if it’s just an old Chinese myth, but my mom swears by it. Happy mom = happy life, and happy wife = happy life, so my dad and I just do it for kicks.

One of the hardest things about making dumplings is how finely you have to chop the vegetables. You can easily make a mess in the kitchen (and even hurt your fingers) by chopping all of these vegetables into tiny pieces. Instead, I recommend using a food processor to chop your veggies, if you have one, to make your job 10 times easier.


How to fold dumplings

 
Gyoza 2 ways: pork & cabbage, chicken & mushrooms


1) Put some filling into the center of the wrapper and add some water to the edges. The water will help the sides stick together.

2) Fold it half way and pinch it in the center. Add more water on the edges of the outside layer, specifically on the side where you intend to create the folds.


Gyoza 2 ways: pork & cabbage, chicken & mushrooms

3) Fold in the open flaps, kind of like you’re sealing an envelope. Start with fold that’s closest to the middle, and fold the wrapper in until it aligns with the top of the wrapper.

Gyoza 2 ways: pork & cabbage, chicken & mushrooms

4) Create a second fold with the flap, also aligning it with the top of the wrapper.

Gyoza 2 ways: pork & cabbage, chicken & mushrooms

5) Create two more folds on the other side, symmetrical to the ones you already made.

6) Pinch the top edges to ensure that it’s completely sealed. We wanna make sure the edges really stick together so that the dumpling doesn’t open up when we boil it or fry it.


16 oz of meat will usually make around 40 to 50 dumplings, depending on how much filling you put into each one. If you’re not too confident in your wrapping skills, you can start off by using a smaller amount of filling in your dumplings. It’ll be a lot easier, trust me!


Gyoza 2 ways: pork & cabbage, chicken & mushrooms
 

Voilà! You’re done!

My mom literally makes 5 of these while I make 1.

 
Gyoza 2 ways: pork & cabbage, chicken & mushrooms


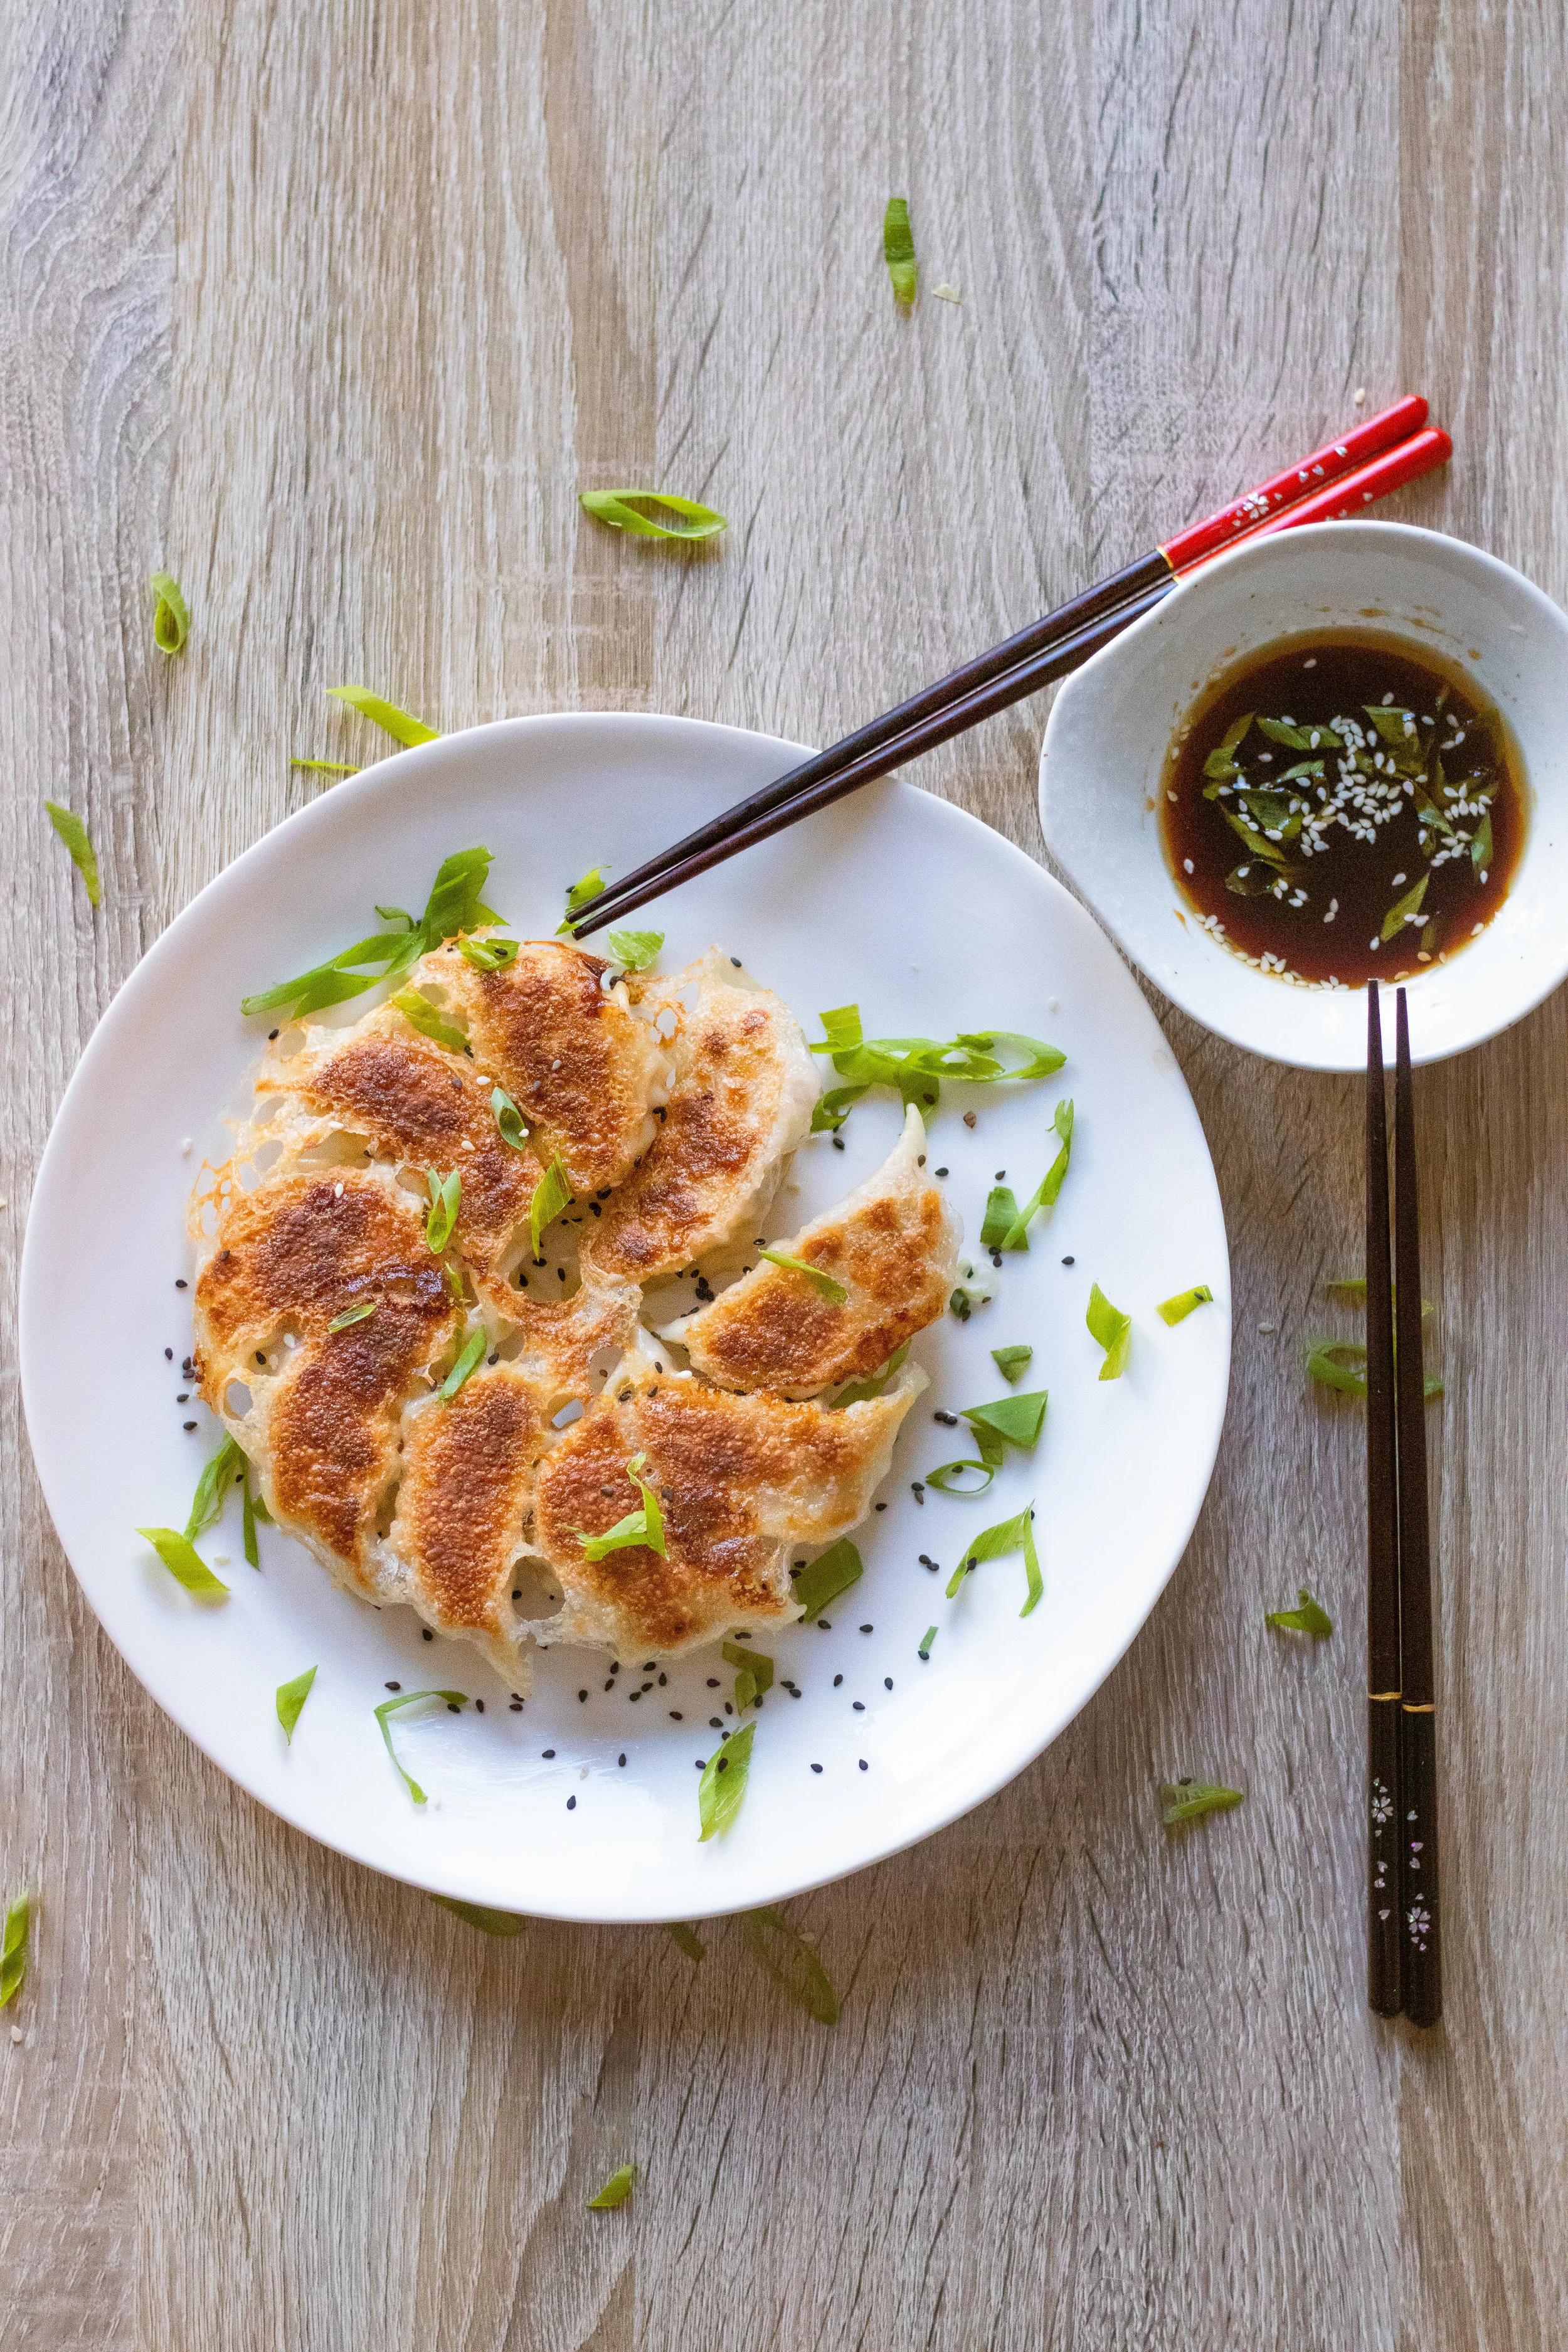
Secret to giving your gyoza wings: Nope, not red bull. Cornstarch and water, actually! Most people will just pour water into the pan to steam them, but I like to stir in a little bit of cornstarch or potato starch (or even flour) into my water before I add it to the pan. Another trick to making them super presentable is to arrange the gyoza in a windmill shape in an 8-inch nonstick pan, put a plate over them once they’re done, and flip the pan onto the plate.


Gyoza 2 ways: pork & cabbage, chicken & mushrooms


Not so much into frying these babies? You can make a healthy(ish) version by steaming them or boiling them! Just be sure not to boil them for too long until they’re soggy (you can avoid this by boiling them without the lid for the last few minutes), but also boil them long enough to ensure the meat is cooked. The hardest part is deciding which one tastes better: the pan fried ones, or the boiled ones?

Answer: porque no los dos?


Gyoza 2 ways: pork & cabbage, chicken & mushrooms


Gyoza 2 Ways: Pork & Cabbage, Chicken & Mushroom

Ingredients for Pork & Cabbage gyoza

  • 40-50 store-bought gyoza wrappers
  • 16 oz ground pork
  • 2 eggs
  • ½ cup chopped scallions
  • ½ stalk of Napa (or Chinese) cabbage, around 2 cups after they've been chopped and dehydrated*
  • 1 tsp minced ginger
  • 1 tsp minced garlic
  • 2 tsp soy sauce
  • 1 tbsp oil
  • 2 tsp cornstarch or potato starch
  • 2 tsp salt
  • sprinkle of white or black pepper

* You'll need to dehydrate the cabbage so the dumpling filling isn't watery and soggy


Ingredients for Chicken & Mushroom gyoza

  • 40-50 store-bought gyoza wrappers
  • 16 oz ground chicken
  • 2 eggs
  • ½ cup chopped scallions
  • 1 cup diced carrots
  • 1 cup diced dried shiitake mushrooms that have been soaking in water
  • 1 tsp minced ginger
  • 1 tsp minced garlic
  • 2 tsp soy sauce
  • 2 tsp sesame oil
  • 2 tsp cornstarch or potato starch
  • 2 tsp salt
  • 2 tbsp soy sauce
  • 1 tbsp water that shiitake mushrooms have been soaking in (optional)

Ingredients for the slurry

  • 3 tbsp water
  • 2 tsp cornstarch/potato starch/flour

Takes , Makes 8 servings for each filling, which each person eating around 5 dumplings.


Instructions for the Pork & Napa Cabbage Filling

  1. Finely chop the Napa cabbage. If you have a food processor, use it to do all the chopping for you to avoid the mess :)

  2. We want to make sure the cabbage doesn’t release too much water into our dumplings. Sprinkle some salt onto the cabbage to help it lose some of its moisture and set aside for 30 minutes.

  3. After setting it aside, squeeze out all the water from the cabbage and put it into a strainer. Note that different types of cabbage and different parts of the cabbage itself may release more water than others. After squeezing out all the water, you should be left with about 2 cups of cabbage to balance out 16 oz of ground pork.

  4. Combine the ground pork, cornstarch, soy sauce, eggs, ginger, garlic, white pepper, salt, and cabbage in a large heat-proof bowl. Stir the mixture in one direction to keep the meat tender and juicy. Add the scallions on top of the mixture but don't stir it in yet.

  5. Heat up a tablespoon of oil in a small pan until it reaches its smoking point. Pour the hot oil onto the scallions and your mixture. The hot oil will make the scallions release their natural oils and flavor. Be careful not to burn yourself while pouring in the hot oil. Stir the oil into the mixture, going in one direction.

Instructions for the Chicken & Mushroom Filling

  1. Soak 6 dried shiitake mushrooms in some water and leave them in the fridge overnight or until they're soft. You’ll tell when they’re fully soaked through by checking if the stems are soft enough to cut through. Dry them off on a paper towel and chop them into small pieces.

  2. Combine the ground chicken, cornstarch, soy sauce, sesame oil, eggs, ginger, garlic, salt, shiitake mushrooms, and diced carrots in a large bowl. Stir the mixture in one direction to keep the meat tender and juicy.

Instructions for Pan-frying

  1. Heat some canola or vegetable oil in an 8 to 10 inch frying pan and swirl it around to make sure the bottom is completely covered. Arrange the dumplings in a nice shape, so that it looks pretty when we flip it out of the pan. Fry them for about 30 seconds without water to let the bottom brown up a bit.

  2. Mix 2 tsp of cornstarch with 3 tbsp of water and add it to the pan. The water should cover up about 60-70% of the dumpling. Put a lid on the pan and steam the dumpling for about 5-6 minutes, or until most of the water has evaporated.

  3. After that, cook the dumplings without the lid for 1-2 minutes for a nice brown crust to develop. Keep a close eye on them to make sure the bottoms don’t burn.

  4. When you see the brown edges forming, put a plate over pan and flip it over. This will make sure the potstickers stay together and create a really beautiful presentation

Instructions for boiled dumplings

  1. Bring water to a boil in a wok and add in 10-15 dumplings, stirring them constantly to make sure they don't stick together. Immediately put a lid over them.

  2. When the water comes to a rolling boil, add in about 1 cup of water and put a lid on the pan. Continue stirring them with a ladle if they're sticking together.

  3. Let the water come to a rolling boil again, and add a second cup of water. Cook them for a few minutes without the lid. They should be finished cooking when they float to the surface.


IMG_1315.jpg


This is a super fun food to make with friends! Why not try hosting a dumpling-making party? If you tried these, let me know how it turns out for you by tagging @cinders_zhang on Instagram! Support me by saving this recipe on Pinterest, and subscribing to my Youtube channel :) Good luck in the kitchen!

♥ Cindy

 
Food, 2Cindy ZhangComment
Poached Eggs and Asparagus (Healthy vegetarian breakfast)


As always, atch the video for a in-depth tutorial on how to make this dish. If you enjoyed watching, please give me a thumbs up/subscribe to me on YouTube!


Poached Eggs and Asparagus (Healthy vegetarian breakfast)


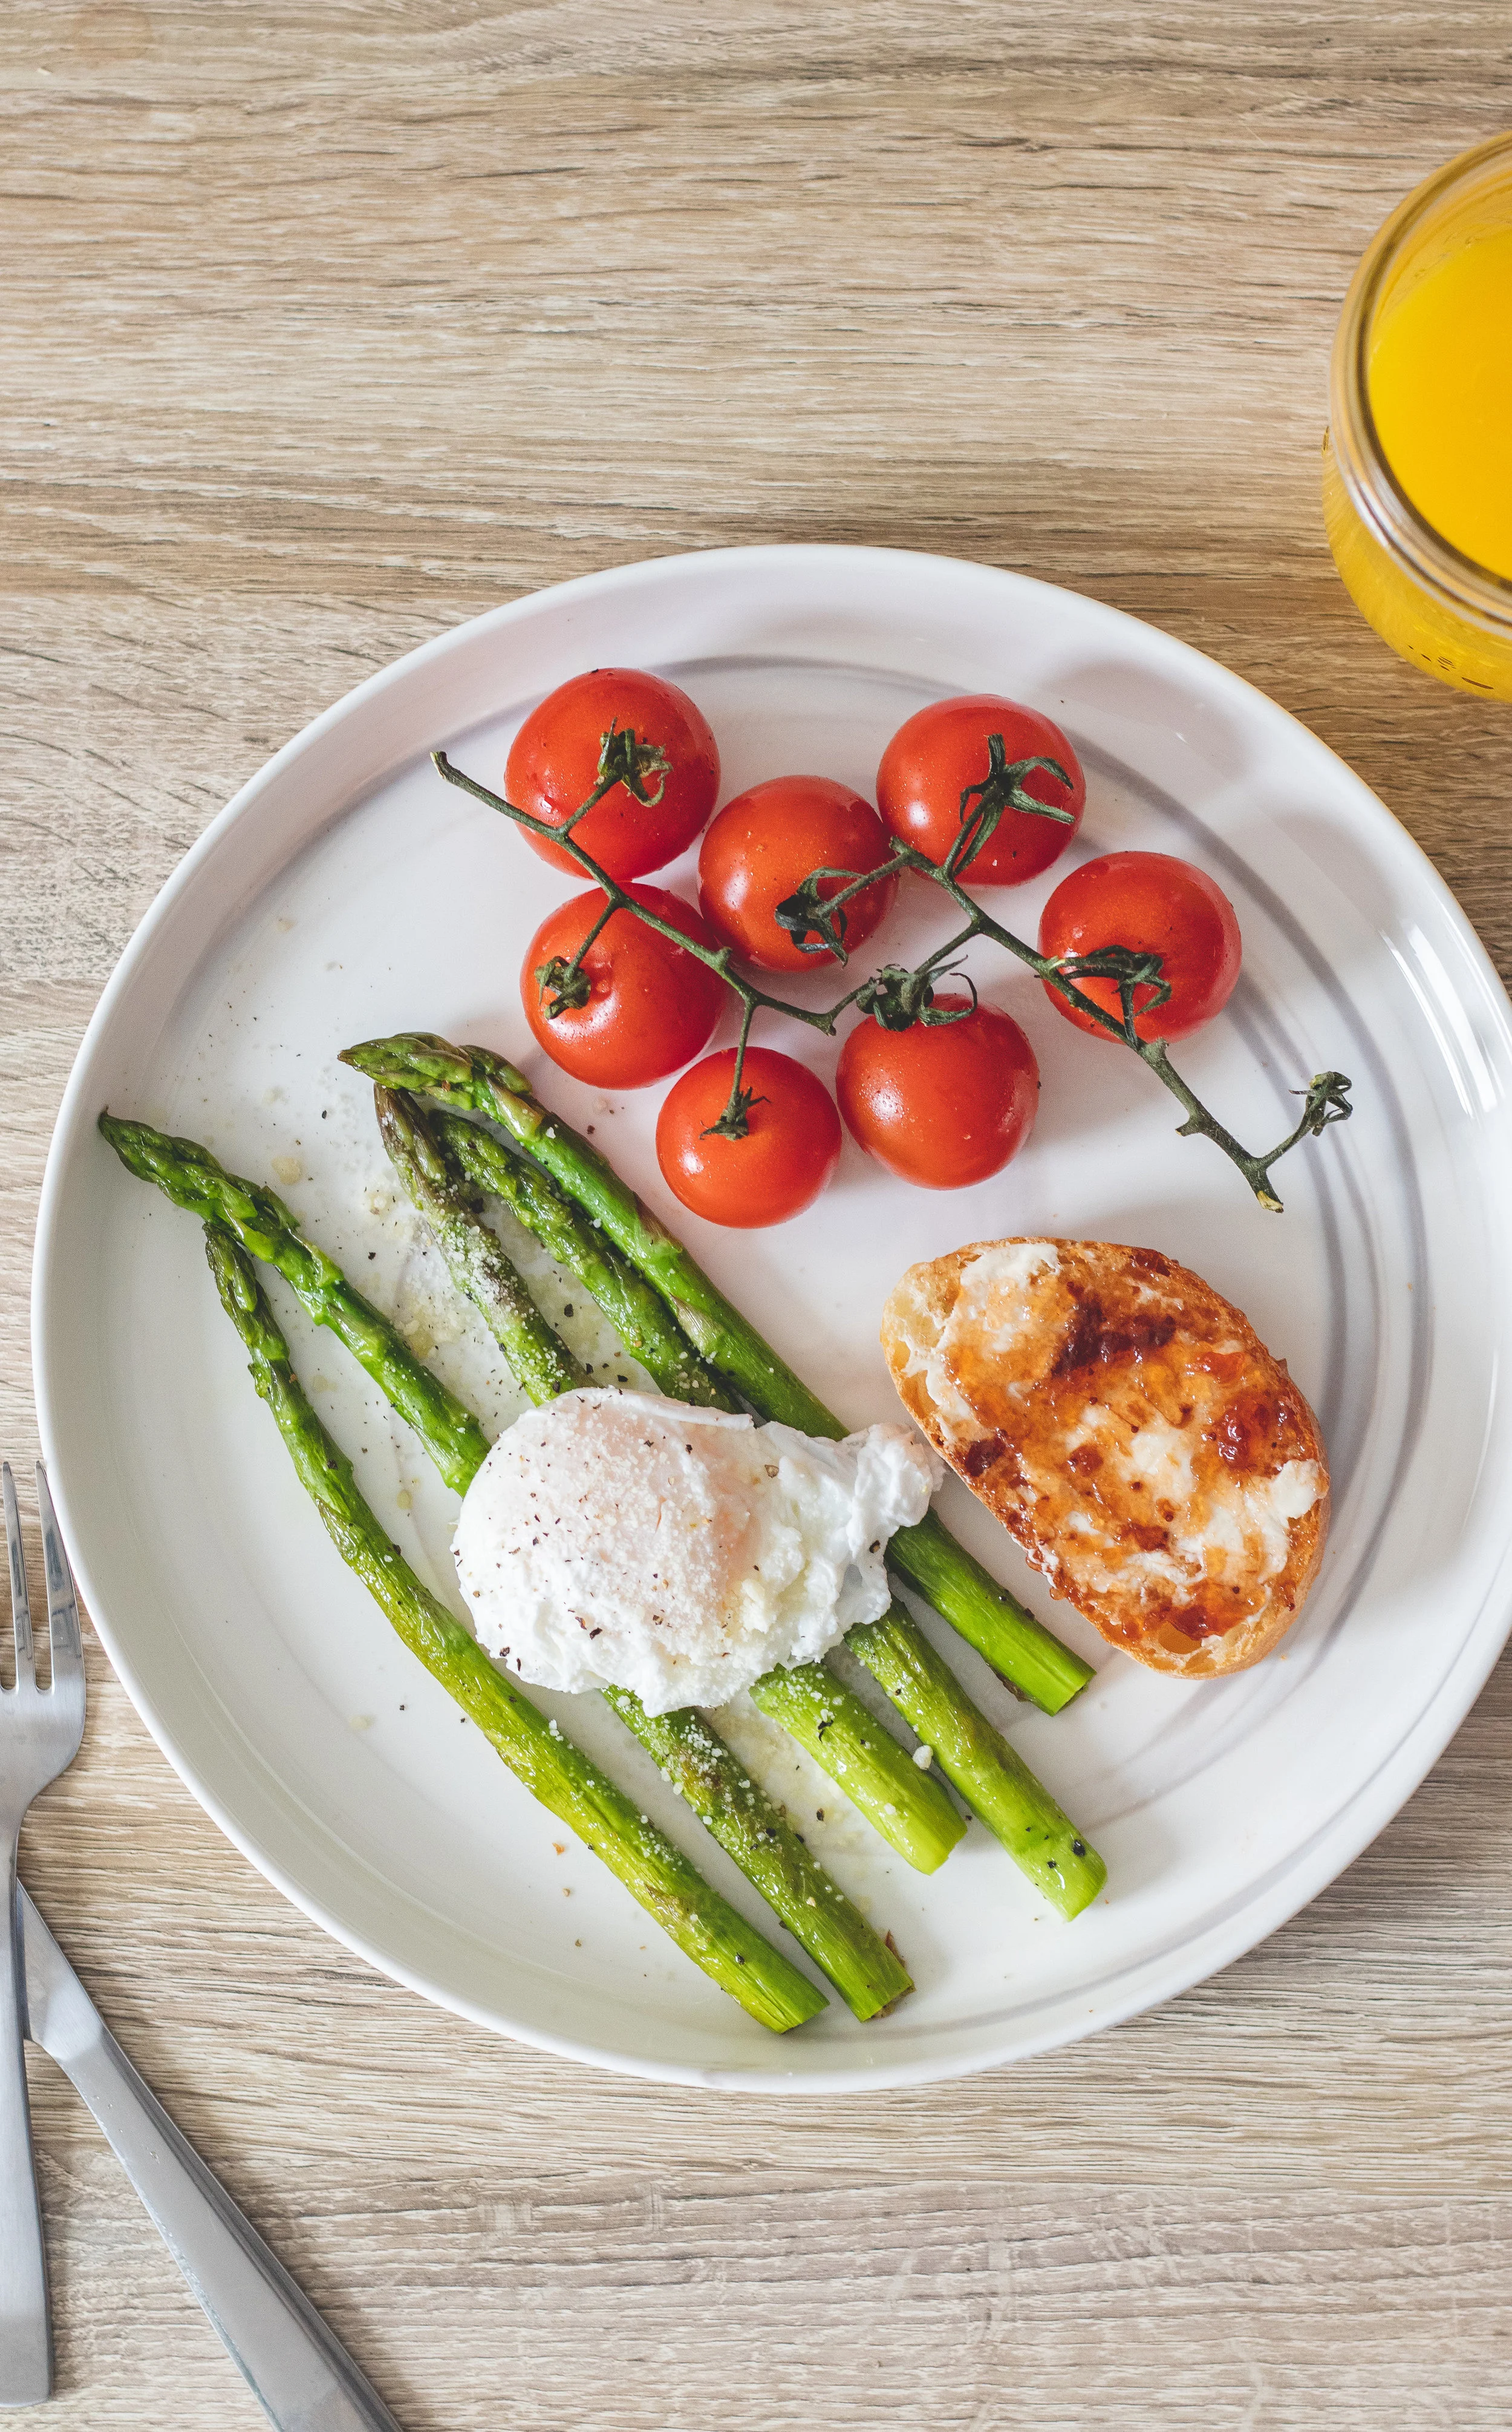
I’ve been on the constant lookout for veggie breakfast options lately. Unfortunately, most meat options for breakfast are not the healthiest. While having breakfast at work one day, I came across some grilled asparagus with hollandaise sauce. After flipping through Pinterest, I realized that having asparagus at breakfast is actually a pretty common thing. So I got inspired to create this super-duper—is this even cooking—easy recipe of sautéed asparagus with poached egg.


Poached Eggs and Asparagus (Healthy vegetarian breakfast)


To make the dish a bit healthier and easier, I swapped out the hollandaise sauce for a sprinkle of parmesan cheese.


Poached Eggs and Asparagus (Healthy vegetarian breakfast)


I love eating tomatoes for breakfast. I was convinced that they were a breakfast staple after having them in a traditional English breakfast. They also go really well with eggs (Chinese stir-fried tomatoes with eggs, anyone?) and provide a nice acidic element to break up the greasiness that a lot of breakfast items tend to have.


Poached Eggs and Asparagus (Healthy vegetarian breakfast)


Make sure to sauté your asparagus for a few more minutes longer than the tomatoes since they’re quite fibrous and will take longer to soften. No one wants to bite into a piece of asparagus that takes forever to chew first thing in the morning.


Poached Eggs and Asparagus (Healthy vegetarian breakfast)


I’m not really one to count calories (I used to be, but those were dark times). But I ended up doing a breakdown of the calories in this dish to convince you—and maybe myself as well—that this is actually a pretty healthy dish.


Poached Eggs and Asparagus (Healthy vegetarian breakfast)

Nutritional Value

Disclaimer: I’m by no means a nutritionist, and this is just based off googling the calories for approximately the amount that I used. (Just want to give out this warning since a reader in the past was quite finicky about this -_-)

5 sprigs of asparagus = 15 calories

1 egg = 70 calories

1 cup cherry tomatoes = 30 calories

1 tbsp of olive oil to sauté the veggies is about 120 calories, but realistically you’re only having half of that—or less (I had a bunch of oil left over in my pan) = 60 calories

1/2 tbsp parmesan cheese = 10 calories

1 slice of baguette = less than 100 calories

less than 1/4 tbsp butter = 25 calories

less than 1/4 tbsp jam = 25 calories

which comes out to be about 335 calories total… which is actually pretty good considering those 5 sprigs of asparagus will fill you up pretty well :)


Poached Eggs and Asparagus

Healthy vegetarian breakfast under ~350 calories/serving

Ingredients (serves 2 people)

  • 10 sprigs of asparagus, with ends discarded
  • 10-12 cherry tomatoes
  • 2 eggs
  • 1 tbsp olive oil
  • salt and pepper
  • white vinegar (for poaching the egg, if desired)
  • baguette or any other toast
  • butter and jam (or anything else you like to spread on top of bread)

Takes , Makes enough for 2 people (romantic brunch here we go!).


Instructions

  1. Slice up the bread and toast in a 350°F oven for about 10 minutes. You can use your toaster as well, but I find the oven is better for toasting a large number of baguette slices.

  2. While the bread is in the oven, heat olive oil in a skillet and sauté the asparagus and tomatoes. Start with the asparagus since they take much longer than the tomatoes. Asparagus: around 10 minutes, tomatoes: around 1-2 minutes. Add salt and pepper to taste.

  3. For the poached egg: Crack the egg into a small bowl to avoid egg shells when you add it into the water. Make a "tornado" in the water with a spoon before adding the egg. This will allow the egg to spiral onto itself and prevent it from falling apart in the water.

  4. Should you add vinegar? It’s totally optional. A little bit of white vinegar can help the egg stay firm, but I’ve made plenty of poached eggs without it.

  5. Poach the egg for 3-4 minutes, and let it drain on a paper towel before serving it.

  6. Spread butter and jam onto the baguette slices and assemble the tomatoes and asparagus onto a plate. Then top the asparagus (very carefully) with the poached egg. Sprinkle on some parmesan cheese at the very end and complete the dish with freshly cracked pepper.


Super duper easy, right? I also want to point out that the photos and video was taken on my new Canon Rebel T7i, which I’ve been in love with. It definitely takes a lot more thinking to take one photo than on the iPhone, but I’m pretty impressed with the results.

♥ Cindy

 
Food, 2Cindy ZhangComment
Parmesan & Butter Risotto with Shiitake Mushrooms


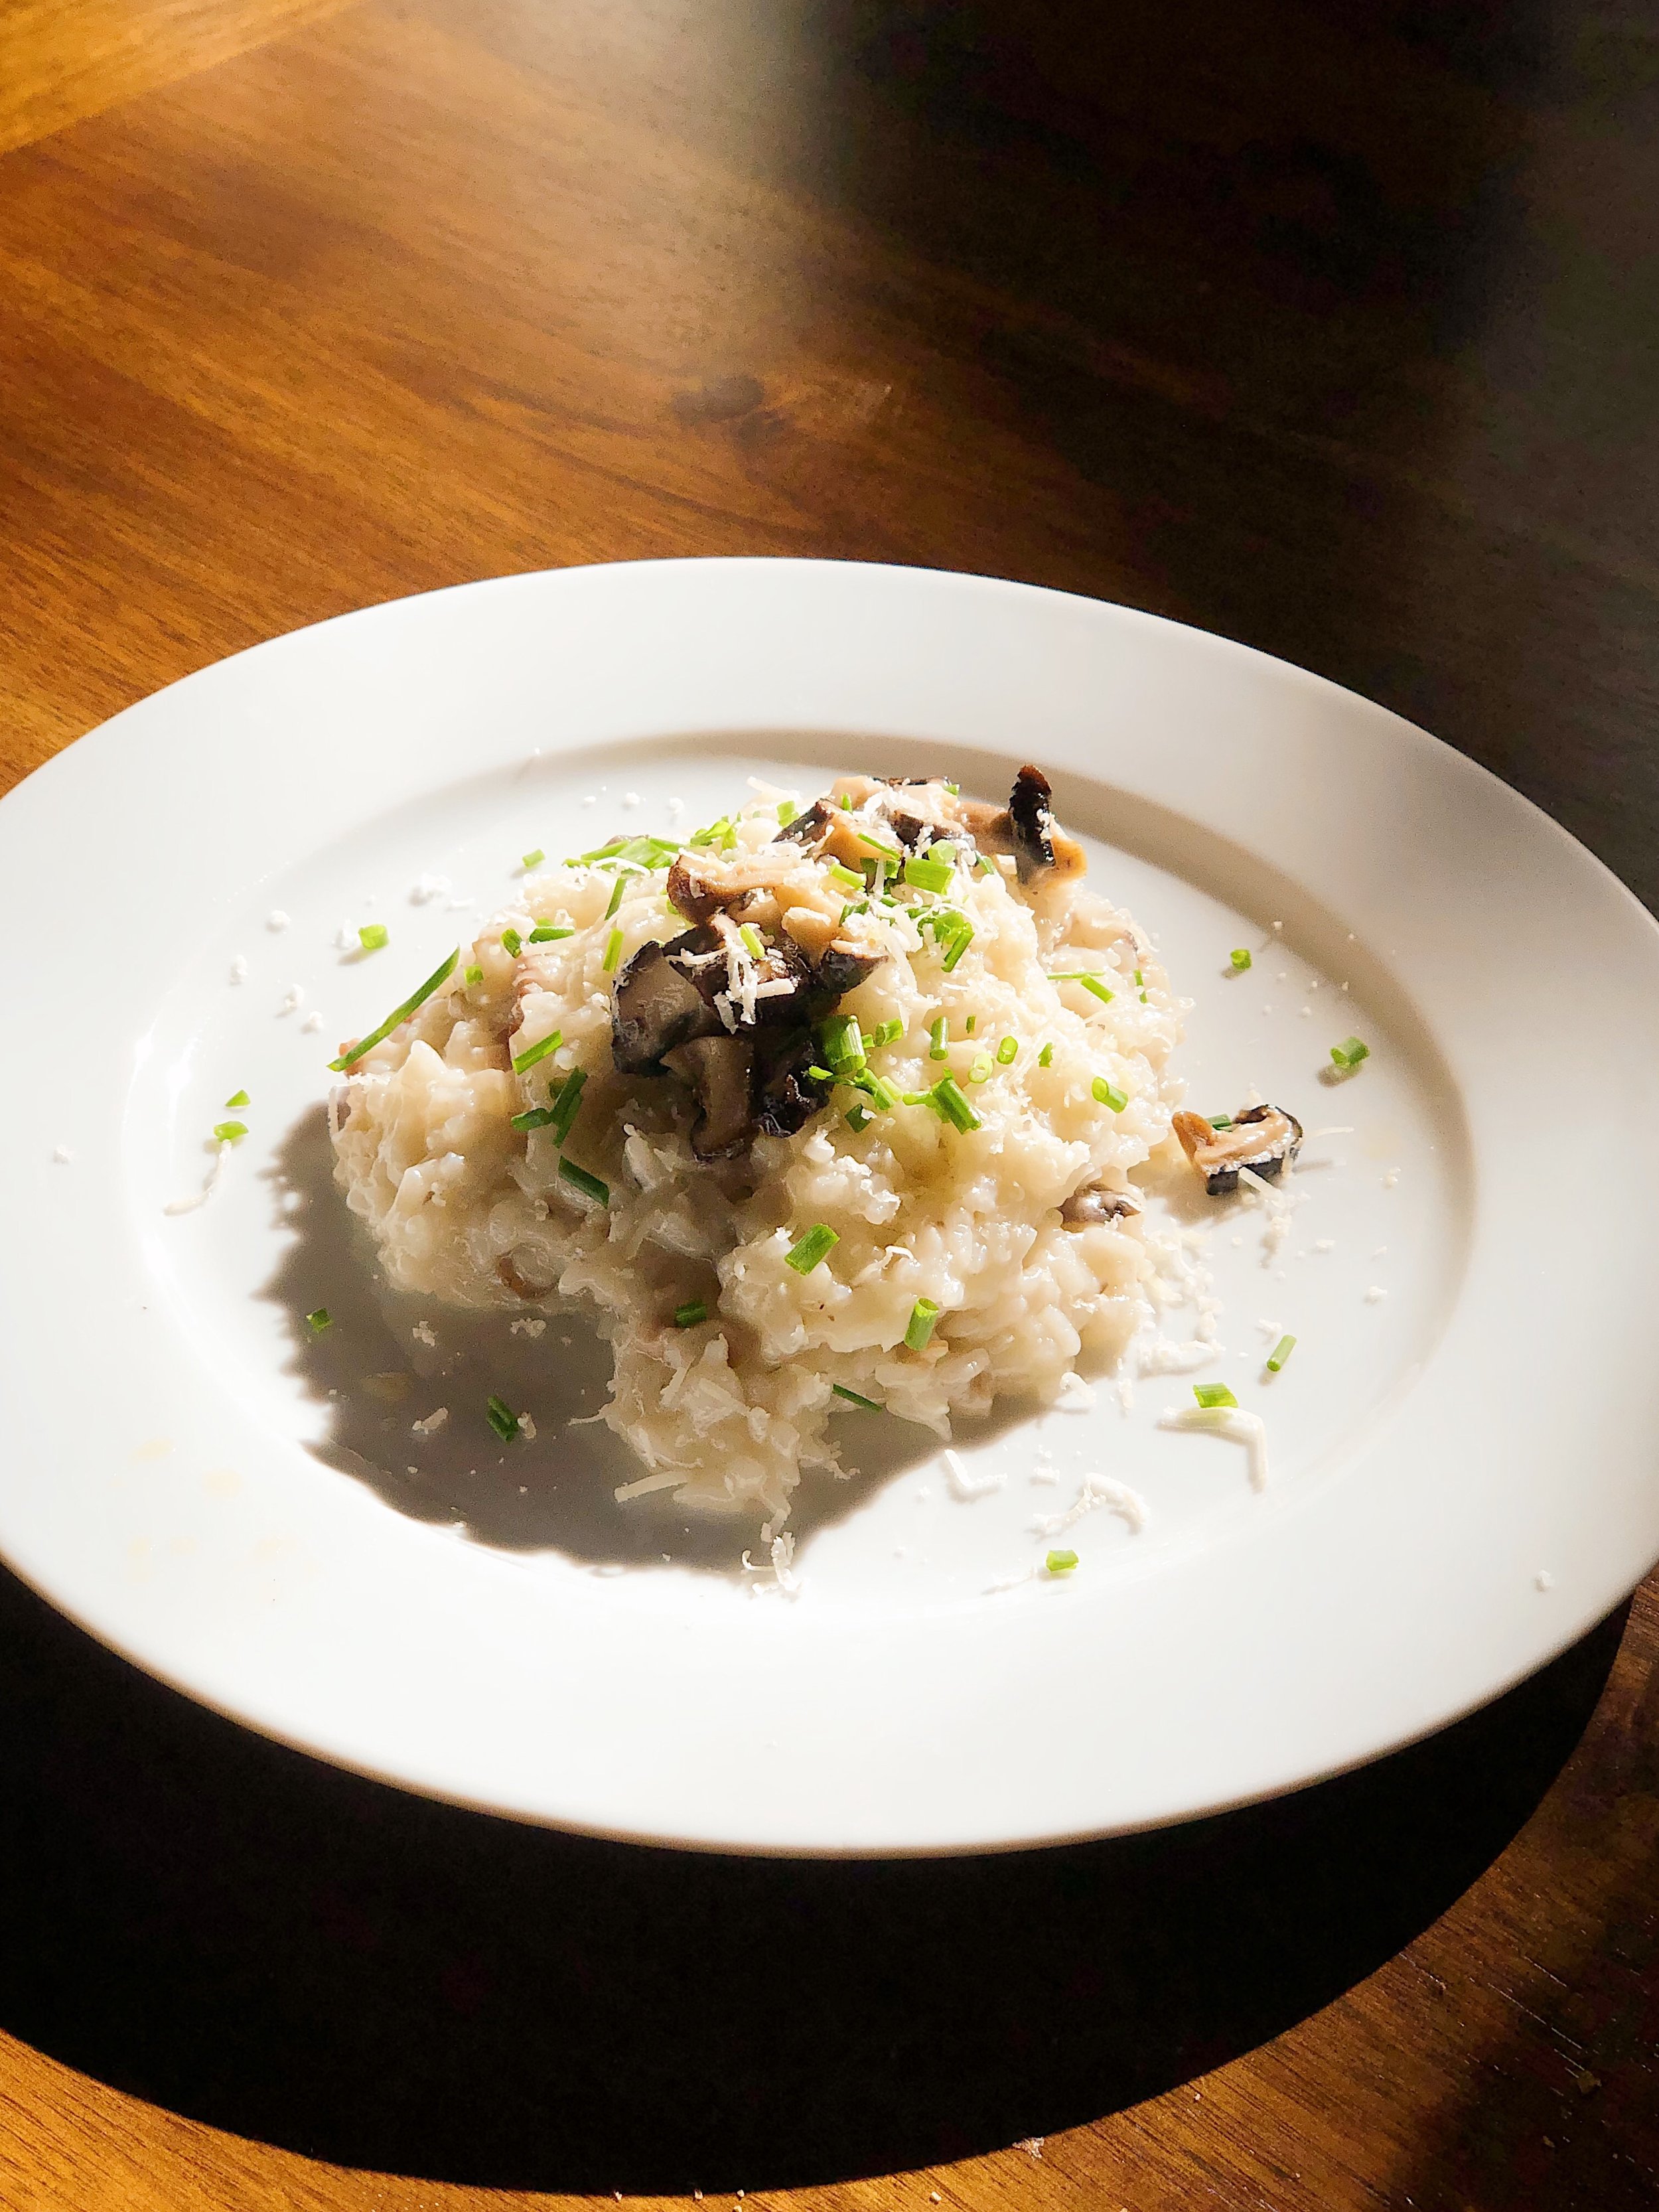
A warm and creamy risotto is the perfect comfort food to warm you up on a cold winter’s day. It only takes a few ingredients to make, and can be made vegetarian by substituting the chicken broth with vegetable broth.

People are often scared to make risotto because of how easy it is to screw up without watching it like a hawk. And they’re not wrong—you do have to keep on stirring it for a good 20 minutes or so for the consistency of the rice to be right. I usually like to take this opportunity to cook an easy side dish like roasted vegetables in the oven while I give the risotto my undivided attention.


Risotto with Shiitake Mushrooms


Risotto, like pasta, is super versatile and makes a great backdrop to all sorts of toppings like seafood and veggies. I decided to top mine with dried shiitake mushrooms (an Asian favorite!), rehydrated in chicken stock and then toasted in the oven with olive oil. Mushrooms and risotto are a classic pairing, and for those that are feeling really fancy, you can also finish off your risotto with truffle oil or truffle shavings.


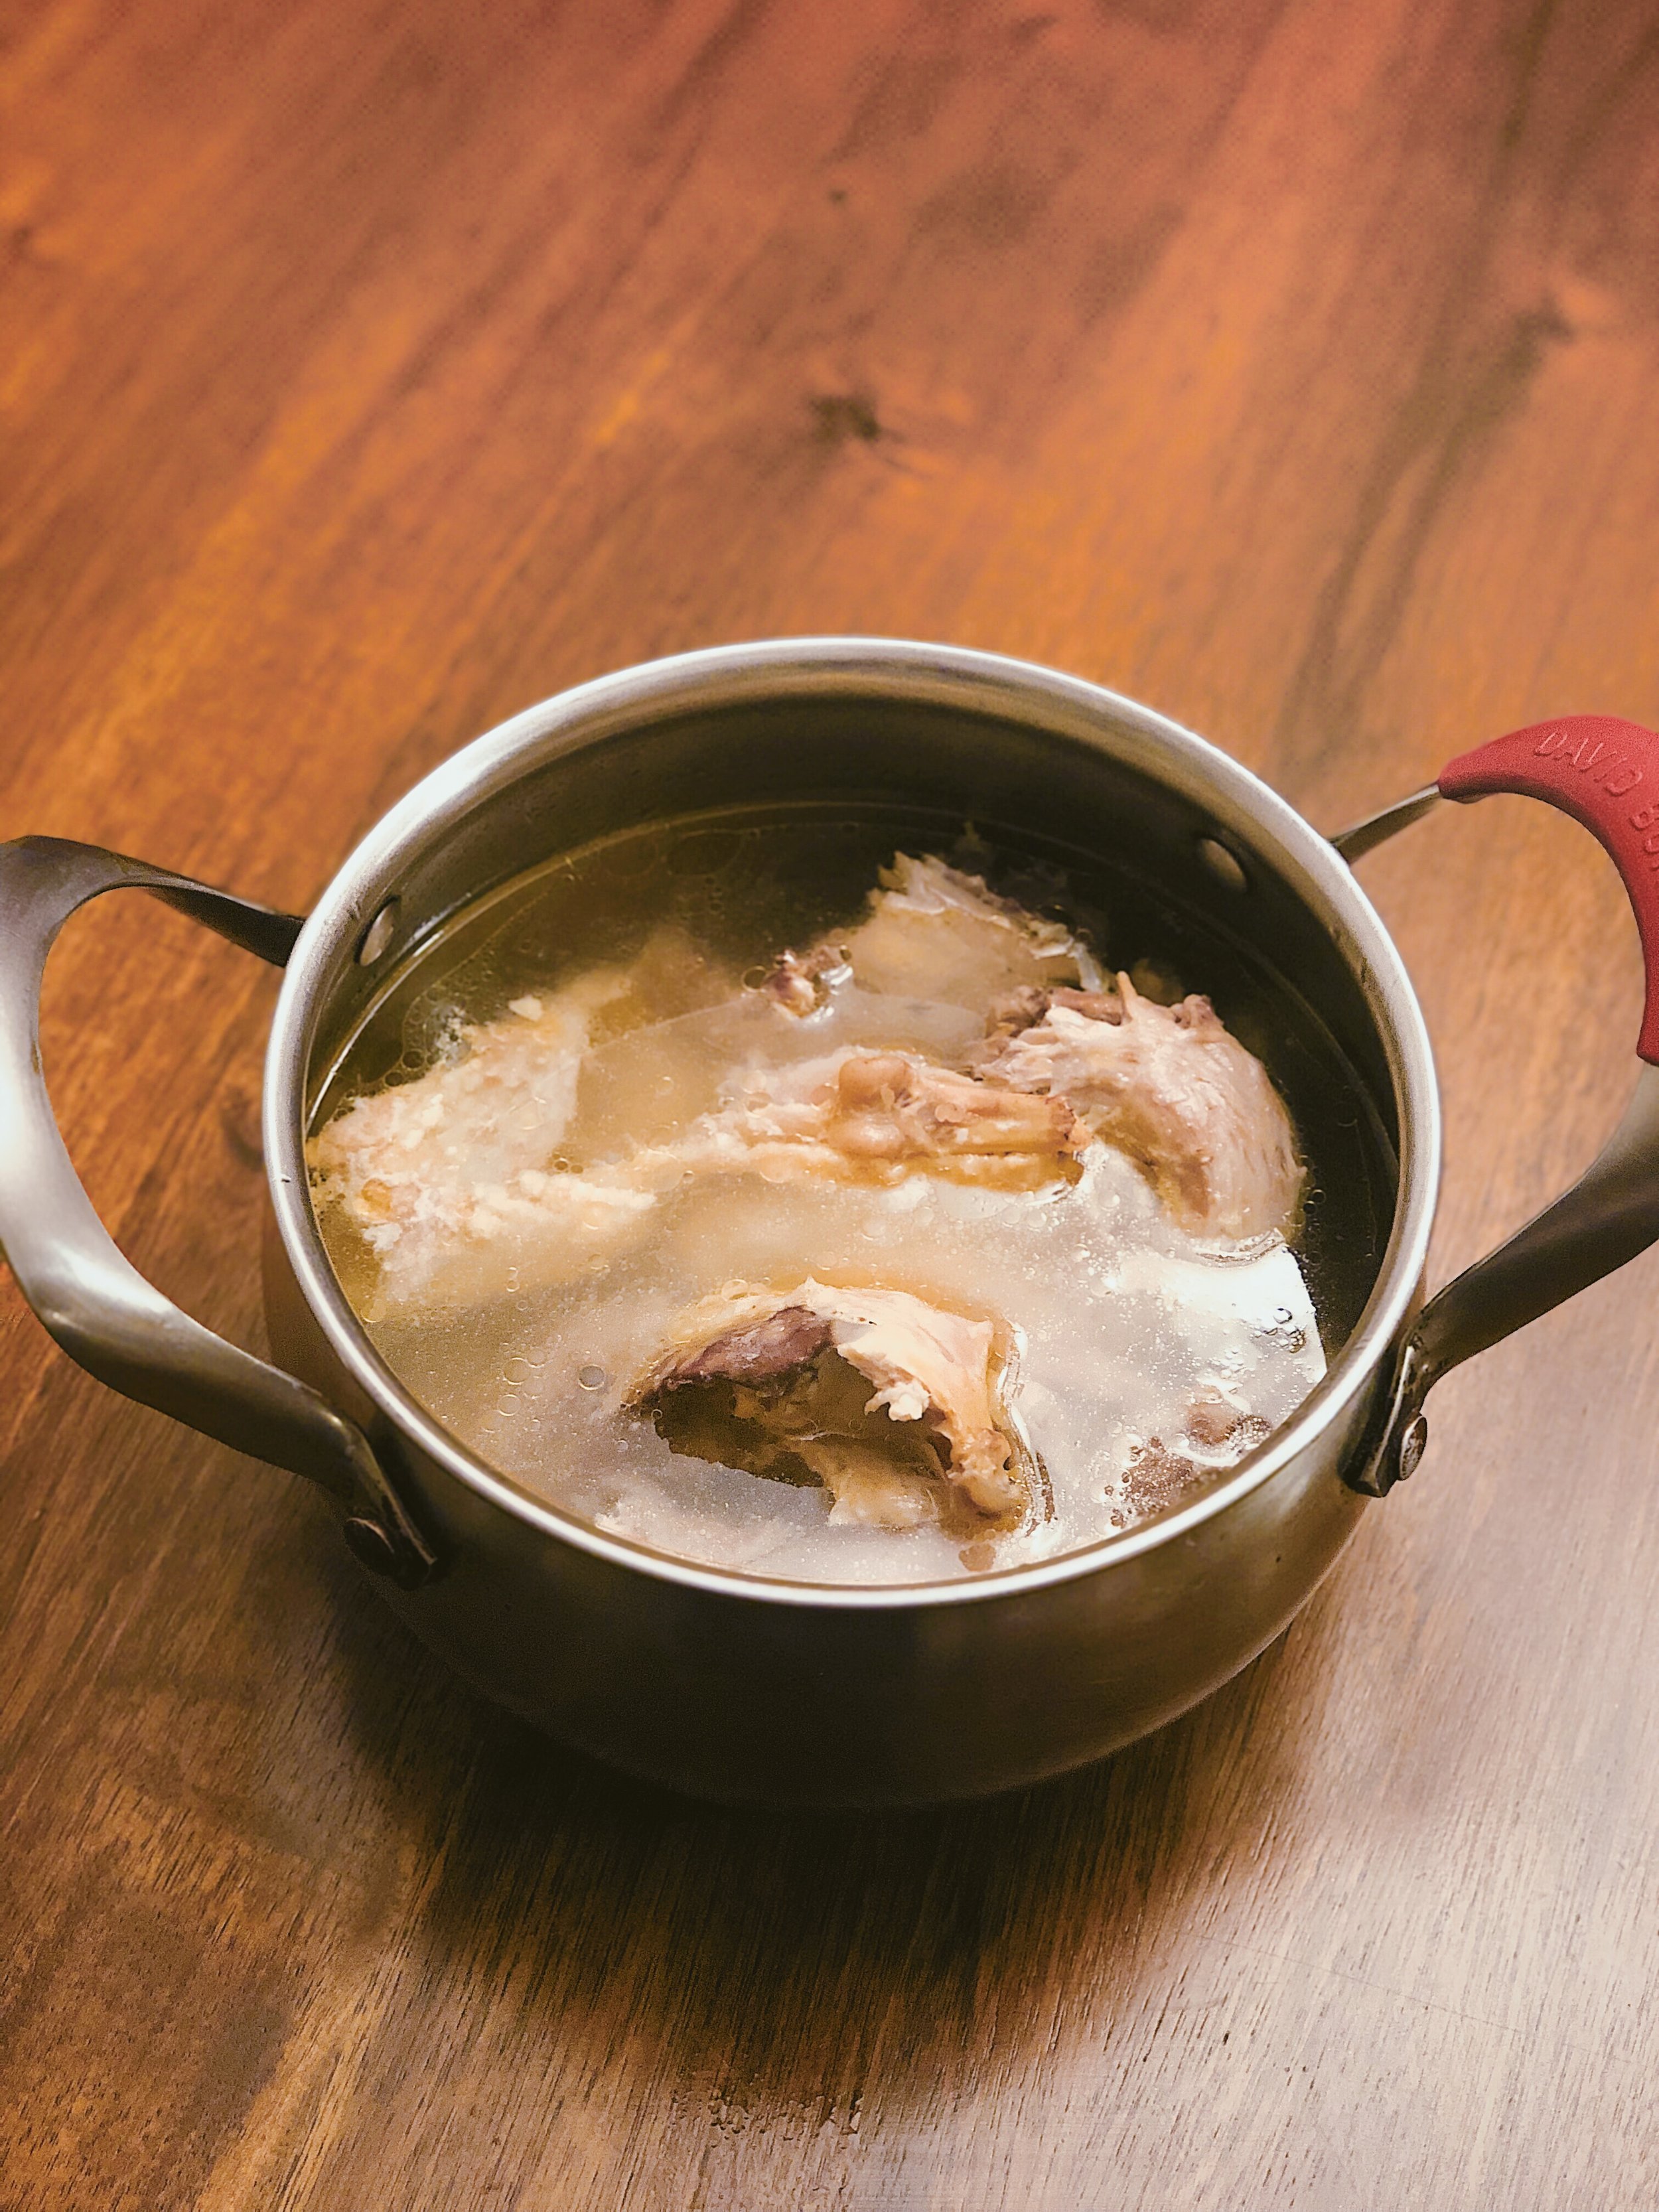
I made my risotto with my mom’s homemade Chicken broth, which is super simple to make. She doesn’t add any herbs or spices to the broth, since a traditional Chinese chicken broth is pretty light in flavor and is focused mostly on the Chicken flavor. To make this simple broth, add a whole cleaned chicken, dried shiitake mushrooms, and water to a slow cooker, and cook overnight (or until the chicken becomes tender). My mom didn’t initially add salt into the slow cooker, since she knew that the broth would be reused for multiple dishes. This way, the broth could be adjusted according to the dish.

Of course, this risotto is totally possible with store-bought chicken broth, or vegetable broth if you’re vegetarian.


Risotto with Shiitake Mushrooms


Parmesan and Butter Risotto with Shiitake Mushrooms

Ingredients (serves 3-4 people)

  • 1 cup arborio or short grain rice
  • 3-4 cups chicken or vegetable broth
  • ½ cup sliced button mushrooms
  • ½ cup dried shiitake mushrooms
  • 2 cloves of garlic
  • 1 shallot
  • 2 sprigs of thyme, chopped finely
  • ½ cup parmesan cheese
  • 2 tbsp butter
  • splash of white wine
  • olive oil
  • salt and pepper to taste
  • chopped chives for garnish

Takes , Makes enough for 3-4 people.


Instructions

  1. Heat up the chicken or vegetable broth and toss in the dried shiitake mushrooms to rehydrate them. After the broth is heated, take out the mushrooms to set aside. Leave the broth on the stove to keep it warm.

  2. Add butter to a nonstick pot or large saucepan and sauté the shallots, garlic, thyme, and sliced button mushrooms. Season with salt and pepper and add a drizzle of olive oil. Add the uncooked rice to the pan, covering it with the vegetables, butter, and seasonings. Add the white wine and cook until it's semi-evaporated.

  3. Start ladling in the warm chicken broth in half-cup increments. Make sure you don't add too much broth, or your risotto will end up like a porridge or a soup. Stir the rice with the broth constantly, until some of the liquid has cooked into the rice or evaporated, then continue the process with more broth.

  4. When you're finally finished stirring most of the chicken broth into the rice—or until your rice is fully cooked through (to the texture of your liking)—melt another tbsp of butter into the rice to get that rich, silky texture. Melt half of your portion of parmesan cheese into the rice as well, if you like your risotto to be creamy and cheesy. If the parmesan cheese hasn't provided enough saltiness to your risotto, feel free to mix in more salt and pepper.

  5. Take your pan off the heat and put a lid over your risotto. Chop up the shiitake mushrooms you previously set aside, toss them in a bit of olive oil and salt and pepper, and pop them into a 450° F oven for about 3-5 minutes until they're nice and toasted.

  6. Spoon the risotto onto a plate and top it with the toasted mushrooms. Drizzle with more olive oil if desired, and garnish with parmesan cheese and chopped chives.


This is the perfect restaurant-style dish to make for Valentine’s Day! (Okay… maybe try it out a few times first and make sure you’ve nailed it before you try to impress your special one) Good luck in the kitchen, and please tag me @cinders_zhang on Instagram if you end up making it :)

♥ Cindy

 
Food, 2Cindy ZhangComment
Shakshuka with Sausage and Mushrooms


Watch the video for a in-depth tutorial on how to make this dish. If you enjoyed watching, please give me a thumbs up/subscribe to me on YouTube!


Shakshuka

Shakshuka from the Starbucks Reserve Roastery & Tasting Room in Seattle


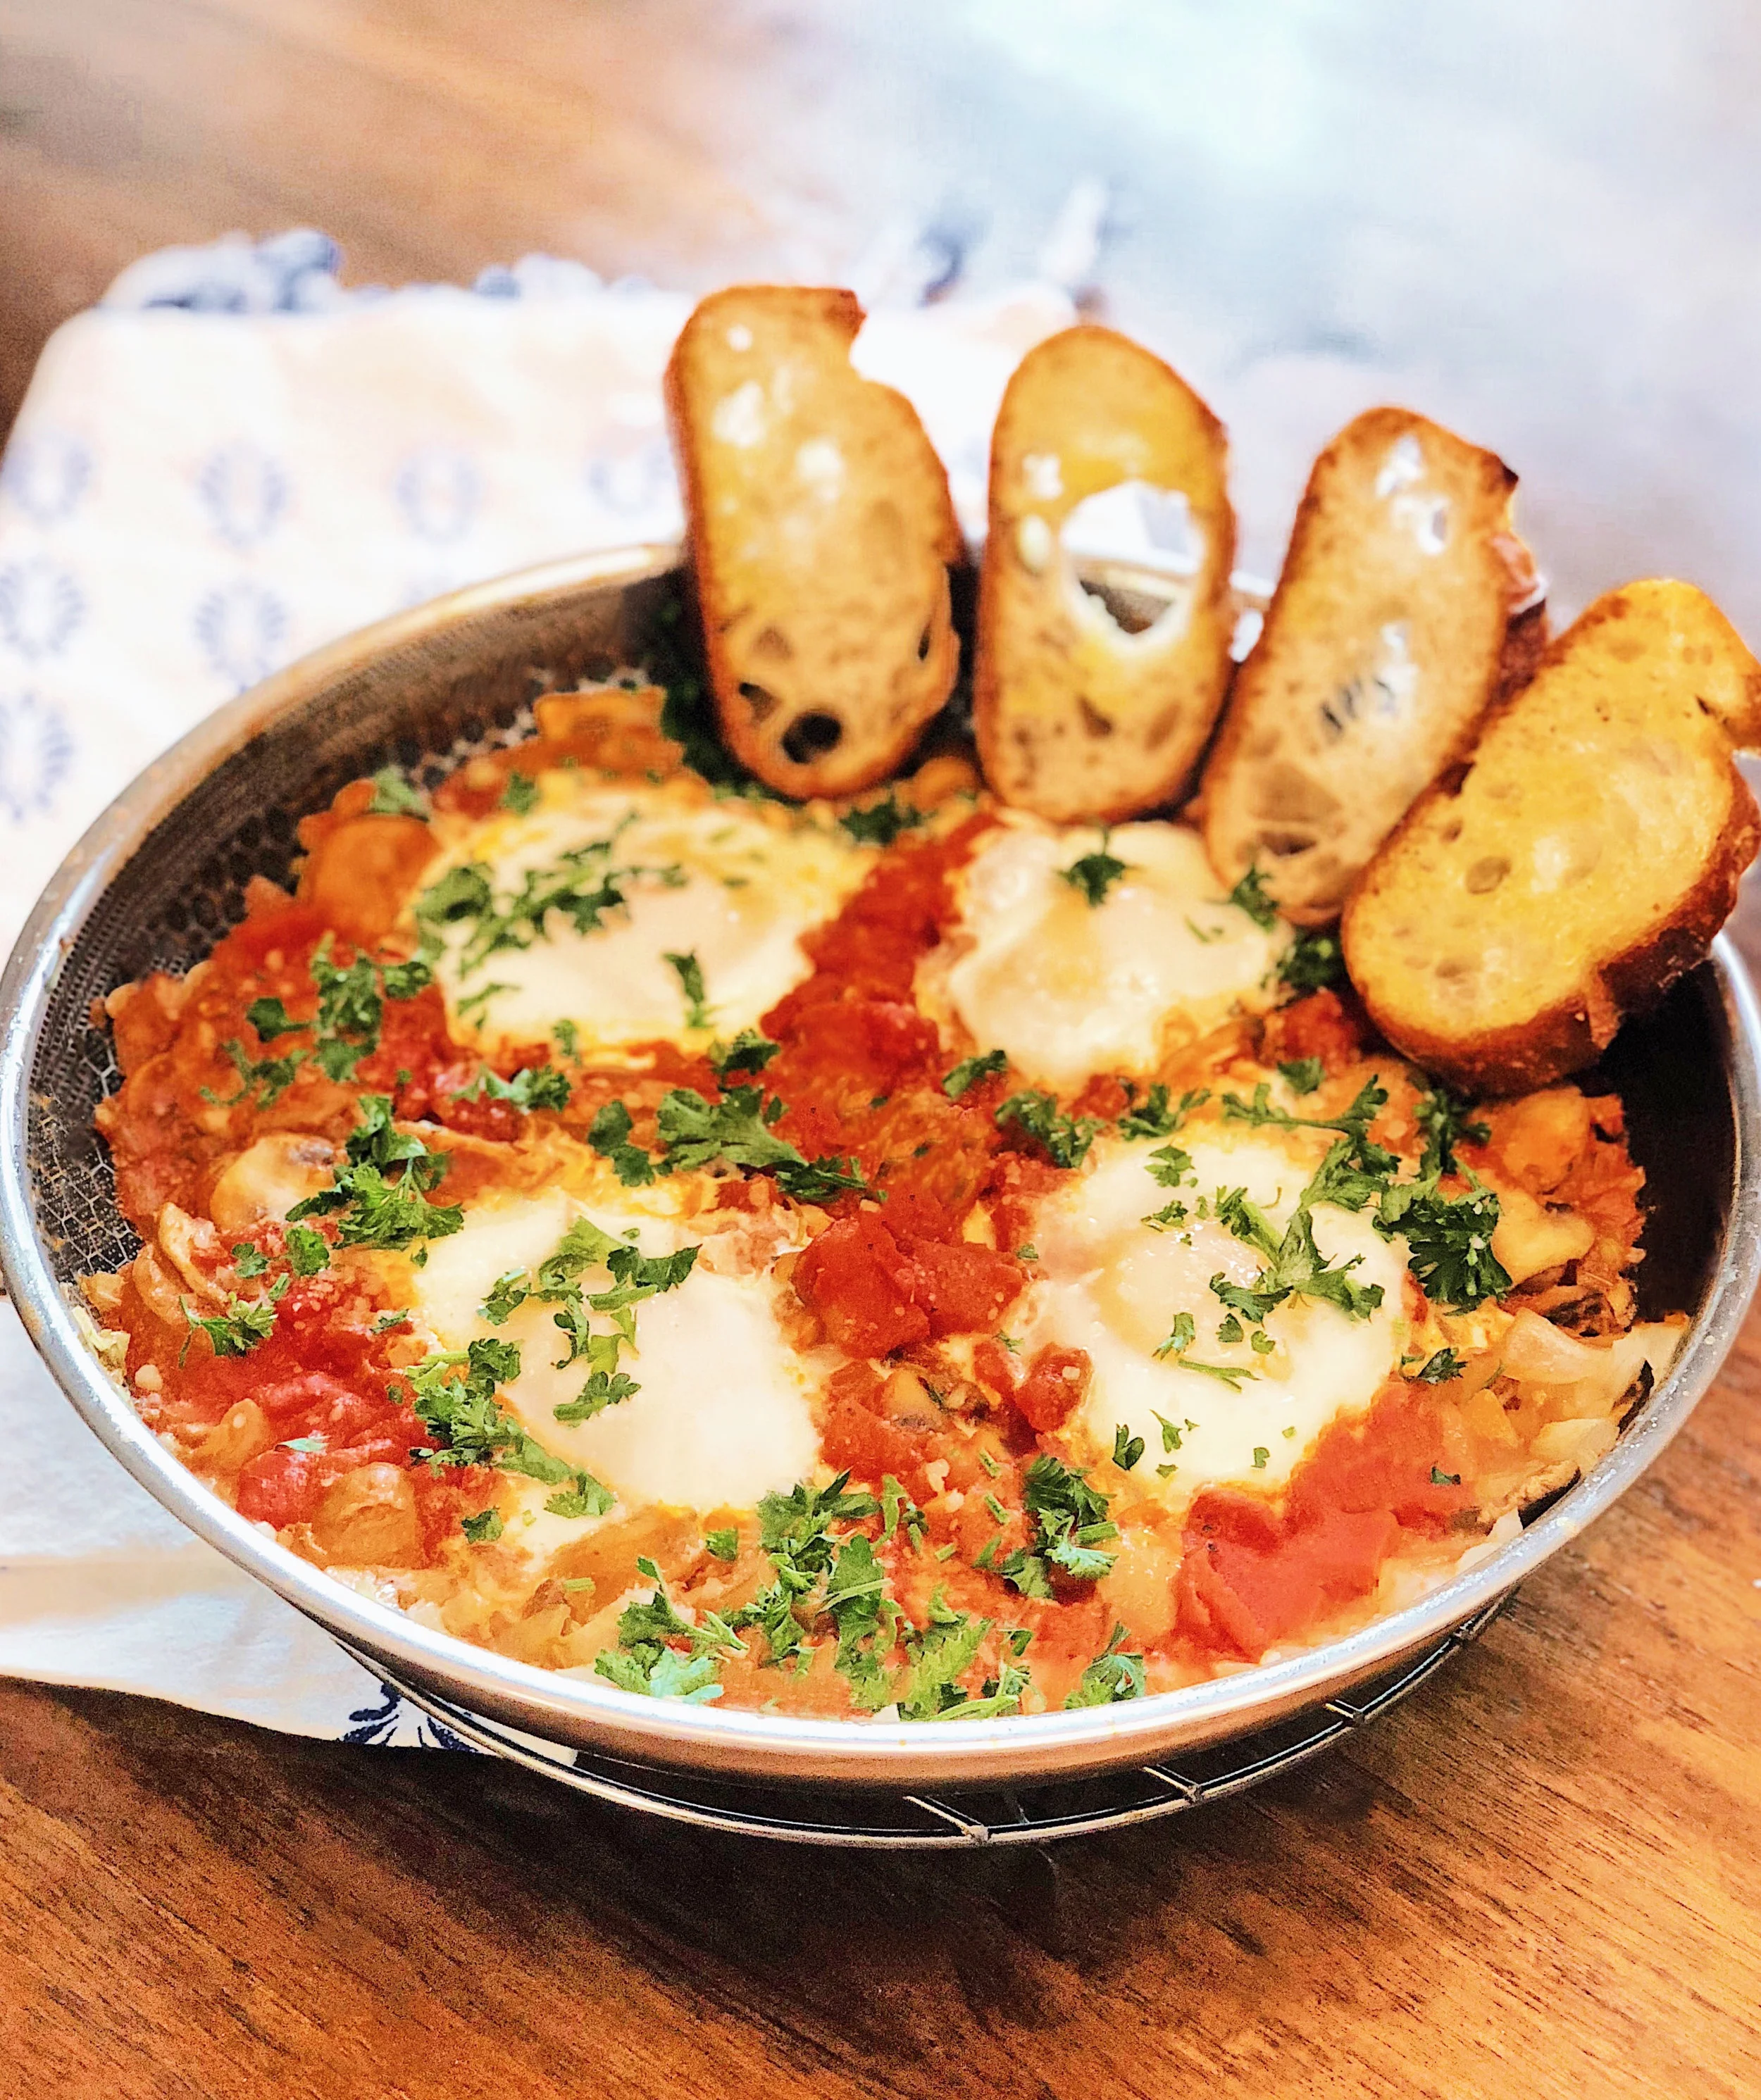
Taking the brunch world by storm, Shakshuka is an Israeli dish consisting of eggs poached in tomato sauce and onions. Strangely enough, I first came across this dish at the Pinterest office for breakfast, and then at a trendy brunch place in San Francisco called The Dorian and also at the Starbucks Reserve Roastery & Tasting Room in Seattle. After realizing that the dish only consisted of a tomato sauce, onions, and a chicken or vegetable stock base, I became super motivated to try it out for myself at home.


Shakshuka with Sausage and Mushrooms


The thing I love most about Shakshuka is that it’s super flexible: you can easily make it vegetarian, and it’s a meal not limited to breakfast. Because it’s super substantial and savory, it works as the perfect “breakfast for dinner” dish. For my Shakshuka, I added some of my favorite breakfast items: chicken apple sausage and mushrooms. If you’re going vegetarian with this, I recommend adding any vegetable that can withstand the heavy tomato sauce, like zucchini or eggplant. If you want to make a full meal out of it and add some extra protein, I recommend chickpeas or white beans.


Shakshuka with Sausage and Mushrooms


Shakshuka with Sausage and Mushrooms

Ingredients (serves 4 people)

  • 1 can (12 oz) of tomato sauce
  • 4 eggs
  • ½ cup sliced mushrooms
  • half an onion
  • 2 cloves of garlic
  • 3 sprigs of thyme
  • 2 links of Chicken Apple Sausage
  • 1 tsp cumin
  • ⅓ cup chicken or vegetable stock
  • splash of white wine
  • olive oil
  • salt and pepper to taste
  • feta or parmesan Cheese
  • chopped parsley for garnish
  • French, Italian, or Pita bread

Takes , Makes enough for 3-4 people.


Instructions

  1. Chop the onions into small pieces and mince the garlic. Slice the mushrooms and chicken apple sausage so that they are roughly the same size.

  2. Add olive oil to a frying pan (one that you'd be comfortable serving this dish out of) and lightly sauteé the onions, garlic, and mushrooms. Season with cumin, paprika, salt, and pepper, and add white wine if you have any on hand, making sure it's fully evaporated.

  3. Add the tomato sauce and chicken stock (or vegetable stock if you're making this vegetarian). Toss in the sprigs of thyme and leave on the stove to simmer for about 3-5 minutes. This is your last chance to mix in salt and pepper to your shakshuka—since we will be adding the eggs right after.

  4. When the chicken stock has evaporated a bit, create four holes in your sauce to make space for the eggs. Crack each egg into a hole (or, if you're worried about egg shells, you can crack them into a bowl beforehand). Cover the pan for about 1-2 minutes so that the eggwhites cook through, leaving the yolk runny.

  5. Add parmesan cheese or feta cheese on top to melt. Finally, garnish with chopped parsley.

  6. For the bread to serve with the shakshuka, I simply sliced them into small pieces and tossed them in olive oil, salt, and pepper. I then popped them in a toaster until they turned golden brown. They'll do a great job of soaking up all the tomato sauce and runny eggs!


Hope you can give this simple recipe a try for breakfast—or any other meal, really! Let me know how it turns out for you by tagging @cinders_zhang on Instagram! Support me by saving this recipe on Pinterest, and subscribing to my Youtube channel :) Have fun in the kitchen!

♥ Cindy

 
FoodCindy ZhangComment
Cast Iron Bacon Fried Rice


Watch the video for a in-depth tutorial on how to make this dish. If you enjoyed watching, please give me a thumbs up/subscribe to me on YouTube!


Cast Iron Bacon Fried Rice


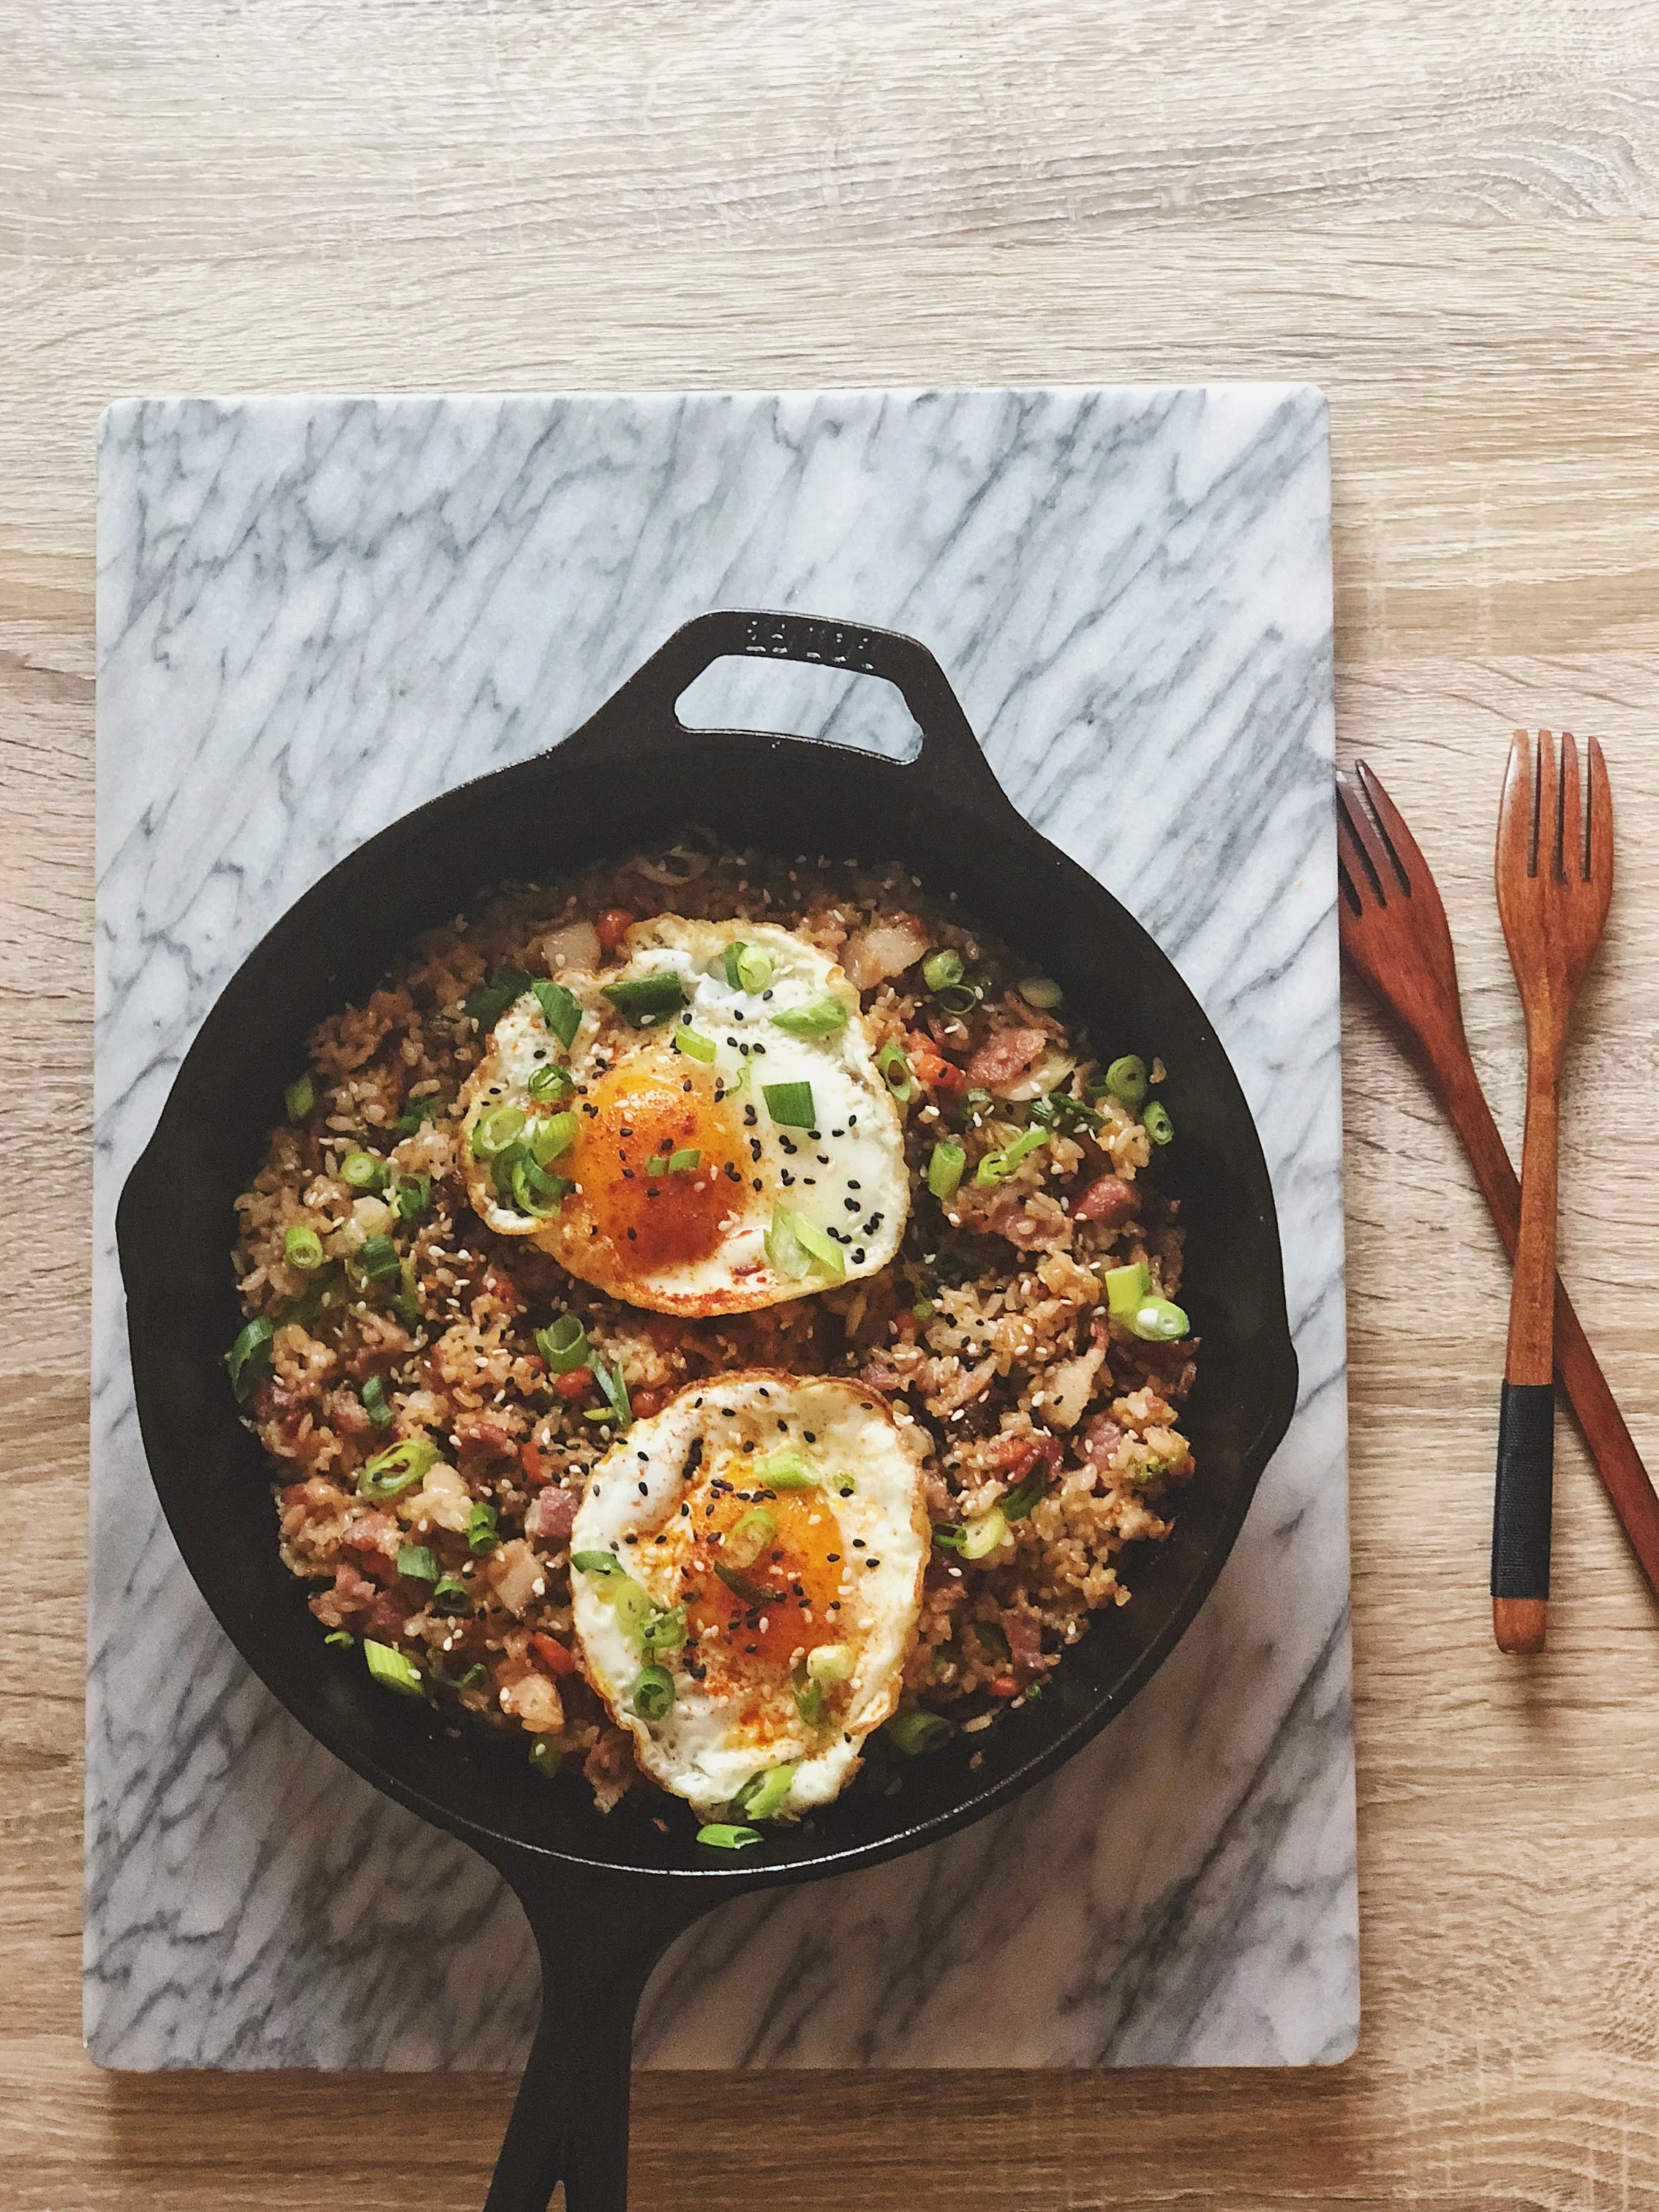
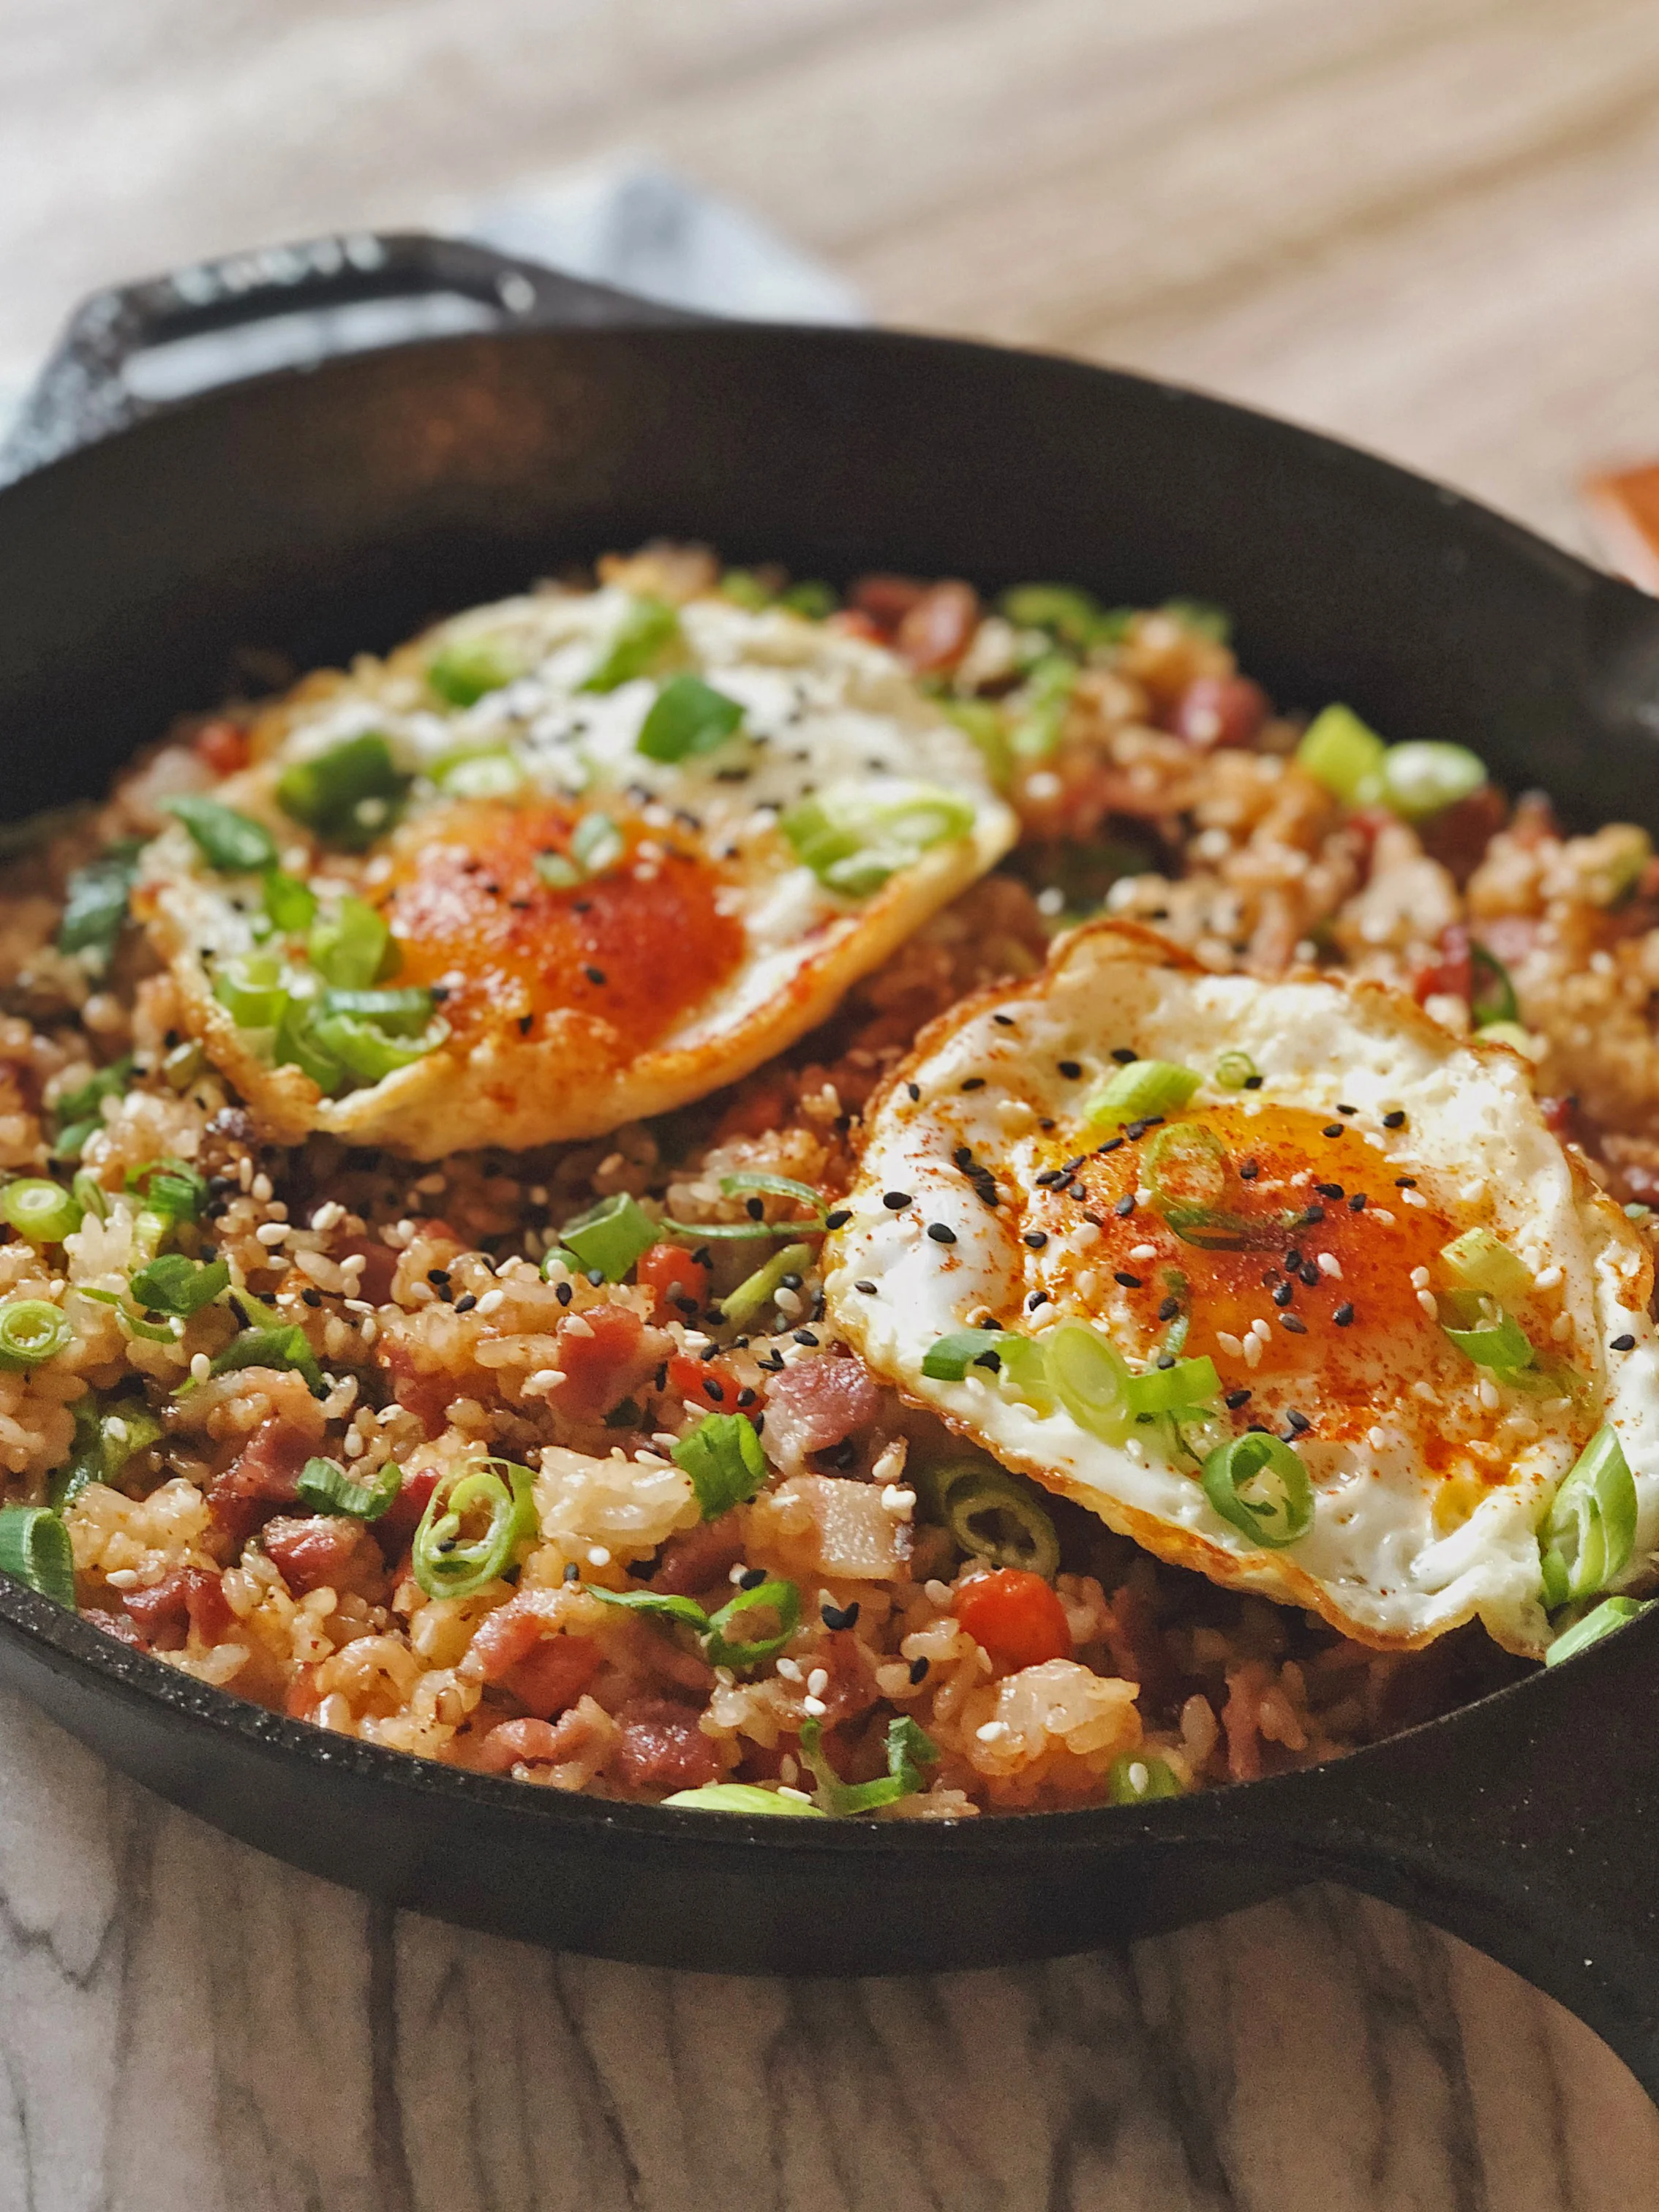
Fried rice is a great way to make use of leftovers and a staple dish in every Asian household. There are so many different varieties: the Korean Kimchi fried rice, the after-Thanksgiving turkey fried rice, or just the basic vegetarian egg fried rice with carrots and peas. So in this post, I thought I’d give it a southern flair by adding bacon, frying the rice in the bacon fat, and cooking the entire thing in a cast iron pan to give the rice a crunchy crust at the bottom—almost like hot stone bibimbap.


Cast Iron Bacon Fried Rice


The idea of bacon fried rice partially came from this YouTube video (which I highly recommend watching): The Untold Story Of America's Southern Chinese, which explores lives of Chinese-Americans living in the Mississippi Delta. The video goes over how they made a living in the Southeast by opening up grocery stores, and delves into the food they ate. Bacon fried rice was one of their signature dishes. Absolutely genius.


Cast Iron Bacon Fried Rice


You’ll need: 2 scallions, 1 cup of peas + chopped carrots, 4 strips of bacon, 4-6 cloves of garlic, 1 tbsp ketchup, 2 tbsp soy sauce, 1 tbsp oyster sauce, 1 tbsp butter, 2 1/2 cups of leftover cooked rice (preferably cold, straight out of the refrigerator), 2 eggs, vegetable or canola oil, salt & pepper to taste, and sesame seeds and paprika for garnish. Feel free to replace the vegetables with whatever you have left over in the fridge. Fried rice is a great canvas to get creative with.

Now, you might think I’m crazy by adding ketchup, but it’s a very common ingredient to add to your fried rice in Asian households. It’s very common amongst me and my other Asian friends to eat eggs with ketchup, and you can also see this combination in Chinese dishes like Stir-fried tomato and scrambled eggs (番茄炒蛋).


Cast Iron Bacon Fried Rice


Cooking with a cast iron skillet might seem a bit scary, but you just have to make sure that it’s well taken care of and seasoned properly. Here’s a super helpful video by Tasty that explains how to clean, dry, and season your skillet. Cast iron might take a few extra steps to clean after, but it’s also very versatile in cooking all sorts of dishes (steak, dutch pancake, pizzas, chicken pot pie… just to name a few) with its advantage of starting something on the stove and finishing it up in the oven.


Cast Iron Bacon Fried Rice


Cast Iron Bacon Fried Rice

Ingredients (serves 2 people)

  • 2 ½ cups of cooked rice*
  • 4 strips of bacon**
  • 2 eggs***
  • 2 scallions
  • 4-6 cloves of garlic
  • 1 cup of peas and chopped carrots
  • 1 tbsp ketchup
  • 2 tbsp soy sauce
  • ½ tbsp oyster sauce
  • 1 tbsp butter
  • vegetable or canola oil
  • salt and pepper to taste
  • sesame seeds and paprika for garnish

* Leftover rice that has been refrigerated (cold and hard) will work best for fried rice. Warm rice straight out of the rice cooker could become mushy in the pan.

** I used a thick-cut uncured style of bacon.

** I use Pete and Gerry's organic free range eggs for their orange yolks.

Takes , Makes 2 servings.


Instructions

  1. Chop the scallions into small pieces on a bias. Set aside a portion of the greener ends for garnish at the very end. Mince the cloves of garlic finely.

  2. Slice the bacon into small quarter-inch pieces.

  3. Fry up the 2 eggs and set them aside to garnish the finished fried rice later.

  4. Fry the bacon in a heated cast iron pan and allow it to render its fat. If it doesn't release a lot of fat, you can add extra oil to the pan. Remove the bacon and drain them on a paper towel, leaving the rendered fat behind in the pan.

  5. Stir fry the peas and carrots in the bacon fat, then add the garlic, stirring constantly to prevent it from burning. Keep the heat on high and add rice to the pan, breaking up the rice and coating it with bacon fat. Keep in mind that in this case, it's okay if the rice sticks to the bottom of the pan. This will create a hot stone bibimbap-style crust.

  6. Add the ketchup, soy sauce, and oyster sauce to the pan, and incorporate them well into the rice. Season with additional salt and pepper if needed after tasting (note that there will be some saltiness coming from the bacon, soy sauce, oyster sauce, and ketchup already).
  7.  
  8. Fold the cooked bacon back in, and wilt the white ends of the scallions into the rice. Turn the heat off, and melt the butter into the rice.

  9. Add the fried eggs on top of the fried rice and garnish with scallions, black and white sesame seeds, and paprika if desired.

  10. Serve in the pan while its still hot, ensuring that the pan doesn't stay on the stove for too long for the bottom crust to become burnt.


Cast Iron Bacon Fried Rice


Again, let me know how it turns out for you by tagging @cinders_zhang on Instagram! Support me by saving this recipe on Pinterest, and subscribing to my Youtube channel :) Good luck in the kitchen!

♥ Cindy
 
Food, 2Cindy ZhangComment
One-pan Pork Belly Carbonara


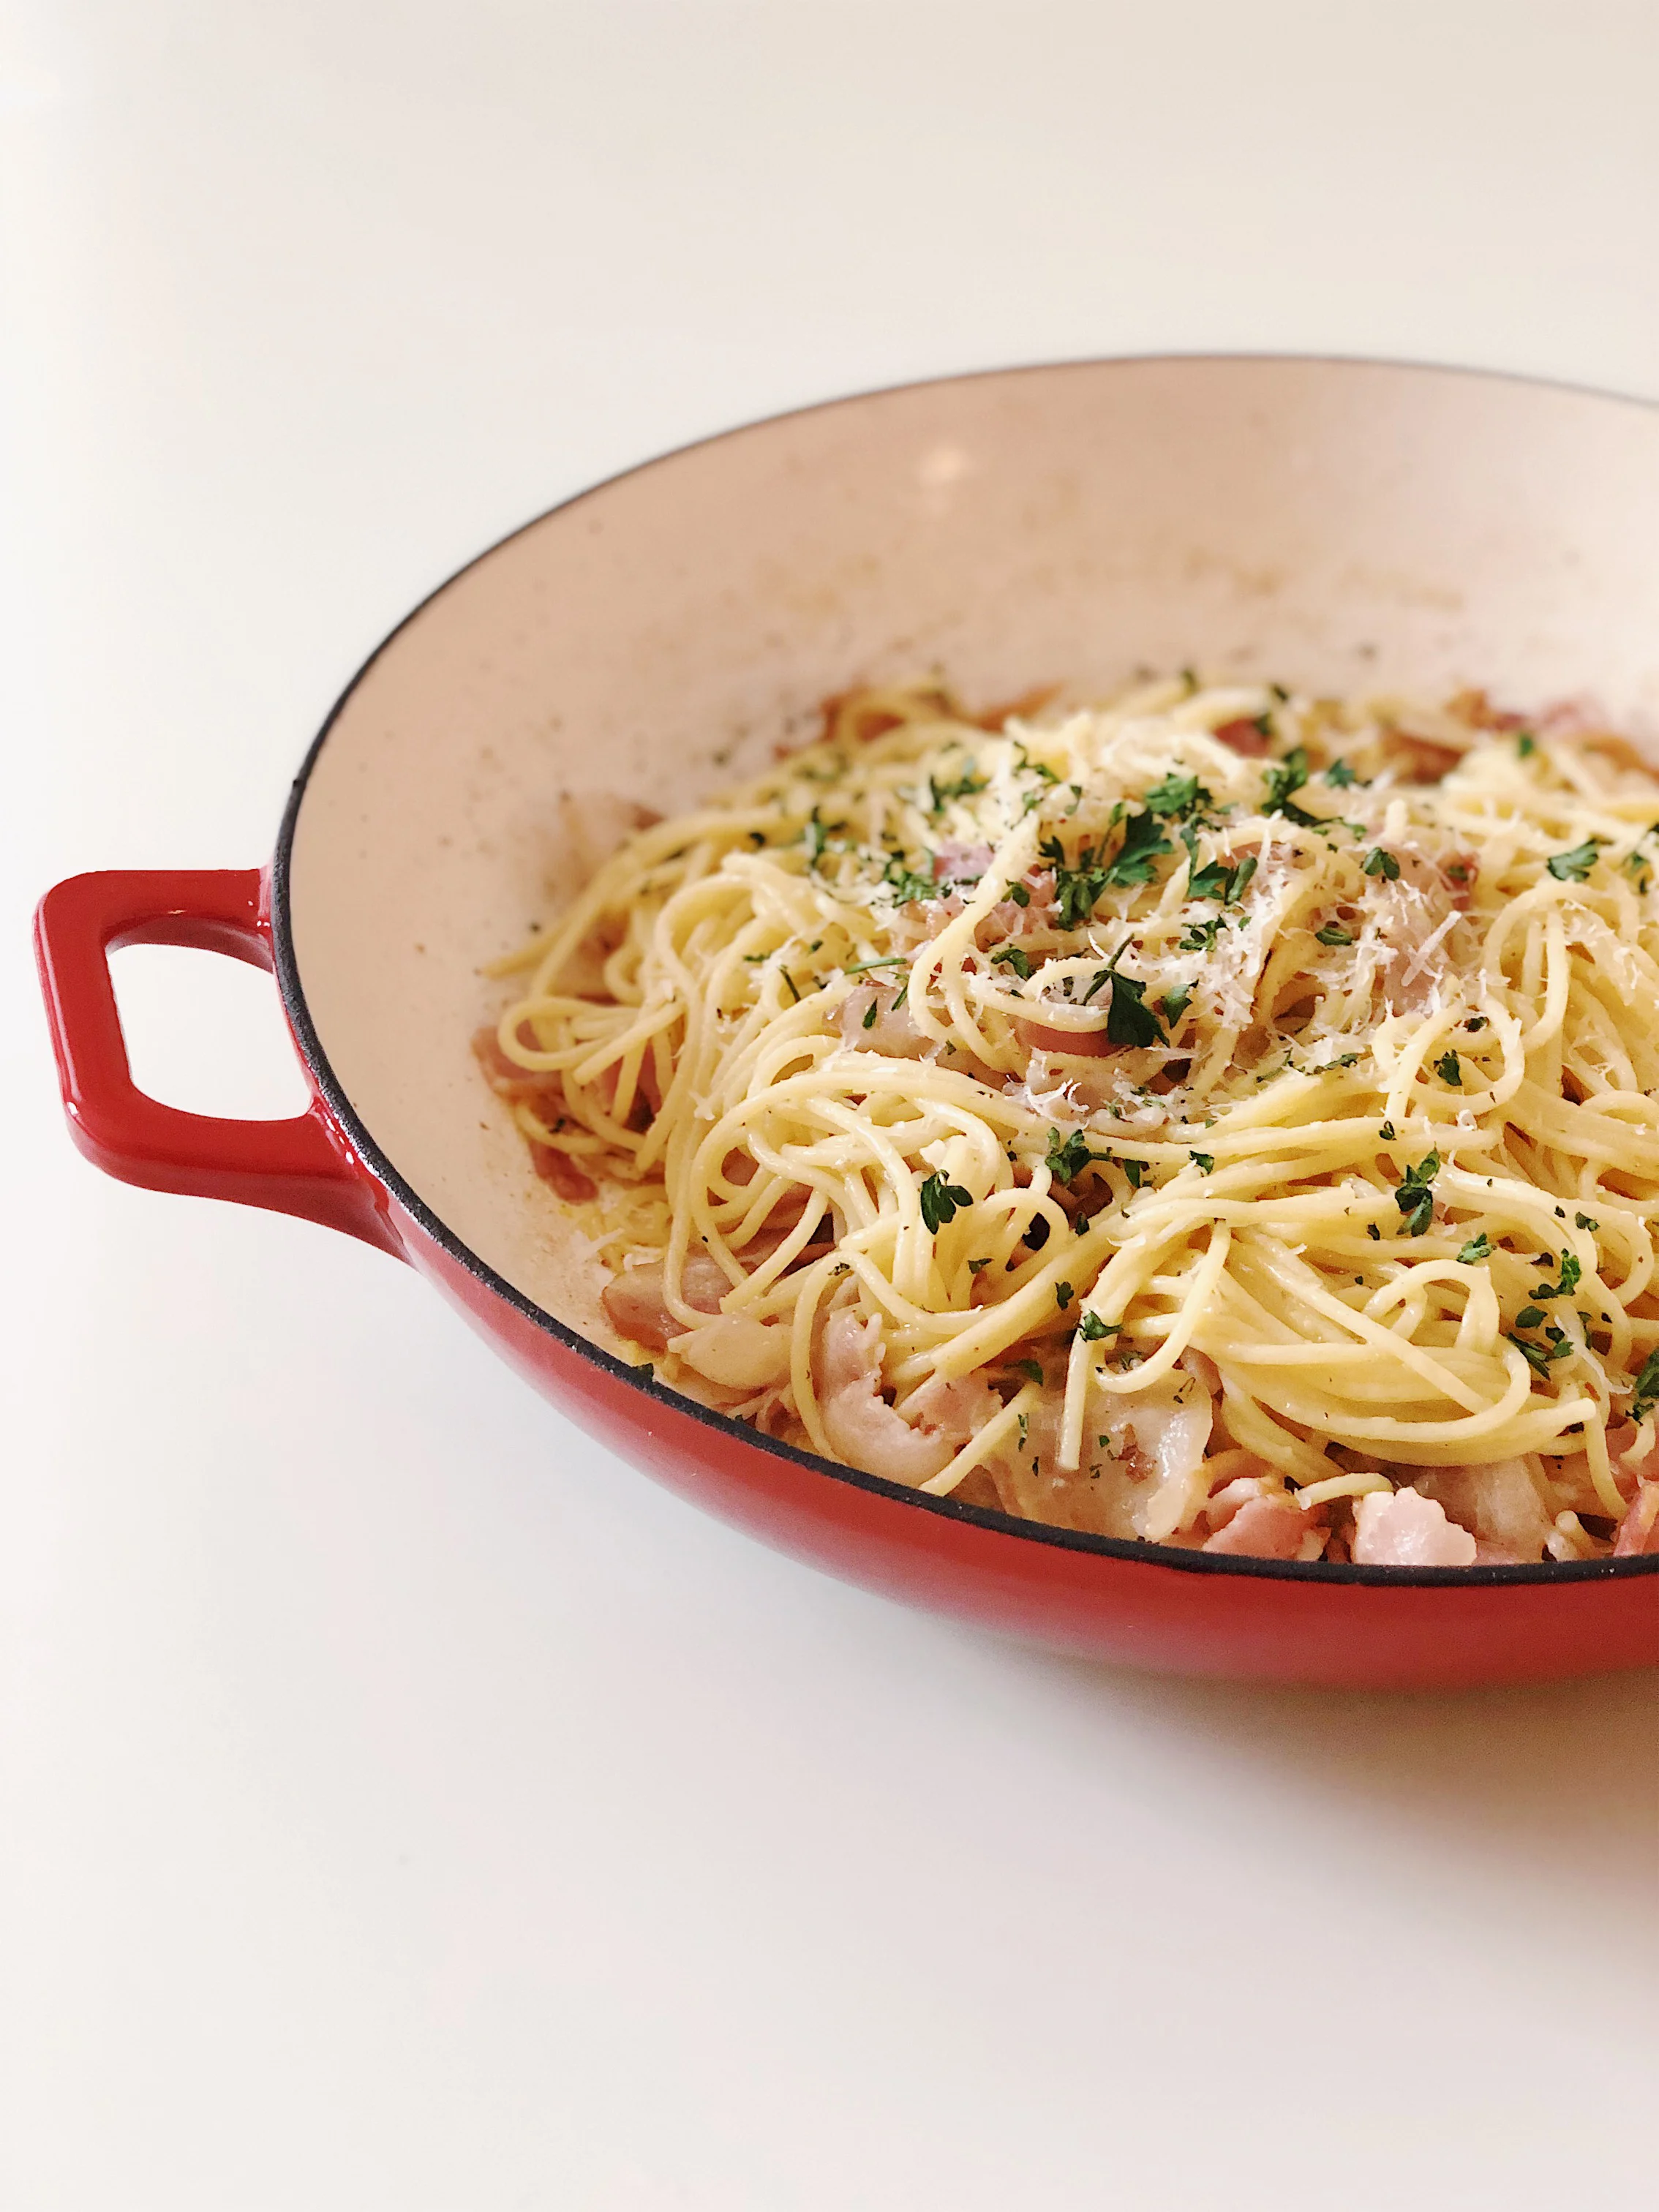
If you’re anything like me and you hate doing dishes, cooking a pasta dish in one pan is a great way to prepare a meal without worrying about the extra pot of water, straining the noodles, and cleaning up additional kitchen tools. This one-pan pork belly/bacon carbonara is a great way to try out this one-pan technique and only requires 7 common ingredients, most of which are probably already in your pantry—spaghetti, pork belly or bacon, garlic, salt, eggs, parsley, and parmesan cheese.


One-pan Pork Belly Carbonara


This is certainly not the healthiest dish—but believe me, it’s so worth the calories. Pork belly is one of my go-to comfort foods, and I love eating it in ramen, pork adobo, Korean BBQ, and hot pot. Because it’s seen more in Asian cooking, it can sometimes be hard to find at the grocery store. If you can’t find pork belly, feel free to substitute it with thick-cut slices of bacon. In these photos, I added a bit of applewood smoked bacon into the mix since I only had a few slices of pork belly left.


One-pan Pork Belly Carbonara


Because this dish can become rather heavy with the pork belly, cheese, and egg yolks, be sure to add lots of freshly chopped parsley on top to balance everything out.


One-pan Bacon Carbonara


One-pan Pork Belly Carbonara

Ingredients (serves 2-3 people)

  • 8 oz (230g) spaghetti
  • 4 strips of thinly-sliced pork belly or bacon*
  • 3 cloves garlic
  • 2 egg yolks
  • parsley
  • parmesan cheese
  • salt + pepper

* The pork belly slices used for hot pot/shabu shabu would be best!

Takes , Makes 2-3 servings.


Instructions

  1. Chop up the pork belly into half-inch pieces. If you can't find pork belly, feel free to use bacon. In my photos, I used a combination of both.

  2. Sprinkle salt and pepper onto the pork belly. If you're using bacon, you can skip the salt.

  3. Finely chop the parsley and set it aside for garnish later.

  4. Chop the garlic into thin pieces to fry up with the pork belly.

  5. In a large pan (with a bit of depth), fry up the pork belly or bacon until it becomes crispy and renders its fat. If it doesn't release too much oil, feel free to add a little more canola or vegetable oil to the pan. Add in the garlic slices when the pork belly is mostly cooked, making sure to stir them around often since garlic can burn easily. When the pork belly renders its fat and becomes crispy, take the garlic and pork belly out of the pan and drain them on a paper towel, leaving the rendered fat in the pan.

  6. With the heat down, add the spaghetti to the pan and enough water to completely submerge the spaghetti. Turn the heat up and let the water cook the spaghetti, leaving the lid off the pan to let the water evaporate. Move the noodles around to prevent them from sticking together. Be sure to scrape off the bottom of the pan as well to incorporate the pork/bacon fat into the noodles.
  7.  
  8. When the water evaporates and the noodles are finished cooking, add back in the bacon and garlic and incorporate them into the spaghetti. If all the water evaporates and the noodles are not yet cooked, feel free to add more water to the pan.

  9. Season the noodles and pork belly with more salt and pepper to taste. Note that if you're using bacon, you won't need as much salt since the bacon itself provides a lot of the saltiness to this dish.

  10. Turn off the heat and let the pan cool down. Fold in two egg yolks carefully. It's crucial you do this on a slightly-cooled pan so that the eggs don't scramble.

  11. Garnish with the freshly chopped parsley from earlier and grate parmesan cheese on top.

  12. Serve while still hot, and enjoy family style!


Hope you can give this comforting dish a try, and let me know how it turns out for you by tagging @cinders_zhang on Instagram :)

Happy new year everyone!

♥ Cindy
 
Food, 2Cindy ZhangComment